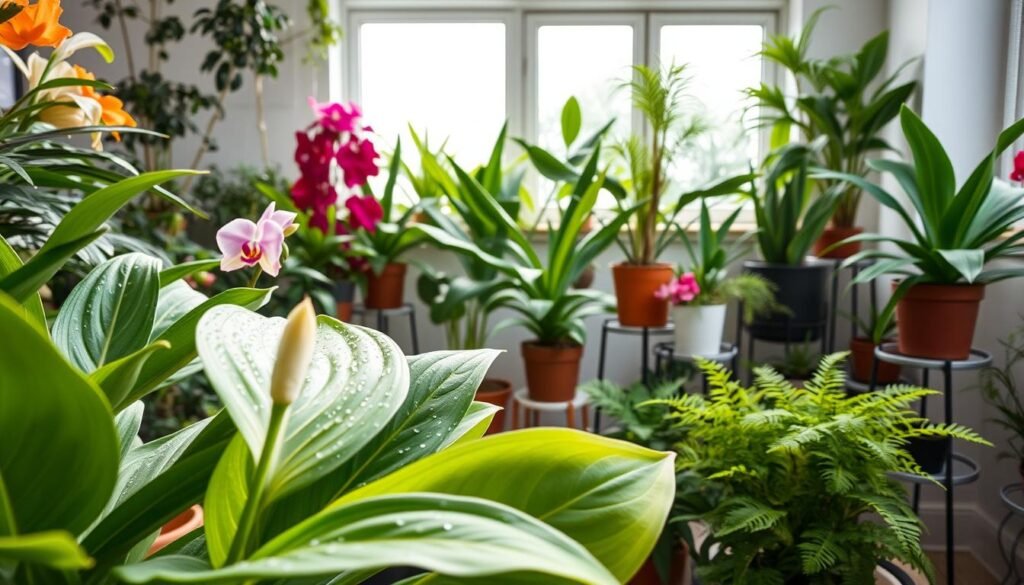
Surprising fact: studies show up to 40% of houseplants that look sick are actually light-stressed, not disease-ridden.
If you want no guessing: many flowers appear “off” simply because they lack bright hours. That stress makes plants easier targets for pests, so diagnosing light is part of any healthy care routine.
Before reaching for sprays, check leaves, stems, and the undersides of leaves. Proper light, steady watering, and good airflow reduce outbreaks and cut down chemical needs.
Gardeners often use neem and neem oil as a popular option in small spaces. It works best when the plant is already well placed in light and not overwatered.
Quick mindset: don’t spray if the plant is too weak; stressed foliage can burn from topical products. Also, pick low-odor options and follow label directions—labels are the law even for gentler products.
One last tip: success comes from thorough coverage, especially underside spraying, and a repeat schedule rather than a single attempt. Next, we’ll explain the science behind neem and why it differs from soap-and-water mixes.
Key Takeaways
- Light stress often mimics other issues—check lighting first.
- Inspect undersides of leaves to catch problems early.
- Support plants with light, water, and airflow before using topical treatments.
- Use low-odor, apartment-safe options and follow product labels.
- Thorough coverage and repeat applications beat one-off sprays.
What Neem Oil Does to Indoor Plant Pests and Why It Works
“Think of some treatments as a diet for bugs and others as a raincoat.” That dual action explains why results are often gradual.
Azadirachtin explained: this compound, found in many neem extracts, reduces insect feeding and interrupts immature growth. It makes sap-feeders stop eating and can slow development over several days, so counts drop rather than vanish instantly.
Smothering action of horticultural oils
Separately, horticultural oil works by direct contact. When an oily spray coats tiny bodies it blocks breathing and mobility. That smothering knocks down soft-bodied insects and mites that hide on leaf undersides.
What it can and can’t do for fungal issues
These products also limit spore germination and slow spread of powdery mildew. They do not cure already dead or badly damaged tissue. Expect prevention and containment rather than instant healing.

- Coverage: hit tops, undersides, and stems.
- Timing: repeat to interrupt life cycles.
- Formulation matters: azadirachtin-rich vs mostly oil changes results.
Practical takeaway: treat with thorough coverage and a plan to interrupt life cycles, and follow label directions for safe indoor use.
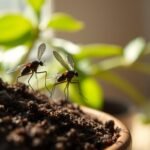
Common Houseplant Pests Neem Oil Targets Indoors
Spotting the exact insects on a sick plant makes treatment far more effective than guessing. Start by inspecting tops and undersides of leaves, stems, and tight joints. Identification guides choice and timing.

Spider mites
Signs: tiny stippling on leaves and fine webbing where activity concentrates.
Tapping a leaf over white paper can reveal moving spider mites. Spray undersides and mid-veins where these tiny spiders and mites hide.
Aphids
Look on tender stems, buds, and new growth. Aphids cluster there and leave shiny, sticky honeydew on leaves and nearby surfaces.
Whiteflies and thrips
Whiteflies live on undersides; adults flutter up when disturbed—try the “flutter test.” Yellow sticky cards help track whiteflies.
Thrips leave silvery streaks and splotches on leaf tissue. Blue or yellow traps catch adults, but thorough foliar coverage is still needed.
Mealybugs and scale
These insects hide in crevices, leaf joints, and along stems. Mealybugs look cottony; scale appears as shell-like bumps. Heavy feeding can cause leaf drop.
- ID before treatment: know where each pest hides in the area and on the plant.
- If you see tiny flies or gnats near soil, the issue may be in the soil rather than only on foliage.
Decision point: once you identify the offender, pick the right product and application method to match the target.
Choosing the Right Product for natural pest control for indoor plants neem oil
Not all neem-based products act the same; start by checking the formulation.
Three common types make a big difference in results. Cold-pressed options often contain azadirachtin and give both coating and biochemical effects. Clarified hydrophobic extracts mainly act by coating pests and may lack azadirachtin. Azadirachtin-only concentrates target feeding and growth but are pricier and used more in commercial settings.
Reading the label
Always confirm the specific plant species is listed and that indoor use is allowed. Check dilution rates and dwell times. A patch test on one leaf is a simple, low-risk check.
What to avoid and when not to use it
Avoid products with harsh soaps, strong fragrances, or unknown additives. These increase leaf burn risk when mixed with oil-based sprays.
Do not apply to moisture-stressed specimens, fresh transplants, or known sensitive varieties until they recover.
- Rule of thumb: cold-pressed products are the best all‑around pick for most homes.
- Choose clear directions and avoid mixing multiple pesticides unless the label allows it.
Next: proper dilution and emulsifying make a chosen product safe and effective in a spray bottle.
How to Mix Neem Oil Spray Correctly for Indoor Plants
Start simple: make the spray in the right order so it works and won’t harm foliage.

Basic ratios: dilute cold-pressed neem oil at 1–2 teaspoons per quart of water or 1–2 tablespoons per gallon. Always follow the product label if it differs.
Why soap matters and how much to use
Water and oil separate. A mild, plant-safe soap acts as an emulsifier so the insecticide coats leaves evenly.
- Use 1/4 teaspoon soap per quart or 1 teaspoon per gallon.
- Add soap to water first, then stir or shake.
- Finally add the neem oil and shake to combine.
Batch size, freshness, and troubleshooting
Mix only what you will use the same day. The active components break down fast once diluted, so a fresh solution gives better results.
If you see oily blobs or separation, shake and confirm you used the soap amount above. If separation persists, remake the batch using fresh water and the correct emulsifier dose.
Quick tip: measure carefully and treat during cooler, low-light time to reduce leaf stress and improve coverage.
How to Apply Neem Oil Indoors Without Damaging Plant Leaves
Start with a tiny trial area so you can spot reactions early. Treat one hidden leaf with the recommended dilute spray and wait 24 hours. If you see no discoloration or burn, it is safe to proceed.
Foliar coverage: mist the tops and focus on the undersides, mid-veins, petioles, and stems where insects hide and lay eggs. Aim for even coverage without dripping.

Best setup: use a shower or sink for small pots. For bigger specimens, place a drop cloth or tub beneath the pot to catch overspray. Mix fresh, follow soap and water ratios, and shake well before use.
- Apply early morning or late evening and keep plants out of direct sun until the spray dries.
- Do not treat drought-stressed specimens; water a day or two before application.
- Ventilate the room, wear gloves and a mask if sensitive, and keep kids and pets away until dry.
- Remember: more is not better—even coverage beats heavy drips that stress leaves.
| Step | Why it matters | Quick tip |
|---|---|---|
| Patch-test | Detects leaf burn or sensitivity | Wait 24 hours before full spray |
| Spray pattern | Reaches hiding insects on undersides and stems | Cover mid-veins and petioles thoroughly |
| Timing & safety | Prevents light-induced damage and inhalation risk | Apply early/late; ventilate and keep pets away |
Next step: if problems are soil-based or you need mild systemic action, consider a soil drench instead of repeated sprays.
When to Use a Soil Drench Instead of a Spray
A soil drench is the better choice when the troublesome life stage lives in the pot rather than on leaves. In simple terms: if larvae or root-feeders are active, treat the growing medium.
Best use cases include recurring fungus gnat larvae despite traps and drying, suspected root nematodes, and persistent sap-feeders where root uptake helps reduce feeding by aphids.
How drenches work and what to expect
A drench involves applying a properly diluted solution evenly to the soil until it is moist but not flooded. Azadirachtin can be absorbed through roots and act as a mildly systemic pesticide, helping deter some sap-feeding insects such as aphids.
Expect to use more volume than a foliar spray and to mix fresh batches the same day. Plan batch size accordingly and avoid letting pots sit in standing water after treatment.
- Choose a drench when life stages are soil-based or when root uptake will help reduce feeding.
- Protect floors, ensure good drainage, and guard against overwatering afterward.
- Pair drenches with improved watering habits to prevent repeat problems.
| Situation | Why Drench Helps | Quick Tip |
|---|---|---|
| Fungus gnat larvae | Treats larvae in soil where sprays miss | Moisten soil, avoid standing water |
| Suspected nematodes | Direct soil contact reaches hidden feeders | Use even application and monitor drainage |
| Persistent sap-feeders (e.g., aphids) | Mild systemic uptake reduces leaf feeding | Allow time—effects are gradual |
Next: schedule drenches and sprays to match life cycles. For more on keeping buds and blooms healthy during treatment, see this helpful guide on bud drop and fixes: bud drop fixes that work fast.
Treatment Schedule and What Results to Expect Over Time
A clear timetable lets you track progress and spot rebounds quickly. Plan treatments so they match insect life cycles and your care routine. Use simple checkpoints and avoid guessing.
When to repeat treatments
Active infestation: apply a thorough spray now and repeat in 7–10 days. That second application often finishes developing stages that survive the first pass.
Prevention: many labels recommend intervals of 10–14 days. Stick to label timing if you switch products.
What “working” looks like
Expect gradual drops in live counts over several days, not overnight vanishings. Look for fewer insects on inspection, less new leaf damage, reduced sticky honeydew, and fading webbing.
Common mistakes that reduce success
- Missing undersides and tight crevices—coverage is the biggest reason treatments fail.
- Over-spraying until leaves drip; that stresses a plant and still won’t reach hidden feeders.
- Treating drought-stressed specimens—water 1–2 days before application so leaves tolerate the spray.
| Situation | Action | When |
|---|---|---|
| Active outbreak | Full spray + repeat | Now, repeat in 7–10 days |
| Ongoing prevention | Light, thorough spray | Every 10–14 days |
| Monitoring | Check leaves and new growth | Every few days between sprays |
Final tip: consistency beats intensity. A light, even spray repeated on schedule preserves leaves and gives the best chance to bring pests under control while you shift to routine prevention and better growing conditions.
Conclusion
Treating problems starts with steady basics—light, clean leaves, and proper soil moisture. Healthy care is the first line of defense, and neem oil can help when insects appear.
Three pillars: pick the right product formulation, mix with a mild emulsifier, and apply evenly—especially to undersides—on a repeat schedule.
Expect gradual results: neem acts by disrupting feeding and growth, so patience plus consistency wins. Keep inspections regular, avoid chronic overwatering, and maintain good drainage to reduce soil issues.
For safety, patch-test first, ventilate while spraying, and keep pets away until treated areas are dry. If pests persist after two to three proper applications, recheck ID, try washing or pruning, and ensure the plant isn’t stressed.
Take action: combine steady gardening habits with correct use of neem oil to protect your plants with confidence.