Surprising fact: over 40% of indoor pest outbreaks trace back to soggy roots and trapped water at the bottom of pots.
This brief guide aims at a clear goal: how to improve drainage in potted plants so indoor blooms stay healthy and less attractive to moisture-loving problems like fungus gnats and rot.
Better root health starts with simple physics: healthier roots plus more air in the soil equals stronger plants that shrug off stress and pest pressure.
You’ll learn how to spot poor flow, pick the right container, tweak potting mix texture, and change watering habits so water never pools and soil keeps breathing.
This approach avoids harsh chemicals and focuses on container choice, mix particle size, and daily habits. Drainage here means a balance of water and air around roots, not just holes in the pot.
Renters and design-minded plant parents can still protect floors with saucers, double potting, and simple monitoring. Advice fits common indoor flowers like peace lily, African violet, geranium, and kalanchoe.
Key Takeaways
- Excess moisture at roots invites pests; keep soil airy and water moving.
- Soil structure is the biggest lever for healthier roots, not gimmicks.
- Choose pots and mixes that let water exit and air enter the root zone.
- Small habit changes in watering prevent stagnant water and fungus gnats.
- Renters can use saucers or double pots to protect floors while keeping flowers safe.
Why Drainage Matters for Indoor Flowers
Too much water around roots quietly sets the stage for fungal trouble and decline. When soil stays wet, air pockets collapse and the root zone loses oxygen. That lack of oxygen weakens tissues and makes plant roots vulnerable.

Constant moisture invites fungus and encourages rot. Soft, brown roots and a sour smell are classic signs that excess water is harming the system.
Think of drainage and watering as partners: you can give a deep drink, as long as excess water can leave and the mix can re-aerate. Good flow prevents stagnant water in saucers and long periods of soggy soil.
Indoor spots dry much slower than outdoors, so the right balance matters even more inside. The sweet spot is soil that stays evenly moist without turning swampy — that way roots can breathe, grow, and resist pests.
- Below the surface: wet soil fills air space and chokes roots.
- Common consequences: fungus, rot, and stressed foliage.
- Prevention first: better flow now means fewer issues later.
Signs Your Pot Has a Drainage Problem
You can spot a failing pot system by watching leaves, feeling the mix, and checking the saucer after watering.

Leaf and growth clues
Lower leaves that turn yellow while newer tips brown are classic signs of oversaturation. This happens when the root zone stays wet for long periods and damages tissues.
Touch, smell, and surface checks
Feel the soil. If it stays soggy long after watering, that means excess water isn’t leaving. A musty or moldy odor and visible fungus on the surface are red flags.
Saucer and standing water
If you often find water sitting in the saucer hours after you water, the pot isn’t draining properly. Stagnant water invites pests and fungal growth.
Root rot warning signs
Wilting when the mix is wet can be confusing—damaged roots cannot absorb moisture. Pull the pot out if needed: brown, mushy roots and a rotten smell mean root rot and call for prompt action.
- Quick routine: check moisture and saucers each watering and note changes over time.
- Why it matters: consistently wet soil creates ideal conditions for fungus gnats and other pests.
Drainage Holes and Pot Setup Basics
Start with the pot itself: a well-made container sets the stage for steady water flow. Pick a planter that gives clear exit points at the bottom so water can leave instead of pooling.

Choosing containers with properly placed openings
Good holes are multiple, large enough for quick flow, and located at the lowest point of the container. A plastic inner pot with holes inside a decorative planter is an easy, renter-safe setup.
Keeping pot drainage holes clear
A simple breathable barrier, like a coffee filter, keeps soil from washing out and clogging holes. Do not seal exits with pebbles; those can shift and block the bottom.
- Common failures: a single tiny hole, holes raised above a recessed base, or a pot sitting flush in a saucer so water can’t exit.
- Quick test: water the pot over a sink and confirm water exits within seconds without backing up.
- DIY safety: pick the right drill bit for the material—ceramic needs a carbide bit, plastic a standard bit, metal a high-speed bit—to avoid cracks or tears.
| Feature | Good | Avoid |
|---|---|---|
| Number of holes | 2–4 at bottom | 1 tiny, central hole |
| Placement | At lowest point | Raised or recessed base |
| Plugging method | Breathable filter or mesh | Loose pebbles that shift |
how to improve drainage in potted plants by Fixing the Potting Mix
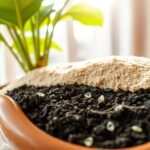
The single biggest upgrade for root health is swapping fine, compacted soil for chunkier, air-filled media. That change speeds water drain and gives roots the oxygen they need.
The real lever: particle size and air space
Larger particles create bigger voids. Water moves through these gaps faster and air replaces moisture. That keeps roots healthy and lowers pest risk.
Perched water table explained
Containers hold a zone of trapped water at the bottom because capillary action resists gravity. Fine-textured mixes wick this water upward, leaving the lower layer constantly wet.
Why fine, compacted media hold too much moisture
Pressing the mix when potting, repeated wetting that collapses structure, or using heavy garden soil all cause compaction. A clay-like mix behaves like one solid mass and holds water like a sponge.
Practical fix: amend the entire potting mix with chunkier materials—perlite, pumice, or coarse sand—rather than adding a gravel layer at the bottom. Work the amendment through the whole volume so the mix drains evenly.
For watering timing and frequency tips that match improved media, see this watering schedule.
Skip the Gravel Layer Myth and What to Do Instead</h2>
The idea of a rock layer under potting mix sounds sensible, but physics tells a different story.

Putting gravel or pebbles at the bottom of a single pot does not make the soil above drain faster. Water will “perch” above that coarse layer until the soil’s air spaces fill. The result is a wetter root zone, not a drier one.
“Perched water accumulates above coarse material until soil air space fills.”
When gravel can help — and when it backfires
Gravel steals usable volume from the container. Less room for roots means more stress for indoor flowers.
That said, gravel or pebbles can be useful inside an outer planter. In a double-pot setup the coarse material raises the inner pot above standing water and keeps it away from pooled liquid. But if the inner pot sits in pooled water or you never empty the outer tray, gravel only prolongs sogginess.
A better solution: amend the entire potting mix with coarser particles so the whole container drains evenly. This keeps more root space free and helps water move through the mix instead of sitting at the bottom.
| Scenario | Effect | Best practice |
|---|---|---|
| Single pot with gravel layer | Perched water above layer; wetter roots | Avoid; amend full mix instead |
| Double pot (inner + outer planter) | Gravel elevates inner pot above pooled water | Use coarse material only in outer planter; empty outer water |
| Gravel left in wet outer container | Traps water and promotes oversaturation | Remove standing water regularly or use a riser |
Best Drainage Amendments for Indoor Pots
Choosing stable, coarse ingredients is the quickest path to a balanced potting mix. Amendments work by increasing particle size and pore space, so pick chunky, long-lasting materials that won’t turn into fines.
Perlite: lightweight aeration
Perlite is expanded volcanic silicate. It is sterile, pH neutral, and very light. Use it for fast aeration and low water-holding.
Practical notes: pre-moisten perlite to cut dust. Expect some float after heavy waterings, so blend it through the mix rather than layering.
Vermiculite: buffering and nutrient hold
Vermiculite is expanded mica that holds nutrients and buffers pH. It has higher water retention than perlite and can compress over time.
Use vermiculite where moisture and CEC matter, but avoid heavy use for species that need a very quick dry period.
Coarse sand: stability and flow
Choose washed, horticultural sand graded about 0.25–2 mm. This material increases weight and keeps top-heavy pots stable.
Do not use beach sand or calcareous, salty grades. Sand adds ballast but also raises the mix’s overall weight.
Other durable options
- Pumice — porous, long-lasting
- Scoria/lava rock — stable, more dense
- Pea gravel — coarse voids for some mixes or outer pots
- Clay balls (LECA) — reusable and long-lived
Key rule: blend amendments evenly through the potting mix. A single bottom layer won’t fix soil that holds water.
| Material | Benefit | Tradeoff |
|---|---|---|
| Perlite | Light, airy; fast drainage | Dusty; can float |
| Vermiculite | Holds nutrients; buffers pH | Retains more water |
| Horticultural sand | Stabilizes pots; improves flow | Heavy; avoid salty types |
| Pumice / Scoria | Porous and durable | Can be pricier |
Smart Watering Habits That Prevent Stagnant Water
Smart timing and steady technique keep roots healthy while preventing pooled liquid at the base.
Water thoroughly, then wait. Give each pot a deep soak until excess water runs from the bottom. Let the pot sit until dripping slows and the soil settles.
Gentle, complete watering without leftover runoff
Never leave a pot sitting in runoff. Standing runoff turns into stagnant water that soaks the lower root zone.
Empty detachable saucers at the right time
After watering, wait until drips slow, then pour out the saucer. This prevents roots from reabsorbing excess water for hours.
Avoid compacting the potting mix
When filling a pot, tap the sides and settle the mix gently. Do not pack the soil. Compact media loses pore space and holds moisture longer.
| Action | Why it helps | When to act |
|---|---|---|
| Water until runoff | Hydrates full root ball | Every scheduled session |
| Empty saucer quickly | Stops re-soaking of lower zone | Once drips slow (10–30 minutes) |
| Sink/shower routine | Protects floors; ensures full drain | Monthly or for heavy waterings |
| Refresh old mix | Restores airflow and proper drain | If surface pools or drains slow |
Quick tip: a drier top layer between waterings reduces fungus-friendly conditions and keeps pests away.
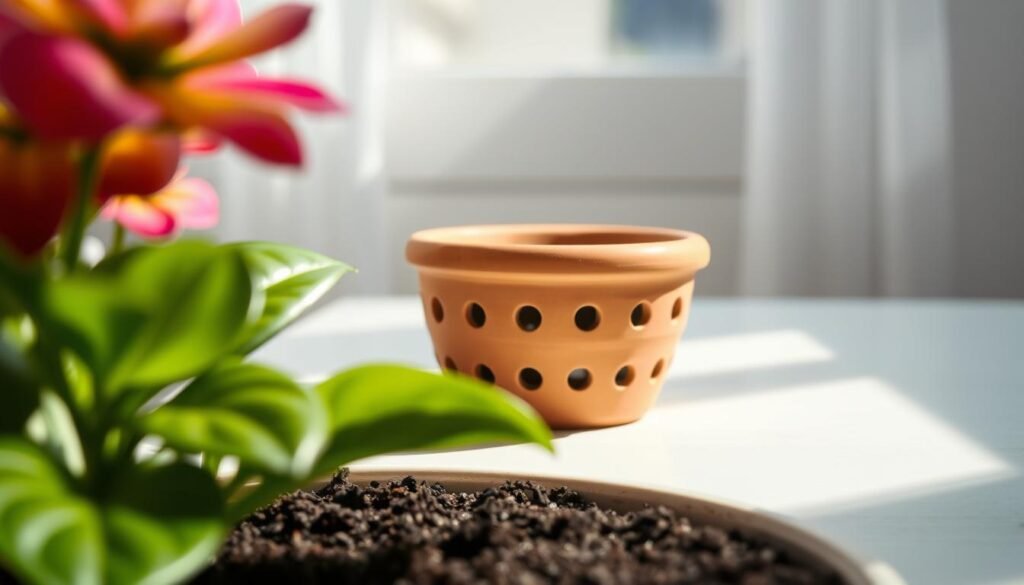
Solutions for Planters Without Drainage Holes
If your decorative planter lacks holes, you can still protect roots and floors with a few simple steps. These fixes keep water from sitting at the bottom and give roots air between waterings.
Double potting (cachepot method)
Step-by-step: keep the plant in a nursery pot that has drainage holes. Place that inner pot inside the decorative planter.
Water the inner pot over a sink or tray, then return it to the outer planter. This preserves a proper flow while keeping surfaces safe.
Monitor and remove standing water
After watering, lift the inner pot and check the outer container for pooled water. Pour out any collected water so roots do not sit in excess water.
Practical tip: if the outer container is deep, add a thin layer of gravel or pebbles to raise the inner pot above any leftover water. Use this only as an elevation, not a drainage layer inside the planted pot.
When drilling holes makes sense
If you want true drain-through performance, drilling holes can convert a sealed vessel into a real pot. Only drill when the material is safe for modification.
- Ceramic or stone: use a masonry/tile bit and drill slowly with water cooling.
- Plastic: a standard bit works; hold the container steady to avoid splitting.
- Glass or thin porcelain: generally risky—avoid drilling unless using a specialist bit and steady support.
| Material | Recommended bit | Notes |
|---|---|---|
| Ceramic / Tile | Masonry / diamond | Slow speed; use water |
| Plastic | Standard twist | Low pressure; steady grip |
| Glass | Diamond core (specialist) | High risk; consider pro |
Use risers for airflow under the bottom pot
Place small feet or risers beneath pots to create air space. Elevated pots dry faster, reduce condensation on wood floors, and cut the chance of stagnant water forming under the container.
Routine matters: double potting is helpful, but check outer planters each watering. A quick lift and pour prevents weeks of root stress and keeps your flowers thriving.
Conclusion
Air-filled soil and clear exits for excess water are the simple backbone of healthy flower care.
Recap: Combine a pot with real holes, a chunky potting mix, and watering habits that stop standing water. This three-part way keeps soil airy and reduces root rot risk.
Key fixes: use drainage-friendly pots or double-pot setups, keep exit holes clear, skip a gravel bottom layer, and amend mixes with perlite, pumice, or coarse sand.
Watch for cues: yellow lower leaves, soggy soil, musty odors, or water left in saucers. Those signs call for quick action.
Friendly next step: pick one simple change today—empty saucers after watering, add coarse amendment at repot time, or switch to a pot with holes—and reassess after a few weeks.