Surprising fact: about 60% of indoor flower problems blamed on dry air are actually caused by insufficient light, not humidity.
If leaves look dull or plants stall, don’t reach for a humidifier first. Manufacturers’ specs can confuse shoppers. A simple meter that reads lux or foot-candles gives a clear, measurable way to compare window light vs a grow light.
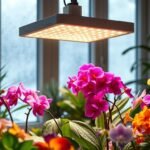
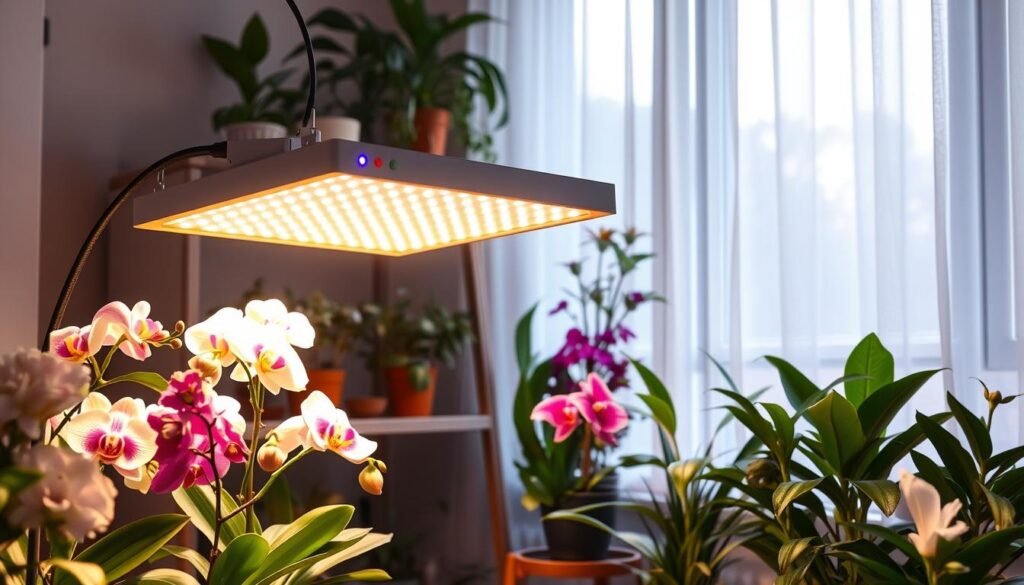
This short guide focuses on choosing a full spectrum LED grow light for houseplants and practical fixes when winter dims your windows. You’ll get a quick indoor-light diagnosis, an easy explainer of what full spectrum means, and a practical buying framework: coverage, mounting height, timers, dimmers, and design.
We’ll cover fixture types — stand, tabletop, panels, clamps, bulbs, and mounted bars — and keep advice measurable with real distances and expected meter readings. Expect safety tips too: steady hours, correct distance, and avoiding heat stress beat blasting plants with the closest fixture.
Key Takeaways
- Many indoor flower issues are low-light problems, not low humidity.
- Use a lux/foot-candle meter to compare window light vs a grow fixture.
- Choose fixtures by coverage, height, timers, dimmers, and design.
- Match recommended types to your space: stands, panels, clamps, or bulbs.
- Measure distances and hours, and avoid heat stress for better results.
Why indoor flowers and houseplants struggle without enough light in winter
Winter cuts the day short and quietly robs indoor plants of the light they need. Shorter days, a lower sun angle, and weaker window intensity can halve the energy your plants receive compared to summer.
Common low-light symptoms often look like watering errors. Leaves may yellow, growth slows, stems stretch tall and spindly, and new leaves stay smaller. Soil can remain damp longer because the plant is not using water fast enough.
Common low-light symptoms that mimic “watering” problems
- Yellowing or pale leaves that suggest overwatering.
- Leggy stems and slow recovery after pruning.
- Smaller new leaves and prolonged wet soil.
When a grow light is a better solution than a sunnier window
Moving a pot to a brighter window helps when a good, warm exposure exists. But many apartments lack strong sun, or the best windows are drafty and cool in winter. In that case, a controllable grow lights setup gives steady daily hours and consistent intensity without sacrificing comfort.
Tip: If you can’t provide stronger natural light without making your space colder or rearranging furniture, an artificial solution is often the simplest upgrade. Once light is stable, basic plant care — watering, airflow, and monitoring — clears up many of those “mystery” problems.
What “full spectrum” really means for plant growth indoors
Plants respond to different bands of color, so a daylight-like fixture isn’t just about looks. “Full spectrum” is marketing shorthand that usually means the lamp emits across the PAR window plants use most.
PAR explained: the 400–700 nm range plants use most
PAR is the band from roughly 400–700 nm that drives photosynthesis. Think of it as the usable slice of the color band that most house plants depend on.
Why red and blue wavelengths matter
Chlorophyll a and b absorb blue and red best. That’s why early fixtures leaned hard into those bands. Those colors help leaf development and energy capture.
How green still supports growth
Green light isn’t wasted. It penetrates deeper in a canopy and helps shaded leaves. White fixtures that blend blue, green, and red are easier on the eyes and still productive.
- Buying tip: Labeling alone won’t guarantee results — check intensity and distance recommendations.
Next: we’ll cover meters, coverage, and controls to match fixtures to your space.
How to choose the best full spectrum LED grow light for houseplants
Start with measurement, not guesswork. A simple lux or foot-candle meter tells you whether a led grow light will actually reach leaves where they sit.

Measure light like a pro: lux, foot-candles, and why a meter helps
Point the meter at the leaf surface and compare a window spot to the fixture at the same height. You don’t need lab precision—just consistent readings to guide placement.
Coverage area and mounting height: inches and feet that change everything
Intensity falls fast with distance. Many small fixtures are useful only within ~12 inches. Raise a bar a few inches and you can widen usable coverage across more pots.
Color temperature and “white vs pink” choices
Common temps: 6500K (cool), 5000K (daylight), 3000K (warm). White tones are easier in living rooms; pink tones work but can be distracting.
Heat, airflow, and safe distance
Even efficient models produce heat. Keep airflow and a safe gap from leaves so plants don’t scorch and the fixture can cool.
Controls: timers, dimmers, and app options
Reliable schedules beat guesswork. Timers, dimming, and app control dimmable features keep hours per day consistent and reduce missed days.
- Match coverage to your pot layout: bar, panel, or bulb shapes matter.
- Use a meter to set height in inches or feet, then lock it in.
How much light your plants need and how long to run grow lights
Deciding how much daily illumination your plants need starts with matching species to intensity and schedule. Pick a realistic goal: boost tropical foliage or support bright, sun-loving pots like cacti and succulents.
Low-light favorites vs brighter “sun-lover” plants
Low-light tolerant foliage (pothos, ferns) does well with modest intensity at about 12 inches or closer from a modest fixture.
Sun lovers such as succulents and cacti need stronger output or much shorter distance to thrive.
Setting a reliable schedule
Most indoor setups perform best with a steady routine. Aim for 10–12 hours per day using a timer. Some bulbs or panels recommend up to 18 hours; choose longer hours only when intensity is low or the product specifies it.
Supplemental lighting vs replacing window light entirely
Supplemental runs—an extra few hours in late afternoon—can noticeably improve tropical plant vigor without replacing daylight. Full replacement needs higher intensity and longer hours.
| Plant type | Approx. usable distance | Typical hours per day |
|---|---|---|
| Low-light foliage (pothos, philodendron) | ~12–18 inches | 10–12 hrs |
| Bright sun plants (succulents, cacti) | 6–12 inches (strong panel) | 12 hrs (up to 18 if intensity low) |
| Mixed collections | Use adjustable mounts or separate fixtures | 10–14 hrs with zoning |
Tip: Pair a timer or smart plug with your fixture to keep hours consistent and saving you daily switching. The next sections recommend styles based on these needs.
Best overall stand light with timer and dimming
For most plant owners, a tripod-style fixture that folds and includes timers and dimming hits the sweet spot. The LBW model we tested is the versatile option many people choose when they want one unit to cover a mixed collection without permanent mounting.
LBW LED Grow Light With Stand: flexible setup for mixed plant collections
The LBW unit covers 380–800 nm and pairs an adjustable tripod with a gooseneck head. It offers six brightness settings and timer choices (4 / 8 / 12 hours).
Key benefits:
- Movable tripod and gooseneck let you aim the fixture at shelves, corners, or cluster pots.
- Built-in timers and multiple brightness levels reduce guesswork and help match plant needs.
- Includes hanging hardware and folds for compact storage when not in use.
Best placements for shelves, corners, and apartment spaces
This unit works well in apartments, basements, or rented rooms where drilling is not an option. Use it on a shelf edge, beside a window, or in a corner to add targeted coverage without changing the room design.
“Start at medium brightness and a reasonable distance; then raise or dim based on new growth and leaf response.”
Trade-off: It’s practical rather than decorative. If tidy design is top priority, consider a different option. But if flexibility, timer, and dimmer matter, this fixture is a strong value and illustrates why those features are worth paying for.
Best stylish tabletop option for small plants and shelves
For apartments and offices, a tasteful tabletop unit can keep small pots healthy without shouting “equipment.” It blends into living spaces and gives steady daily hours so plants respond to consistent care.

AeroGarden Trio: decor-friendly design with multiple modes
The AeroGarden Trio has three adjustable heads and a modern design that sits well on a shelf. It offers simple modes: a daylight-like option, warmer tones, and cooler tones so you can choose what looks best and what the plant needs.
Using touch controls vs app control dimmable features
Touch controls are quick for on-the-spot changes. The app unlocks finer scheduling, sunrise/sunset fades, and extended hours up to 24. The app can feel confusing at first but works once set.
Ideal plant height and spacing in the 12-inch range
This unit is best for plants under about 12 inches. Space pots so each head covers a small zone and avoid tall specimens that cast shade. Angle heads carefully; it may take minutes to get stable positioning.
- Looks like furniture: great when design matters.
- Simple modes: pick warm, cool, or mixed without overthinking.
- Beginner friendly: encourages regular use and good habits.
Best for grow tent setups and bigger plant areas
A planted tent changes the game: controlling the environment makes it easier to run a dedicated area that keeps multiple pots healthy.
Mars Hydro TS series is the serious-choice brand when coverage matters. A single panel covers about 2.5 x 2.5 feet of usable canopy. That even spread cuts hot spots and helps plants at similar heights get the same amount of light.
Mars Hydro TS features and practical notes
The panels dim, and they support daisy chaining so you can link several units to one control. That reduces cord clutter and makes expansion simple.
There’s no built-in timer, so pair panels with a smart plug or external timer to keep schedules steady.
Daisy chaining explained
Daisy chaining means linking multiple fixtures so they run from one controller. It saves outlets and makes a larger area behave like one system. Use the manufacturer wire and follow max-unit recommendations.
Managing temperature and humidity inside a grow tent
Enclosing plants traps heat and moisture. Add venting, an inline fan, and a small circulation fan to keep air moving.
Check temperature and humidity daily. If temps rise, raise panels or increase airflow. If humidity climbs, use vents or a small dehumidifier to avoid mildew.
Placement tips: hang panels higher as plants stretch, dim if brightness is too intense near leaves, and keep at least a few inches of clearance around fixtures for cooling.
“Choose this setup when coverage and control matter more than how the fixture looks in your living room.”
| Use case | Approx. coverage | Notes |
|---|---|---|
| Single tent for multiple pots | ~2.5 x 2.5 feet | Best with 1 TS panel per small tent; add panels for larger area |
| Expanded canopy (multiple panels) | 4–6+ square feet | Daisy chain panels; use one smart plug for timing |
| Basement corner or dedicated room | Varies by area | Manage temperature and humidity with vents and fans |
Best clamp grow light for seedlings and multi-pot coverage
Clip-and-aim simplicity wins when you want targeted beams without a big footprint. The Leoter four-head clamp unit works well on a tight shelf or a kitchen edge and gives precise control over small trays.
Leoter 4-head: flexible arms for targeted coverage
Each arm bends independently so you can reduce shadows and spread usable coverage across multiple pots. The strong clamp secures to a shelf or table edge and keeps heads steady over seedlings.
Switching color modes across stages plant growth
Modes include warm/white, red+blue, and red+blue+warm. Use red+blue for early veg and warm/white as foliage develops. Keep intensity and hours consistent between stages plant growth; that matters most.
- Best as a “clip it and aim it” option — ideal for seed starting, propagation, and clustered trays.
- Stable clamp mount saves floor space and fits tight shelf setups.
- Built-in timer (3/9/12 hrs) and many dimmer levels make routine simple and reliable.
- Limitations: not decorative and not a substitute for a larger floor fixture.
Best budget bulb that fits standard lamps
A simple screw-in bulb can be the quickest, lowest-risk way to test added indoor illumination. The GE BR30 fits standard 120V lamps and gives an approachable entry point when price is the main concern.

GE BR30: easy entry into led grow options
The GE BR30 version targets an advanced red band and recommends long runtimes—up to 18 hours in some guides. It has no built-in timer and some testers reported a faint humming.
Where it shines and practical tips
Best matches: herbs and leafy greens on a kitchen counter, small desk plants, and a single specimen moved indoors to overwinter.
- Use an adjustable lamp so you can keep the bulb at an effective distance as the plant grows.
- Pair with an external timer to maintain consistent daily hours without manual switching.
- Pick a flood-style bulb when you want wider spread over a small grouping; don’t expect it to cover a whole room alone.
| Feature | Benefit | Trade-off |
|---|---|---|
| Fits standard 120V lamps | No extra fixture purchase | Limited coverage per bulb |
| Advanced red emphasis | Good for leafy growth and overwintering | Not adjustable color modes |
| Long recommended runtimes | Supports plants needing many hours | Use with a timer to avoid waste |
“If price is the deciding factor, try a bulb first. It’s low-commitment and shows whether added hours help your plants.”
Note: Expect fewer controls than a panel and occasional humming. As an affordable choice, this bulb is a smart test before spending more on larger fixtures or multi-head setups.
Best mounted bar for under-shelf plant care
A slim mounted bar can turn a crowded shelf into a thriving plant display without extra floor gear.
Soltech Solutions Grove is light-weight and unobtrusive. It sits under cabinets or shelves and aims output close to leaves, which boosts effectiveness in tight spaces.
Soltech Grove: slim profile that fits shelves and cabinets
The Grove has a tap-to-control brightness and a built-in timer for steady daily hours. Its thin design blends into modern design and keeps plant zones neat.
Mounting choices and tidy wire management
Use adhesive strips on smooth surfaces for a quick install. If the shelf surface is textured, use screws or supplied hardware for a secure mount.
Cord routing matters. Run the wire along the shelf lip, clip it under the board, or use a small raceway so the setup looks intentional and not DIY messy.
“Under-shelf mounting puts the fixture closer to foliage, which is the single biggest benefit in narrow spaces.”
- Clean shelf upgrade: ideal when a floor stand would waste space.
- Best use: small pots, seedlings, and multi-level displays.
- Compatibility: pairs well with strip-style layouts on multi-tier shelving.
- Daily ease: timer and tap control remove guesswork and simplify routines.
| Feature | Benefit | Notes |
|---|---|---|
| Slim mounted bar | Close coverage under shelves | Improves intensity in tight vertical space |
| Adhesive vs hardware | Quick install or secure mount | Use screws on textured surfaces |
| Cord management | Clean appearance | Clip, raceway, or zip-tie the wire along shelf edge |
Best hanging pendant grow light that blends into home decor
Soltech’s Aspect pendant makes a strong case when you want effective plant lighting that doesn’t look like equipment. It hangs like a normal pendant and fits living rooms or dining nooks while focusing usable output on a cluster of plants below.
Soltech Solutions Aspect: strong output with a living-room-friendly look
Aspect grow light aims at buyers who value design as much as performance. The pendant’s clean profile blends into decor while delivering high intensity. Testers measured very bright output close-up, so placement matters.
Using the included timer and adjusting height as plants grow
The Aspect includes an analog 12-hour timer, which makes routine simple. Many users swap to a smart plug when they want variable schedules or remote control.
Because the fixture is powerful, hang it by the foot rather than inches above foliage. Give the canopy room and airflow to avoid heat-related stress. Raise the pendant as plants stretch so top leaves aren’t blasted by close intensity.
| Feature | Benefit | Notes |
|---|---|---|
| Decor-forward pendant | Blends into living spaces | Good when aesthetics matter |
| Very high output | Covers larger clusters from several feet | Do not place ~1 foot from foliage; use safer distances |
| Analog 12-hour timer | Easy daily scheduling | Can swap to smart plug for flexibility |
| No dimmer | Simpler design | Height is the primary control |
“Hang it higher to widen coverage and protect leaves; adjust height as plants grow.”
Best strip and tube options for plant shelves and propagation racks
When plants line up on shelves, strips and tubes give more uniform intensity than a single bulb. Long fixtures distribute usable output across rows and reduce shadows that stunt small pots.

Barrina T5 tube sets: modular coverage for larger shelving
Barrina T5 kits include multiple 3-foot tubes plus connectors and zip ties. That hardware makes it simple to scale a propagation rack or a multi-tier shelf without custom wiring.
Testers praised brightness and broad coverage. The kits snap into place and stay neat in tight spaces.
When non-dimmable fixtures become a dealbreaker
These tubes are not dimmable. That’s fine for a dedicated plant room or garage. But in a shared living area they can be visually intense and too bright in the evening.
Dealbreaker checklist: if you need mood lighting, quiet evenings, or aesthetic control, prioritize dimmable options or pair tubes with timers and curtains to limit hours.
Connectors, zip ties, and layout ideas for tight spaces
Run tubes front-to-back on deep shelves to light pot rows evenly. On narrow units, place parallel lines to minimize shadows across multiple pots.
Use included connectors and zip ties to keep cords tidy and maintain tidy spacing without drilling. Lightweight mounting means quick changes when you rearrange plants.
| Feature | Best use | Notes |
|---|---|---|
| Long strips/tubes | Multi-tier shelves, propagation racks | Even coverage, fewer hotspots |
| Barrina T5 kits | Scaleable shelving setups | Includes connectors and zip ties; not dimmable |
| Layout options | Deep vs narrow shelves | Front-to-back for depth; parallel for width |
“Consistent shelf lighting is one of the easiest upgrades to keep multiple plants stable through winter.”
How to match light strength to real distances and coverage
Distance is the single most practical factor when you set up a lamp over plants. A source inches from a leaf can be effective while the same unit several feet up loses usable output quickly.
Close-range strip setups for small pots and low-light plants
Strips work best when placed within about 6–12 inches of small pots. That short span delivers measurable intensity to seedlings and low-light species.
Tip: space strips evenly so each pot sits under an active band, not a shadowed gap.
Bar lights for shelves: maintaining strong light across multiple levels
Use a dedicated bar per shelf tier rather than relying on spill. Repeat bars across levels to give each row similar coverage and avoid one-light covers-all mistakes.
High-output panels and pendants for 2–4 feet of usable area
High-output panels or pendants can cover a 2–4 feet area when hung a few feet above the canopy. They widen coverage but need airflow and careful height to prevent hotspots.
- Translate strength to placement: start at the maker’s recommended inches, then test.
- Measure with a meter when possible, then watch leaf posture and new growth.
- Avoid one fixture trying to cover too many pots; zone instead.
| Fixture type | Typical distance | Best coverage |
|---|---|---|
| Strip | 6–12 inches | Small pots, trays |
| Bar | 12–24 inches | Multi-level shelves |
| Panel/pendant | 2–4 feet | Clusters, larger area |
“Matching coverage and distance is the fastest way to make any grow light purchase actually work.”
Which features are worth paying for at each price point
Smart spending focuses on consistent performance and usable coverage rather than brand hype. That rule helps you buy the right products and avoid overpaying for bells you won’t use.
Budget essentials
At lower price points, prioritize three things: a stable mount or clamp, a reliable timer, and real coverage that reaches leaves.
If a cheap option can’t reach the canopy, it won’t help—no matter what the spec sheet claims.
Mid-range upgrades
In the mid price range, focus on design improvements and dimmable control. A better fixture with solid aiming hardware and a dimmer makes intensity easy to tune.
This makes the units easier to live with in shared rooms and improves results more than a small jump in output.
Premium perks
Premium products buy cleaner design, stronger output, and wider usable mounting heights. Brands that invest in materials and finishing often deliver units that blend with decor and cover larger clusters.
“For one plant, a bulb is often enough; for collections, pay for coverage and control; for decor-first rooms, pay for design.”
- Decision shortcut: single specimen = bulb; several pots = invest in coverage and timer; living-room placement = prioritize design and brand.
- Remember: the best choice is the product you’ll actually run every day.
Setup checklist for better results fast
A quick checklist gets your fixture working well the same day you unpack it. Follow these steps to reduce guesswork and see steady improvement in plant care.
Dialing in placement: angle, height, and avoiding shadows
Aim the unit so light hits the canopy evenly. Tilt heads to remove harsh shadows and cover multiple pots without hotspots.
Measure distance in inches from leaves. Small fixtures often work best within 6–18 inches; panels need several feet. Use a lux or foot-candle meter to confirm usable intensity.
Pairing grow lights with a smart plug for consistent schedules
Lock in steady hours per day with a smart plug or external timer. Irregular time is one of the top reasons a setup “doesn’t work.”
If a fixture has dimming but no timer, a smart plug is an easy solution and keeps routines hands-free.
Preventing leaf scorch while maximizing growth
Watch leaves for bleaching or crisp edges. Those signs mean too much intensity or too little airflow.
Keep clearance around the fixture, route the wire safely, and add a small fan if heat pools. Change one variable at a time—height or hours—then observe new growth for 1–2 weeks.
- Quick checklist: aim evenly, measure with a meter, set a timer, keep airflow, inspect leaves weekly.
- Remember: better light won’t fix every problem, but it makes watering and feeding decisions clearer.
Conclusion
If pots look unhappy in short days, a measured lighting plan usually helps faster than more water or misting.
Key takeaway: fix the light first—tested units improved plant performance more than natural light alone. Start with coverage, then set mounting height and distance in inches or feet, add timers and dimming, and finally pick a style that fits your room design and price expectations.
Match fixture types to use: stands for versatility, tabletop units for small pots, clamps for multi-pot targeting, bulbs for budget entry, bars/tubes for shelves, and panels/pendants for larger area work. If you build a grow tent, plan airflow, temperature control, and schedules along with intensity.
Action step: choose one product class, set a routine of hours, place it at a sensible distance, and watch new growth over the next few weeks. Predictable light makes watering and overall care simpler and more reliable.