Nearly 70% of houseplant failures tie back to poor drainage — not light. That surprising stat shows why the right pot matters as much as care routines.
This short guide explains what repotting indoor flowering plants really means and why the choice of pot can make or break long-term root health. With the right container, fresh soil, and a simple plan, repotting is an uncommon, low-drama job.
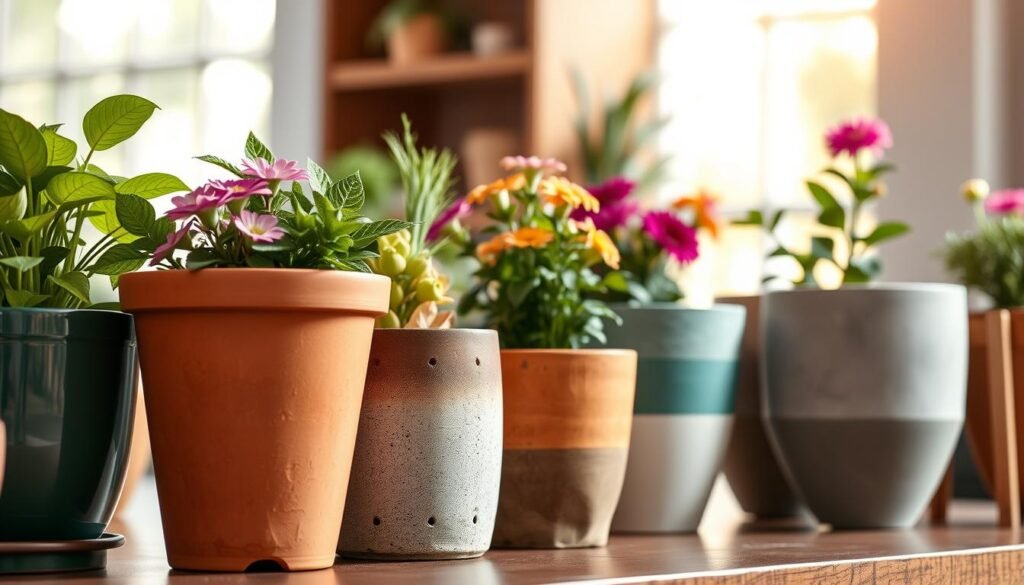
We’ll walk through the three big pot decisions — drainage, size, and material — and show how each affects watering, root oxygen, and soggy soil risk. You’ll learn the Goldilocks sizing rule (usually 1–2 inches up) and why oversized pots often keep soil wet too long.
Finally, learn to pair a functional pot (with drainage holes) with a decorative cachepot so you can style safely. For creative container ideas and styling tips, see this container guide.
Key Takeaways
- Drainage matters most — choose pots with drainage holes when possible.
- Pick a pot just 1–2 inches larger than the root ball to avoid overpotting.
- Use fresh potting mix, not dense garden soil, for better aeration.
- Cachepots let you style safely but don’t trap water against the inner pot.
- Healthy roots mean better blooms: balance moisture, air, and nutrients.
How to Tell When Your Indoor Plant Needs Repotting
Spotting clear signs that a plant has outgrown its home helps prevent stress and poor growth. Look for visual clues, test how water behaves, and confirm with a quick root check before you act.

Visible roots and roots from drainage holes
Too many roots means more than a stray tip at the surface. If lots of roots circle the top or spill from the holes, the root system is crowded and searching for room.
Water behavior and soil dryness
When water runs straight through or the soil dries much faster than before, roots likely occupy most of the pot. Fast drainage often signals reduced soil volume to hold moisture.
Growth and stability clues
Little new growth during active months or a top-heavy, tipping houseplant can mean the root base no longer supports shoots. Combine these signs for a stronger diagnosis.
“A quick slide out of the current pot will reveal circling roots — the classic sign that it’s time to act.”
| Sign | What to look for | Why it matters |
|---|---|---|
| Roots at surface | Many roots showing on top | Soil volume is low |
| Roots in holes | Roots exit drainage holes | Plant is seeking space |
| Fast drainage | Water runs through | Less soil to retain moisture |
| Slow growth / tipping | Few new shoots; unstable | Root system needs a better base |
Quick tip: Gently remove plant and check for circling roots before you commit to a larger pot. Some species tolerate being snug longer, so use multiple cues and common sense.
Timing and Prep for repotting indoor flowering plants
Timing matters: many gardeners choose spring or summer when growth resumes. That active time helps a new container support growth quickly.
Fall can also work. When light dims and growth slows, gentler conditions reduce transplant shock for some houseplants.

Pick time by plant behavior
Watch for new shoots, circling roots, or soil that dries oddly fast. Those signs tell you it’s the right moment more than a calendar does.
How big the new pot should be
Use the 1–2 inches rule: choose a new pot that is only 1–2 inches wider than the current container. A slightly larger container supports root growth without making soil stay too wet.
Drainage holes and cache pots
Drainage holes let excess water escape and lower root-rot risk. If you prefer a decorative cache pot, keep the plant in a nursery pot with holes and set that inside the cache. Always empty any collected water after you water the container.
Soil, watering, and a quick prep checklist
Use a fresh potting mix or potting soil made for containers. Avoid dense garden soil indoors — it compacts, holds too much moisture, and limits air.
- Water the day before to ease removal and reduce stress.
- Gather a new pot, saucer, fresh mix, and a small tool (butter knife works).
- Make sure you have drainage holes or a hole-equipped nursery pot for the cache.
“Watering a day ahead makes the root ball hold together and slide out more cleanly.”
| Prep Step | Why it matters | Quick tip |
|---|---|---|
| Choose season | Active growth helps recovery | Prefer spring/summer; fall okay for slow growers |
| Pick size | Prevents overwatering and root stress | Go 1–2 inches wider |
| Ensure holes | Reduces waterlogging | Use nursery pot + cache pot; empty collected water |
| Fresh mix | Improves aeration and drainage | Avoid garden soil indoors |
The How-To: Repotting Without Damaging Roots or Causing Root Rot
Start calm and follow each step. Work on a covered surface and have fresh soil, the new pot, and a small tool ready.

Gently remove the plant from the old pot
Squeeze flexible plastic sides if you can. Tip the pot on its side and slide a butter knife or small tool between the wall and soil to loosen without tearing roots.
Massage and tease the root ball
Loosen circling roots at the bottom and sides so they can absorb water, air, and nutrients. Losing a few fine roots is normal; never yank aggressively.
Optional root pruning to limit size
If you want the plant to stay the same size, trim up to about one-third of the lower roots. Do this after removal and before placing the plant in the new pot.
Set planting height and fill the bottom
Add fresh potting mix to the bottom third of the new pot. Position the stem base roughly 1/4–1/2 inch below the rim so there’s space to water.
Backfill, settle, and water
Fill soil around the root ball, work it into gaps to remove air pockets, and firm lightly—do not compact. Tap the bottom of the pot to help settling.
- Water thoroughly until water runs from the holes.
- Let it sit about 30 minutes so the mix wicks moisture.
- Empty any collected drainage so roots do not sit in standing water.
“A slightly larger pot is fine; a much larger one invites wet soil and root rot.”
Why avoid overpotting: Big empty soil volumes stay wet longer than roots can use. That extra moisture increases the chance of waterlogged conditions and root rot, so stick to modest size increases and fresh mix.
Aftercare in the Weeks After Repotting
New soil and extra volume change how quickly a container dries, so adjust expectations for the next few weeks. Give the root zone time to settle before returning to a normal routine.

Adjust watering and watch the pot
Many plants will drink more slowly at first because the fresh soil holds moisture. Water thoroughly when the container actually needs it, then wait longer than your old schedule.
Keep light and location stable
Place plant back in its usual spot and avoid moving it around. Consistent light, temperature, and humidity help steady recovery and reduce stress.
Three simple cues to avoid overwatering
- Check soil feel below the top inch, not just the surface.
- Lift the pot to judge weight—light means dry, heavy means still wet.
- Confirm drainage is working and empty any standing water from saucers or cache pots.
Tailor care and support growth
Different types need different dry-down levels: succulents, cacti, and ZZ/snake plants prefer a deeper dry; pothos and philodendron do well when the top few inches dry; ferns like steadier moisture.
Recovery often looks like a short pause in growth; new leaves and firmer posture follow as roots expand. Reintroduce fertilizer gently only after you see fresh growth.
“Track watering dates and note seasonal changes so each pot gets the right rhythm.”
| What to watch | How to check | When to act |
|---|---|---|
| Soil moisture | Finger test 1–2 inches deep | Water when appropriate dryness reached |
| Pot weight | Lift before and after watering | Adjust interval based on weight change |
| Drainage | Check saucer for standing water | Empty immediately to protect roots |
| Growth signs | New leaves, firmer stems | Resume light feeding once steady growth returns |
For seasonal watering guidance and to fine-tune schedules, see this watering schedule guide.
Conclusion
A careful pot swap keeps roots happy, reduces stress, and helps your houseplants recover faster.
Choose a new pot only 1–2 inches larger, use fresh potting soil, and make sure the container drains well. These steps balance air and moisture so roots can breathe and grow.
Timing often favors spring or summer, but act when your indoor plants show clear signs they need space. A modest size increase beats a much larger pot that stays too wet.
Two big mistakes: skipping drainage and over-sizing the container. Both invite soggy mix and raise the chance of rot.
Quick checklist to reuse: confirm rootbound, prep tools and fresh mix, remove gently, loosen roots, set height, water through, and empty excess. Apply this routine across common houseplant types while tuning for each species’ dry-down and light needs.