Surprising fact: up to 40% of indoor plants show visible stress signs each year, and curled leaf tips are one of the earliest alerts.
This guide treats curling as a signal, not a single disease. A plant rolls its leaf edges to cut exposed surface area. That protects it from water loss and damage, but it also tells you something in care has shifted.
Rather than guessing, use a symptom-by-symptom method that narrows causes fast. We focus on water and soil, roots, light and temperature, humidity, pests, and nutrients. Each curl pattern can mean different things depending on the exact conditions.
Quick reassurance: curled leaves may not snap back right away. The goal is to stop more harm and encourage healthy new growth. Start by stabilizing care—then confirm the cause with a few simple checks like a soil finger test or a close look for insects.
Key Takeaways
- Treat curling as a stress signal, not a single disease.
- Use a symptom-by-symptom approach to find the likely cause.
- Check water, roots, light, humidity, pests, and nutrients first.
- Stabilize care before applying treatments.
- Expect recovery to show in new growth rather than instant uncurling.
How to Read Leaf Curling Symptoms Before You Treat
Spotting how a leaf curls gives a fast clue to what stressed the plant and where to look first. This helps you avoid treatments that do more harm than good. Start by observing the pattern, then run a few quick checks to confirm the cause.

What this response means in real time
Plants curl to conserve moisture and limit damage. When water or humidity is low, a plant reduces exposed surface area to slow evaporation. Heat and sudden bright light can trigger the same defensive action.
Direction clues that narrow the cause
Inward curl often points to drought or low humidity. Upward or twisted tips can mean heat stress or intense light. Downward or flaccid curling tends to indicate overwatering or root trouble. Curled edges often reflect dry air or spot damage.
Fast checklist to narrow the cause
- Feel the top inch of soil and then an inch deeper; note the last time you gave water.
- Check if the pot drains freely and if the surface repels water.
- Ask whether the plant moved closer to a window or outdoors recently; sudden direct sunlight can scorch.
- Scan the room for drafts or consistent high temperature that may stress growth.
- Inspect undersides for sticky honeydew, speckling, webbing, or cottony spots that signal insects.
Immediate, do-no-harm steps
Move the plant out of direct sunlight and into bright, indirect light. Stabilize watering — do not double-water or fertilize until you know the issue. Avoid abrupt repotting while you observe.
| Symptom | Likely cause | Quick check | First action |
|---|---|---|---|
| Inward curl | Dry soil or low humidity | Feel soil 1″ and 2″ deep | Move to humid spot; water if deep soil is dry |
| Upward/twisted tips | Heat or sudden bright light | Note recent light changes and room temp | Shift to bright, indirect light; cool room slightly |
| Downward curl | Overwatering, poor drainage | Check pot drainage and soggy soil smell | Hold watering; improve drainage after diagnosis |
Watch for results over time: improvement usually appears in new growth, not by instant straightening. Give it a few weeks while you keep conditions steady.
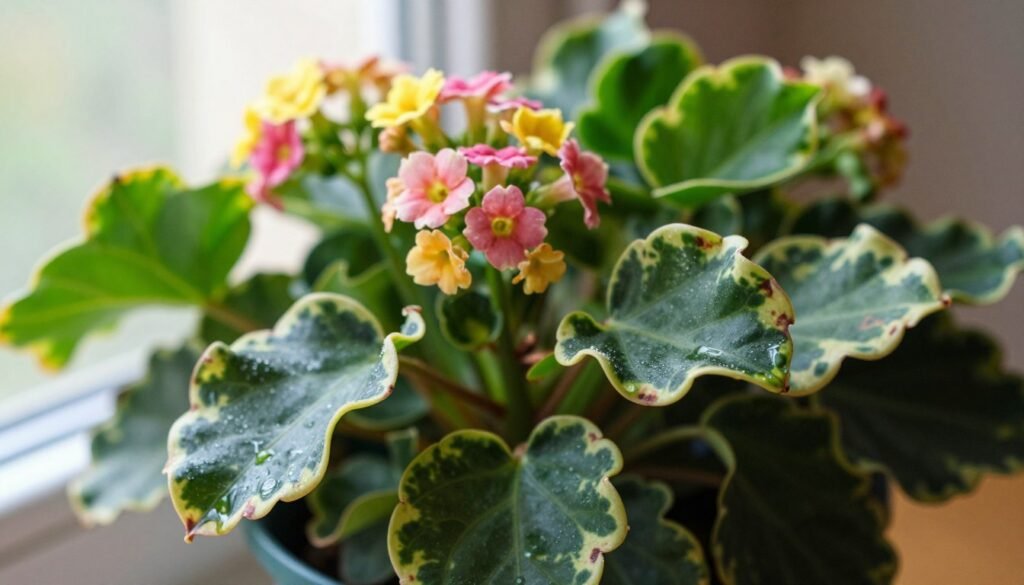
leaves curling on flowering houseplant: Watering and Root Problems That Trigger Curling Leaves
Most cases of curled foliage trace back to how the pot drains and whether roots can actually take up moisture. Start by checking the soil both at the surface and an inch or two down. If the soil dry test shows dryness top to bottom, the plant reduces exposed area to slow moisture loss.

Underwatering signs
Soil dry at the top and deep down usually means the root zone lacks moisture. When the medium is bone dry, leaves curl to limit evaporation. Confirm with a finger or a moisture probe.
How to water correctly
Soak the pot until water drains from the pot’s drainage holes. Let the container drain completely so roots get both water and oxygen. Repeat only after the top inch feels slightly dry.
When soil won’t absorb water
Very dry, hydrophobic mixes let water run straight through. Rehydrate by bottom-soaking: place the pot in a tray of room-temperature water for at least 15 minutes. Allow the media to wick moisture upward, then drain excess.
Overwatering and root rot
Soggy, muddy substrate and stalled growth mean roots lack oxygen and can’t “drink.” Confirm root rot by unpotting: healthy roots are firm and light-colored; rotten roots are brown, soft, and often foul-smelling.
Fixing root issues (step-by-step)
- Unpot the plant and gently remove old soil.
- Prune away brown, mushy roots with clean shears.
- Repot into a pierced pot with a well-draining mix and avoid sitting trays of standing water.
Root-bound stress and prevention
Circling roots, fast-drying soil, or stalled growth mean the root ball is crowded. Repot to a slightly larger pot when roots crowd out soil. Match watering to the plant and season, check moisture before each watering, and never let the pot sit in standing water.
Light, Temperature, and Humidity: Getting Growing Conditions Back in Range
Bright light can be a blessing and a hazard; sudden exposure often triggers leaf damage that shows quickly. Too much direct sunlight—especially after a plant moves outdoors or closer to a window—can scorch tissue and make edges curl or brown within days.

Avoiding light shock: an easy acclimation plan
Start with 1–2 hours of gentle morning or evening light, then add an extra hour each week until the plant tolerates brighter spots. This minimizes leaf burn and reduces the chance of rapid water loss.
Too little light vs. too much
Insufficient light shows as weak, leggy stems and plants that turn toward windows. If growth is pale or stretched, move the pot into brighter indirect light or add a grow light set to 10–14 hours daily.
Temperature and drafts
Aim for about 65–85°F indoors. Consistent heat above 80°F, combined with low humidity, stresses plants and can make leaves curl. Cold drafts from windows, doors, or HVAC vents also provoke stress—moving the pot a few feet often helps.
Raising humidity without fuss
Dry air pulls moisture from tissue; curled edges are one of the first signs. Increase humidity with a small humidifier, a pebble tray, or grouping plants so they share microclimate moisture.
Stable light, temperature, and humidity protect buds and reduce drop while your plant recovers—slow, steady adjustments beat sudden changes every time.
Pests, Disease, and Nutrient Stress: How to Fix Curling Leaves Without Guesswork
When new shoots twist or cup, look first for tiny insects or a nutrient gap. These problems are common and often reversible with quick action.
Common sap-suckers: aphids, whiteflies, mealybugs, spider mites, and scale. They hit new growth and flower stems first because those tissues are softer and richer in sap.

How to spot an infestation
Confirm pests by checking for sticky honeydew, speckling or tiny stings, fine webbing, visible larvae, or whitish cottony masses in leaf joints.
First-response plan
- Isolate the plant immediately.
- Rinse foliage with lukewarm water and wipe both top and underside with insecticidal soap or neem oil.
- Repeat every 4–7 days to catch new hatchlings.
Severe cases and disease links
Severe infestations show multiple life stages or rapid spread. Use targeted insecticides and repeat treatments on schedule. Quarantine new plants to prevent recurrence.
| Problem | Cause | First change |
|---|---|---|
| Disease outbreaks | Overwatering, poor air flow, contaminated soil | Isolate, prune infected tissue, improve ventilation |
| Nutrient deficiency | Old, depleted soil | Fertilize lightly or repot with fresh mix |
| Fertilizer burn | Excess salts from too much feed | Leach soil with heavy watering or repot |
Repotting can reset conditions: fresh substrate, better drainage, healthier roots, and pause fertilizing for about four weeks to let the plant recover.
Conclusion
Match the symptom to the likely cause, then steady care and wait for recovery. Start by checking soil moisture, pot drainage, and nearby light and temperature. Stabilize water and humidity, and isolate any plants with visible pest activity.
Quick next steps: confirm soil wetness a few inches down, ensure the pot drains, move to bright indirect light, and keep temperature steady. These simple checks often stop the problem fast.
Expect results in new growth rather than instant smoothing. Give the plant 1–2 weeks for existing curled leaves to relax and more time for healthy growth to appear.
Prevent future issues with consistent watering, good drainage, gentle transitions to brighter spots, routine pest checks, and repotting when roots crowd the pot. Use this guide seasonally to keep plants resilient.