Surprising fact: many houseplant cuttings form visible roots in glass faster than they do in soil — a quick win that hooks new plant parents. This guide gives practical water propagation tips for strong roots and clear steps to avoid soggy stems and rot.
Expect easy, honest advice meant for everyday plant lovers in the United States. You’ll learn how to pick the right plant, take a clean cutting, and keep clear, oxygenated water so cuttings thrive instead of collapsing.
At its core, new roots start at nodes. Keep nodes submerged and leaves dry. This method is popular at home because it is low-mess, cheap, and genuinely fun to watch as tiny white threads appear.
The step-by-step flow covers plant choice, node ID, cutting technique, container setup, light and warmth, optional hormones, timelines, and moving plants to soil. Promise: most mush problems trace back to submerged leaves, dirty tools, stagnant liquid, low oxygen, or leaving cuttings sitting too long.
Key Takeaways
- You’ll get reliable, practical water propagation tips to avoid mushy stems.
- Success hinges on the right plant, clean cuts, and clean water.
- Keep nodes under liquid and leaves dry to encourage healthy growth.
- Watching roots in clear glass is low-cost and satisfying at home.
- Common failures come from dirty tools, stagnant liquid, and overlong stays.
Why Water Propagation Works and When It Doesn’t
Understanding water roots vs. soil roots clears up a common myth: these are not different kinds of anatomy. They are the same structures adapting to wet or packed media.
Water roots often appear faster because cuttings sit in constant moisture. That steady access to hydration lets plants form visible root nubs without the resistance of potting mix.
But there’s a trade-off. Soil usually produces tougher early roots because the stem must push through particles. Those early challenges make soil roots more resilient when a cutting moves into a pot.
When to choose soil instead
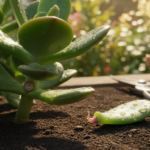
Thick or woody stems can rot or stall if left in clear liquid too long. Fiddle leaf fig and many ZZ plant cuttings often do better started in soil.
Match the way you propagate to stem type: soft, vining material is great in clear jars. Woody, fleshy stems are usually safer in potting mix. That simple rule improves success and reduces losses.
Best Plants for Water Propagation at Home
Easy wins
Pothos, philodendron, tradescantia, and spider plant are widely available in the U.S. and root quickly from simple cuttings.
Vining stems have many nodes, so you get more chances to form new roots. That lowers the risk of total failure.
Aroids and collector favorites
Monstera, syngonium, hoya, and cane begonia often do well when nodes are submerged. Many Epipremnum and Scindapsus varieties are dependable too.
Choose healthy growth with firm stems and clean leaves to improve success.
When plants may struggle (and what to do)
Some species—like fiddle leaf fig and ZZ—can rot or stall. Try letting cut ends callous, or start those cuttings directly in potting mix instead.
Also avoid leaving leaves in the jar and change the liquid regularly to prevent problems.
| Category | Good Candidates | Why they work | Alternative method |
|---|---|---|---|
| Easy wins | Pothos, Philodendron, Tradescantia, Spider Plant | Many nodes; fast visible rooting | Jar or small glass |
| Aroids | Monstera, Syngonium, Scindapsus, Hoya | Vining habit and aerial nodes | Jar with occasional changes |
| Tricky species | Fiddle Leaf Fig, ZZ Plant | Thicker stems that rot easily | Start in soil; callous cut end |
| Special cases | Ficus types, Cane Begonia | Collector plants that still root well | Monitor closely; avoid submerged leaves |
Pick the Right Cutting for Fast Root Growth
A confident pick at the start speeds up visible root growth and reduces surprises.
How to spot nodes
Look where a leaf or petiole meets the main stem. That junction often shows a small bump or raised ring. Nodes are the real rooting sweet spot on pothos, monstera, and similar vines.
How many nodes and leaves to keep
A practical rule: aim to submerge 1–2 nodes. Keep 1–2 healthy leaves above the liquid to supply energy. Too many leaves increase stress because the cutting has no mature system to support them.
Choose stems with aerial roots
Stems with aerial roots give a head start. Those tiny roots can absorb moisture and help the cutting survive and begin growth faster than a blank stem.
When to use wet sticks
“Wet sticks” are leafless segments with a clear node. They take longer but save space and work well for rare plants or spare stem pieces.
Make the Cut Cleanly to Avoid Rot
A clean, decisive cut is the single best move to prevent early stem collapse. Take the time to plan each snip and you reduce infection risk and speed recovery.
Where to cut: below a node (and why it matters)
Cut about 1 cm below a visible node. That position puts the growth point where new roots usually form.
Leaving the node intact gives the cutting clear access to stored energy and a place to focus the next step of growth.
Angled cut vs. straight cut: balancing uptake and disease risk
Many growers favor a ~45° angle to increase surface area and encourage faster uptake. Straight cuts have less exposed tissue, which can lower disease risk.
Neither is always best—choose an angled cut when you want quicker contact, or a straight snip if you want to limit exposed cells.
Sanitizing scissors or pruners to prevent fungus and bacteria
Use sharp, clean snips and make sure tools are wiped with 3% hydrogen peroxide before and after use. One decisive snip avoids crushing the stem.
If a cutting goes mushy within days, poor sanitation or damaged tissue is often to blame. Clean tools and confident cuts cut down that risk.

Prep Your Cutting So Leaves Don’t Turn to Mush
A little prep on the cutting saves you from smelly jars and mushy stems down the line. Remove any green that would sit at the bottom of the container. Exposed leaf tissue in the liquid is the fastest route to decay.
Strip the lower foliage
Strip lower leaves so no leaf tissue is submerged. Leave nodes visible and clear; those are the parts that belong in the liquid. Make sure the stem is clean where it meets the node.
How much top foliage to keep
Keep a small “solar panel” of 1–2 top leaves to feed the cutting until it makes roots. If a cutting is large or wilting, remove extras so the plant can survive on stored energy.
Submerged leaves rot first, foul the liquid, and then the stem and nodes follow. Keep all remaining foliage in the air above the jar opening so they stay dry and functional.
Different plants behave differently: spider plantlets need minimal submersion, while many vining aroids tolerate deeper node coverage. When in doubt, strip more and check often—this simple habit prevents most rot.
Need troubleshooting on droopy house plants? See this quick guide to drooping flowers remedies.
Set Up the Container and Water the Right Way
A good jar does more than hold liquid — it keeps stems steady and leaves dry while the cutting recovers.
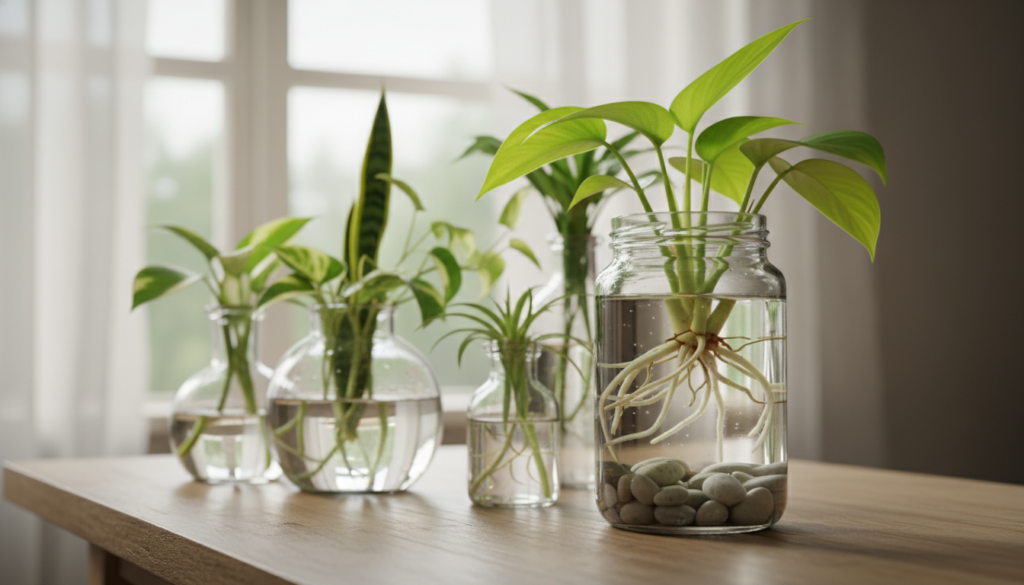
Choosing a stable glass or station
Pick a small-to-medium glass or a tapered-neck station that holds the stem upright. A narrow neck prevents the cutting from sliding completely under the surface.

How deep to submerge stems and nodes
Keep at least one node underwater while the top leaves stay dry. Do not let the entire stem sink to the bottom; that increases rot risk.
Filtered vs. tap options and keeping levels steady
Use filtered water when your tap has strong minerals or chlorine. Tap can work if you change the liquid and keep it clean.
Make sure to top off the glass every few days so nodes never dry out. If evaporation is fast, check the level daily.
| Container | Support | Best use | Notes |
|---|---|---|---|
| Small jar | Moderate | Single cutting | Easy to monitor; top off often |
| Tapered-neck station | High | Multiple stems | Holds stems upright; keeps leaves dry |
| Wide vase | Low | Bulky stems | Needs filler or wrap hack to stabilize |
- Plastic-wrap hack: stretch clear wrap over the mouth, poke a small hole, and feed stems through so only the bottom sits in liquid.
- Make sure cuttings are steady and leaves stay above the rim to cut down rot.
- Top off every few days to maintain submerged nodes and steady progress.
Light, Warmth, and Oxygen: The Conditions Strong Roots Need
Bright, steady light and gentle warmth make a huge difference in how quickly cuttings recover and form new tissue.
Bright indirect vs. direct and low light
The sweet spot is bright, indirect light. It feeds the cutting without heating glass or scorching leaves.
Direct sun can burn foliage and heat the liquid too much. Low light slows growth and raises the chance of root rot.
Why gentle warmth speeds progress
Warmer air accelerates cell activity, so cuttings often make visible growth faster in warm rooms. In winter, a small heat mat can shorten the wait.
Oxygen and the risk of decay
Even in jars, roots need dissolved oxygen. Stagnant liquid loses oxygen and invites decay that leads to mushy, brown tissue.
Fresh changes and occasional topping up keep oxygen levels healthier and cut down on rot risk.
When to add a light or heat mat
A basic LED grow light rescues dim apartments. A low-wattage heat mat helps in chilly rooms. Both are affordable upgrades that reduce the calendar time to visible roots—often just a few weeks under good conditions.
water propagation tips for strong roots
Keep a simple weekly routine and you’ll prevent most common failures.

Change water weekly to prevent stagnation and algae buildup
Swap the liquid about once every seven days. A weekly change cuts down bacteria and slimy algae that slow new root growth.
Top off between changes to keep nodes submerged
Evaporation can expose a node quickly. Add fresh liquid between full changes so the node never dries and delicate new roots stay moist.
Never submerge the whole cutting (especially leaves)
Golden rule: keep foliage above the surface. Submerged leaves rot fast and will foul the jar, harming the entire stem.
Use a pothos cutting to help trigger faster rooting in other plants
Placing a healthy pothos piece in the same jar can sometimes speed rooting in slower plants. Many growers report a helpful boost from shared compounds released by pothos.
Watch for early root nubs and adjust care before problems start
At the first white nub, keep conditions steady, avoid overhandling, and continue weekly swaps. If water turns cloudy or smells off, change it immediately and rinse the container to protect new growth.
- Weekly rhythm: change weekly, top off midweek.
- Prevention: remove algae and cloudy liquid right away.
- Action: react to the first nub instead of waiting for failure.
Rooting Hormone and Nutrients: Helpful Boost or Optional?
A small dose of hormone or a light feed can tilt the odds toward success when a cutting is slow to respond.
When a rooting hormone helps
Use a rooting hormone when cuttings are slow, rare, or at higher risk of rot. Gels like Clonex are popular because they combine IBA with antifungal action. That mix can reduce early decay and raise the chance of a healthy root forming.
When to add nutrients
Hold off on feeding until you see the first white nub. Early on, the cutting needs stability, not fertilizer. Once a tiny root appears, introduce a hydroponic-appropriate, low-nitrogen nutrient at low strength.
How to dose and maintain
Re-dose nutrients after each weekly water change rather than guessing daily. Start diluted and watch the stem and water clarity over several days. If the liquid clouds or growth slows, reduce concentration and return to plain liquid until things clear.
How Long Water Propagation Takes and What Success Looks Like
Different plants follow different timetables; some show clear signs in days while others wait patiently for weeks.
Typical timelines vary. Fast rooters may display pale, threadlike growth in 1–2 weeks. Slower species often need 4–8 weeks or more under steady conditions.
Typical timelines: fast rooters vs. slower plants
Expect quick visible growth from many vining houseplants in about a week or two. Other types—thicker-stemmed or semi-woody cuttings—can take several weeks to begin forming new tissue.
Healthy growth vs. warning signs
Healthy signs: firm, pale or white new threads that lengthen steadily and leaves that stay stable without rapid yellowing.
Warning signs: brown or mushy tissue, slimy stems, and a foul odor point to rot or poor oxygen levels. Sudden leaf collapse is also an early alert.

What to do if nothing happens after weeks
If progress stalls after several weeks, follow this reset step plan:
- Refresh the liquid and scrub the jar to remove slime.
- Improve light and add gentle warmth to boost metabolic activity.
- Confirm at least one node is submerged and leaves remain dry above the rim.
- If the cut end is dark or soft, recut to healthy tissue and restart in fresh liquid.
| Issue | Signs | Quick action |
|---|---|---|
| No visible growth | No nubs after 4–6 weeks | Refresh liquid, raise temp, add light |
| Early rot | Brown mush, bad smell | Discard if severe; recut healthy section and restart |
| Slow, tiny nubs | Small white bumps | Keep steady conditions; avoid overhandling |
Remember: slow growth is still progress. Tiny nubs are a positive sign; consistent care usually wins over constant tinkering. Set clear timeline ranges so you don’t panic and give each cutting a fair chance.
Transplanting to Soil Without Losing Your New Roots
The transition from clear jars to a real pot is a delicate step. The goal is to let the cutting keep its momentum while it builds soil-ready growth. Timing and a gentle hand make the switch painless.
The best time to pot up: length and branching cues
The best cue to pot up is visible branching on those pale new filaments and a length near 3–5 cm (about 1–2 inches). When you see forks or side shoots, the cutting has shown it can support growth in a new medium.
Why waiting too long makes the transition harder
Overgrown water-grown threads can become soft and sensitive. If you wait too long, they may struggle to adapt and must re-form tougher soil roots. Move cuttings at the right stage to avoid shock.
How to plant for a fuller look by grouping multiple cuttings in one pot
Beginner-friendly approach: choose a well-draining potting mix, place two to four rooted cuttings together, and set them at the same level. Gently firm and water in to settle the mix around the filaments.
- Keep soil lightly moist at first.
- Avoid harsh direct sun for one to two weeks.
- Expect adaptation—soil roots form over time while new growth thickens.
Conclusion
A few steady routines will turn tentative cuttings into dependable houseplants.
Quick recap: choose node-rich cuttings, keep foliage out of the jar, and change the liquid weekly to avoid slime and decay. These simple habits deliver reliable propagation and steady root growth.
Set the scene with bright, indirect light, a bit of warmth in cool months, and fresh, oxygenated liquid. That combination is the clearest way to reduce mush and speed healthy development.
Start at home with easy options like pothos, philodendron, tradescantia, and spider plant to build confidence fast. Once you nail this setup, water propagation becomes a repeatable method to multiply plants and share them with friends.
Keep it simple, stay consistent with weekly changes, and pot at the right stage for the smoothest transition.