Surprising fact: more than 40% of U.S. home growers say new plants form faster from cuttings that include a piece of the parent plant.
This introduction compares two common methods: starting new plants from a single leaf, or taking a piece of stem with leaves attached. The difference is simple: a leaf begins with almost no stored support, while a stem cutting carries energy and structure that can speed growth.
Expectations matter: both methods are straightforward but not instant. Results vary by species, season, and indoor light and moisture. Some plants won’t root from a leaf at all, so pick the right method for the variety you own.
Our goal is clear: healthy roots and repot-ready growth. This guide will show practical steps, timelines, and troubleshooting to help you get faster, more reliable success with succulent propagation.
Key Takeaways
- Stem cuttings often show growth sooner because they start with stored resources.
- Leaf starts can multiply plants from one donor but may take longer.
- Plant type and season strongly affect outcomes.
- Light, soil mix, and watering speed or slow results.
- Focus on healthy roots, not just early sprouting.
What “faster” means in succulent propagation
Let’s define what “faster” really looks like, with observable stages to track. Faster means reaching clear milestones more quickly: callus formation, visible new roots, tiny pups, and ultimately a plant that’s repot-ready.
Speed milestones to watch
Callus: tissue dries over the cut. Expect this in about 1–3 days for most pieces (sometimes 3–5 days for thicker cuttings).
New roots: fine white threads or tiny root hairs appear next. Early results often show up in about 2–3 weeks.
Pups and growth: small offsets or leaf clusters can form before deep rooting. These are signs the process is moving toward success.
Realistic timelines
In practical terms: days for callusing, weeks for first new roots, and months for a pot-ready baby. Repot-ready means a strong root mass, several inches of growth, and the ability to handle normal care without extra protection.
“Some pieces fail even with good technique; variability is part of learning.”
Leaf vs stem: which succulents work best with each method

Identify the genus or species before you start. Choosing the right species saves time and protects the mother plant.
Good candidates for leaf propagation: Echeveria and Graptopetalum
Echeveria and Graptopetalum are reliable when you want multiple new plants from a few plant leaves. These genera often produce pups from a single leaf cutting.
Beginner-friendly stem options: Sedum, Senecio, and Crassula
If your specimen roots better from a longer piece, try Sedum, Senecio, or Crassula. A short cutting or trimmed offshoot usually takes root quickly and makes it easy to propagate succulents by stem.
When leaf propagation won’t work and cuttings are required
Some genera, such as Aeonium, rarely form new plants from a single leaf. In those cases, use a larger cutting to ensure success. Best match is the rule: pick the method that fits the species and your goals.
Tools, soil, and setup for reliable results at home
A simple setup—proper pot, airy soil, and clean tools—lets cuttings thrive indoors. Keep the work area bright and draft-free. Good conditions matter more than fancy gear.
Choosing the right pot and drainage
Use a planter with drainage. Trapped water invites rot, especially before new roots form. Small nursery pots or shallow trays work well because they dry predictably.
Soil that helps new roots
Start with a cactus/succulent potting mix and boost it with extra perlite. This improves airflow and prevents the mix from staying wet around fragile cuttings.
Clean cutting tools and why sterilizing matters
Use sharp snips or scissors and sterilize before each cut. Wipe or spritz with rubbing alcohol, use a disinfectant, or briefly pass the blade through flame to cut infection risk.
“Clean tools cut losses—sterilizing is quick insurance against bacterial and fungal issues.”
- Basic at-home setup: a pot with drainage, well-draining soil, clean tools, and a bright indoor spot.
- Why drainage matters: it prevents water from pooling and causing rot.
- Pot sizing tip: choose snug pots so soil dries evenly and roots aren’t overloaded.
- Indoor expectations: steady light, gentle airflow, and moderate warmth help growth more than gadgets.
| Item | Recommendation | Why it matters |
|---|---|---|
| Pot | Small nursery pot or shallow tray with drainage | Drains excess water; soil dries faster for root health |
| Soil | Cactus mix + 20–30% perlite | Improves aeration and prevents soggy conditions |
| Tools | Sharp scissors/snips, sterilized | Reduces infection and improves clean cuts |
| Placement | Bright, indirect light with airflow | Encourages steady root development |
Prep the mother plant for propagation success
A short prep routine for the mother plant can cut failures and speed early growth. Good pre-care gives you healthier tissue to work with and a better chance of quick roots.

Water the parent ahead of time and why it helps
Water the parent plant about three days before you take any pieces. This gives the tissues time to absorb moisture so cuts heal and feed tiny new roots faster.
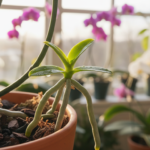
How to pick healthy leaves and stems without stressing the plant
Choose firm, plump leaves and solid stem segments. Avoid yellowing, soft spots, bug damage, or any sign of rot.
Take only a few pieces at a time so the mother stays strong. Make sure you never strip the plant bare or damage the growing tip.
- Why this prep matters: hydrated, healthy material roots sooner and fails less.
- Simple schedule: water → wait ~3 days → cut clean pieces.
- Right way to harvest: intact leaf base for leaves; a clean, solid segment for stems.
| Action | Timing | Benefit |
|---|---|---|
| Water parent | 3 days before cut | Full tissues resist stress and support early root growth |
| Select pieces | Same day as cut | Firm, undamaged parts increase success |
| Harvest amount | Only a few pieces | Keeps mother plant healthy and available for future steps |
“Start strong: good material shortens the road to roots.”
How to propagate succulents from leaves (step-by-step)
Good results begin with a gentle, precise removal—how you take the piece matters.
Remove a leaf cleanly
Gently twist at the base until the leaf releases in one clean motion. Torn or ragged pieces usually fail, so make sure the base is intact.
Let leaves callus
Place removed pieces in a dry, shaded spot for 1–3 days. The end should look dry and sealed, not wet or sticky, before touching soil or moisture.
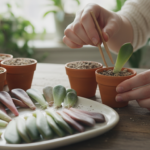
Where to place the pieces
Most growers lay leaves on top of soil rather than inserting the cut end. Laying on top lowers rot risk and often gives better early results.
Watering pattern
Mist the top layer when it dries so the mix stays damp, not soggy. Overwatering early kills baby growth; light, infrequent sprays work best until new roots appear.
Light and what growth looks like
Bright, indirect sunlight for several hours daily helps development without scorching tender pups. It’s common for a pup to form before you see new roots—don’t worry if roots follow later.
Some pieces will succeed quickly while others never do; track patterns and adjust care for better results.
| Step | Timing | Why it matters |
|---|---|---|
| Remove cleanly | Instant | Intact base increases chance of a new plant |
| Callus | 1–3 days | Seals cut to prevent rot when moist |
| Placement | Day 1 onward | Top of soil lowers rot; insertion can root but risks stalling |
| Watering | Mist when top dries | Keeps tissue damp enough for growth without drowning |
How to propagate succulents from stem cuttings (step-by-step)
Decide whether you’ll take a top shoot, an offshoot, or trim a leggy stem before you pick up the scissors. Each scenario needs a slightly different approach to give the piece the best start.

Where to cut: top shoots, offshoots, and trimming leggy growth
Use sharp, sterilized tools and cut just above a leaf node when possible. Top cuttings are great for preserving the apical growth. Offshoots usually root fastest because they already show vigor. Trim leggy growth caused by low light to restart compact form.
Callusing stem cuttings to prevent rot
Let the cut ends dry and harden for about 3–5 days. A proper callus seals the wound and cuts rot risk when the piece meets moist soil.
Planting the cutting: depth and soil contact
Remove any bottom leaves so the bare section can sit in the mix. Set the cutting deep enough to stand upright and make firm contact between stem and soil.
Watering stem cuttings: when to water and when to hold off
Avoid watering right away if the potting mix is lightly moist. Hold off until the top layer dries, then water sparingly. Overwatering is the top cause of failure in early stages.
Optional rooting hormone: when it may help
Rooting powder can speed results in slower types or cool conditions, but it’s not required for most easy varieties. Clean tools with rubbing alcohol before every cut to lower infection risk.
“Check progress gently—feel for resistance on a light tug rather than pulling the cutting free.”
| Scenario | Where to cut | Planting tip |
|---|---|---|
| Top cutting | Just below a node at the top shoot | Keep several inches of stem to anchor in soil |
| Offshoot | At the base where it meets the parent | Plant shallow with good contact at the bottom of the stem |
| Leggy trim | Cut back to healthy growth; save top pieces | Replant top pieces deeper so stems stand upright |
succulent propagation leaf vs stem: which method is faster?
Some methods show visible growth faster simply because they begin with more stored resources.
Why stem cuttings often look “faster” (they start with more plant)
Stem cuttings arrive with built-in structure and energy. That lets them stabilize, form callus, and push new shoots quickly.
This head start often produces the first visible change sooner than other ways.
Why leaf propagation can be slower but multiplies your plants
Starting from a single leaf means the piece must build both a pup and roots from scratch.
That takes extra time, but one donor can yield several new plants if patience pays off.
Typical first results window: what you may see in a few weeks
Expect initial signs in about 2–3 weeks under good light and warmth. Look for tiny roots, a small pup, or the original piece shrinking as energy moves to new growth.
- Short-term speed: stem cuttings usually appear faster.
- Quantity: leaves make more new plants from one parent.
- Best approach: try both methods when you can; that balances quick wins and higher yields.
| Sign | Typical time | What it means |
|---|---|---|
| Tiny roots | 2–3 weeks | Early success; continue gentle care |
| Small pup | 3–6 weeks | Energy shifting; roots may follow |
| Repot ready | Months | Strong root mass and steady growth |
Factors that change propagation time and success rate
Season and indoor comfort shape how quickly new plants form from cuttings.
Season and growth cycle
Spring and summer speed the process because plants are actively growing. Cuts form callus and push new roots faster in warm, long-day months.
Fall and winter can work, but expect more time before roots and visible growth appear.
Temperature, humidity, and indoor conditions
Warm temperatures and moderate humidity speed rooting. Good airflow and a stable spot reduce rot and stalled growth.
If your home is cool or drafty, slow progress is normal. Adjust heat, avoid cold windowsills, and improve drainage to help the process.
Light levels and etiolation
Bright, indirect sunlight fuels energy for new roots and firm growth. Low light causes stretched stems and weak cuttings, which slow success.
Quick fixes: move to brighter light, reduce watering, and improve potting mix drainage if growth stalls.
“Observe and adapt—home conditions vary, so tweak care rather than follow a strict calendar.”
| Factor | Effect on time | How to adjust |
|---|---|---|
| Season | Spring fastest | Schedule major attempts in spring or summer |
| Temperature | Warm helps | Keep 65–75°F for best results |
| Light | Controls stem quality | Provide bright, indirect sunlight |
Care after you see new roots and baby plants
When new roots appear, act gently and confidently. Small steps now prevent drying and support steady growth toward a strong pot-ready plant.
Cover exposed roots to prevent drying
As soon as fine roots show, gently add a light layer of soil so they don’t dry out and stall. Keep soil loose so air reaches roots but moisture drains quickly.
How the mother leaf helps and when to separate
The mother leaf feeds the baby while it builds its own roots. Shriveling of the leaf is normal and means nutrients moved to the pup.
Separate only when the baby has its own roots and the mother is mostly dry. If a tiny tug meets resistance, wait longer.
When to repot: size and root depth cues
Repot when the baby is about 1 inch across and shows a deeper root system that can anchor in a small pot. Use a loose cactus-style mix and a snug pot to encourage steady growth.
- Quick tips: cover roots, wait for independent roots, repot at ~1″ diameter.
- After potting, give bright but gentle light and moderate water to support the new plant without shock.
- Not all babies grow at the same pace—separate only the ones that clearly meet readiness cues.
| Action | Signal | Why it helps |
|---|---|---|
| Cover roots | Fine roots visible | Prevents drying and stalled growth |
| Wait to separate | Mother leaf shriveled, baby has own roots | Ensures independence and higher survival |
| Repot | Baby ~1″ and deeper root mass | Allows stable anchoring in a small pot with good soil |
| Post-repot care | Bright, gentle light; light water | Reduces shock and supports steady growth |
Common mistakes that slow propagation (and how to fix them)
Small mistakes early on cause the biggest delays in new growth. Catching these early saves time and increases your success rate.

Planting before callus forms invites rot
If pieces aren’t fully callused they absorb moisture and go mushy. Make sure the cut end is dry and sealed for the recommended time before touching soil or water.
Watering too much — or too little — can stall progress
Overwatering creates rot; under-watering in dry homes halts root formation. Adjust misting so the top layer is damp, not soggy.
Hands-on handling damages delicate pups
Frequent touching with your hand disturbs tiny roots and transfers oils. Look, don’t touch until a baby clearly has its own roots.
Don’t use torn or unhealthy pieces
Torn bases usually fail to form new growth. Choose firm, whole pieces—damaged ones waste time and lower your overall results.
Expect uneven outcomes — and how to fix common issues
Not every piece will thrive. If you see slow results, extend callus time, improve drainage, tweak mist frequency, and move trays to brighter indirect light.
- Quick fixes: longer callus, better drainage, gentler watering, and less handling.
- Remember: small changes now save weeks of lost time later.
| Problem | Fix | Why it helps |
|---|---|---|
| Early planting | Wait to callus | Reduces rot |
| Over/under water | Adjust misting | Supports steady root growth |
| Frequent handling | Limit touching | Protects fragile roots |
“Small, consistent care beats rushed steps every time.”
Conclusion
Choose the method that fits your goal: use a stem cutting when you want a faster, stable start, and use a leaf start when you want more new plants and can wait.
Core care matters for both: a well-draining pot, loose cactus-style soil, and bright indirect light speed results and cut failures.
Match your approach to the plant type and the top growth you need to trim. Track water, light, and timing across seasons so you learn what works in your home.
Try both methods on one healthy plant, note differences, and compare results over the next several weeks to improve your skill at how to propagate succulents.