Surprising fact: over 70% of common houseplants will root from simple cuttings with nothing fancier than water and a small pot.
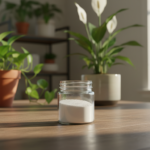
This guide shows how a tiny, consistent workspace makes plant care repeatable without turning your kitchen into a workshop. A basic kit of water, regular potting soil, small pots with drainage, and a clean cutting tool gets you far.
Expect reliable results from a minimal approach. You don’t need specialty containers or rooting hormones for many indoor varieties. The point is to start small, watch what your plants like, and avoid buying gimmicks.
Later sections walk through water versus soil rooting, must-have supplies, optional upgrades, and a simple DIY stand idea. This plan fits common indoor plants and beginner-friendly techniques, with room to grow if your garden goals change.
Key Takeaways
- Keep it simple: water, soil, pots, and a cutting tool are enough for many plants.
- Set a small, consistent area so you can track cuttings and water levels easily.
- A minimal kit gives reliable results; expensive extras are often unnecessary.
- Guide covers water vs. soil rooting, essentials, and easy upgrades.
- Start low-pressure: learn plants’ needs, then upgrade only if needed.
Why a Propagation Station Makes Plant Propagation Easier
Creating one tidy spot for cuttings makes caring for new plants faster and less messy.
Keeping a single place for cuttings prevents mix-ups and simplifies checks. You can track roots, change water, and remove mushy bits without hunting jars around the house.
That routine helps over time. A focused area yields steadier temperatures, fewer forgotten cuttings, and a cleaner process than random jars everywhere.

A dedicated place for cuttings, roots, and routines
Simple daily tasks—check water, rotate toward light, and trim bad growth—become habits when everything is in one spot. This boosts success and makes you more patient, which plants need.
Water rooting vs. soil rooting
Water rooting is beginner-friendly because you can see roots form. Many pothos relatives and philodendrons root easily in water under bright, indirect light.
Soil rooting works better for succulents. Let cut leaf ends callous for a few days, then plant in a free-draining mix. Soil can speed establishment for some species.
| Method | Best for | Key benefit |
|---|---|---|
| Water rooting | Pothos, philodendron, many vining houseplants | Visible root growth, easy monitoring |
| Soil rooting | Succulents, woody cuttings | Faster establishment for tough stems |
| Hybrid approach | Selective species | Start in water, move to soil after roots appear |
Nodes are the little bumps on a stem where roots form. Submerge nodes, not leaves, so roots can appear quickly. Remember: some cuttings root in a week or two, others take longer, and a single place helps you keep track of progress.
Propagation station setup essentials for most houseplants
A tiny, tidy corner with clear rules makes rooting cuttings faster and less fussy.

The simple must-haves are easy: clean water, small glass jars or test tubes, and bright, indirect light. Use any clear bottles or tubes so you can watch root growth. Place the containers where leaves won’t scorch.
The right containers and water level
Choose jars or tubes that hold stems upright without submerging leaves. Fill so nodes sit in water while foliage stays dry. Smaller cuttings need narrow tubes; larger stems do better in wider jars.
Taking cuttings and tools
Find a node, cut cleanly, and strip lower leaves. Use clean scissors, a sharp knife, or pruners. Wipe tools between uses to avoid spreading disease.
Potting up and ongoing care
When roots reach about an inch, move cuttings into 2–4″ pots with drainage and regular potting soil. Water gently after potting.
For plants that stay in water long-term, top off or refresh water regularly and add a light feeding now and then. Keep the area tidy to reduce algae and rot.
Troubleshooting mini-checklist
- Cloudy water: change water and clean jars.
- Mushy stems: recut below healthy tissue and reduce water level.
- Stalled roots: check light and move to brighter, indirect light or try a fresh cutting.
Nice-to-have upgrades and what you can skip
If you start growing many cuttings, or your home is dry or cool, a few upgrades can help a lot.

Optional gear that helps consistency
Humidity domes and trays hold moisture while still letting air move. That prevents wilting and keeps young stems from drying out.
Plug trays and pre-moistened plugs give structure without the mess of loose soil. They are a tidy middle ground between jars and pots.
Seedling heat mats gently warm the root zone and often speed rooting, especially in cool rooms. A thermostat is useful if you want tight control, but it’s not required for small batches.
Lighting and rooting boosters
Clone lights (for example, an 18W grow bar) give steady, full-spectrum light when window exposure is unreliable. That consistency helps plants form steady roots.
Clone gel can speed root growth for stubborn species, but for many common houseplants it’s optional. Try basic methods first and add gel only if test cuttings stall.
What to skip and a buying tip
Skip the extras: specialty tubes, fancy media blends, and gadgets that promise miracles. They rarely improve success for easy cuttings and just add clutter.
“Start with the basics, then add one upgrade at a time.”
Buy only one upgrade at a time so you can see what truly helps your process. That bit of restraint saves money and keeps your area manageable.
How to set up your station at home
Pick a spot that gives bright, indirect light and a surface you can wipe clean fast. A corner near a sink works well for quick water changes and accidental drips. Keep curious pets and cold drafts away so stems recover without stress.

Choosing the right spot
Bright, indirect sunlight helps most plants form steady roots without scorching leaves. Avoid direct noon sun that overheats tubes and slows growth.
Use a washable mat or tile shelf for easy cleanup. Label cuttings so you track which garden or indoor plant each tube contains.
DIY test-tube stand option
Nice but not required: make a simple holder from scrap wood. Use a 4×4 cutoff ripped in half or a 2×4. Measure a ~14″ board to fit about eight test tubes.
Clamp the board, mark spacing, and drill 1-inch holes with a Forstner bit to ~3″ deep in 3½” stock. Test-fit tubes so they sit straight.
Optional: cut a 45° or 70° angle for style, sand with 180 then 220 grit, and finish with a clear oil like Odie’s.
Setting up for water propagation
Fill tubes so nodes sit below the water line while leaves stay dry. Submerged leaves rot fast; keep them out of the tube.
Label and check daily. Change water when it clouds. If a stem gets mushy, recut below healthy tissue and try again.
“Start small: a clean place, a few tubes, and simple steps beat fancy gear every time.”
Conclusion
Consistent care in one simple corner yields better results than an array of gadgets. Keep your propagation station small and routine-driven so you can spot progress and problems fast.
Remember the essentials: clean water, bright indirect light, clean cuts, and pot up once roots are about an inch long. Start with easy plants like pothos or heart-leaf philodendron to build confidence.
Quick checklist for long-term success: keep leaves out of the water, change and clean containers when cloudy, and nudge light levels if growth stalls. Try a simple test—water versus soil in different spots—and take notes.
Small experiments teach you what each plant prefers. Stay curious, tidy, and patient, and you’ll get steady wins without buying every gadget.