Surprising fact: nearly half of casual growers say their first success with a common housegreen came from a single cutting that rooted in a month or less.
ZZ plant propagation simply means turning one mature specimen into several smaller ones you can keep or share. At home, that looks like taking a cutting or dividing a rhizome and giving each piece a new pot.
This guide is a clear, step-by-step how-to for the United States. You’ll use simple tools, low-risk methods, and realistic timelines. Expect easy wins and practical tips for aftercare.
We’ll cover three main ways: stem cuttings, leaf cuttings, and division. Division gives you a new plant fastest. Leaf methods can yield more plants but take longer.
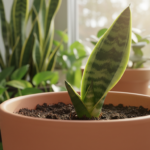
Why zamioculcas zamiifolia is forgiving: thick stems, water-storing rhizomes, and drought tolerance help beginners. Still, overwatering can cause root rot, so learn the finger test and drainage basics.
Later sections include troubleshooting and care routines so you won’t get stuck if growth is slow. For general weekly care tips that pair well with these methods, see this indoor flower care guide.
Key Takeaways
- Propagation turns one mature specimen into several new plants you can pot or share.
- Three simple methods: stem cuttings, leaf cuttings, and division—pick by speed and output.
- Zamioculcas zamiifolia is forgiving due to rhizomes and drought tolerance.
- Avoid overwatering: good drainage and the finger test matter most.
- This guide emphasizes low-risk tools, US timelines, and troubleshooting for slow growth.
Why ZZ Plants Are So Easy to Propagate Indoors
One big reason home cuttings succeed is hidden under the soil in stout storage organs. These stores let a cutting survive dry spells and focus energy on forming roots and shoots.
How rhizomes store water and fuel new roots and growth
Rhizomes are thick, often onion-like tubers that hold water and food. A single rhizome can feed a cutting while roots develop slowly. First you may see tiny roots, then a new rhizome, then visible growth.
Best time to propagate in the United States
Spring and summer are the ideal months because active growth speeds recovery. Winter attempts can work in a warm, bright spot but will take more time.
- Realistic timeline: expect weeks to months before steady new growth appears.
- Light: place cuttings in bright, indirect light—near a window but out of harsh sun.
“Spring and summer encourage stronger rooting because the plant is actively growing.”
What You’ll Need Before You Propagate Plant Cuttings
Good prep cuts the risk of failure. Gather tools and set a tidy workspace before you start. This saves time and helps cuttings get a healthy start.
Clean shears, small pots, and a warm spot with bright, indirect light
Checklist: sharp, disinfected shears; small pots or plant pots; labels; and a warm, stable spot with bright indirect light.
Sanitation matters. Clean cuts heal faster and lower infection risk. Quickly wipe blades with rubbing alcohol or a diluted bleach solution before you cut.

Choosing a well-draining potting mix to help prevent rot
Use a quality potting soil amended for drainage. A simple mix is two parts potting soil to one part coarse sand or perlite to improve permeability.
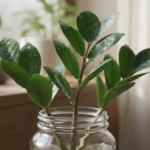
Small pots dry faster, so new roots won’t sit in wet soil. If you prefer water starts, place stem cuttings in a glass of water until roots form, then transfer to soil.
Quick tip: make sure cut ends dry and callus for a few hours before potting in soil. That step helps reduce rot and failure for leaves or stem cuttings.
ZZ Plant Propagation Methods: Leaf, Stem, and Division
Different cut methods suit different goals: quick results, many offsets, or lowest risk. Below are clear, easy steps for stem cuttings in water or soil, leaf and petiole techniques, plus division for the fastest new plants.

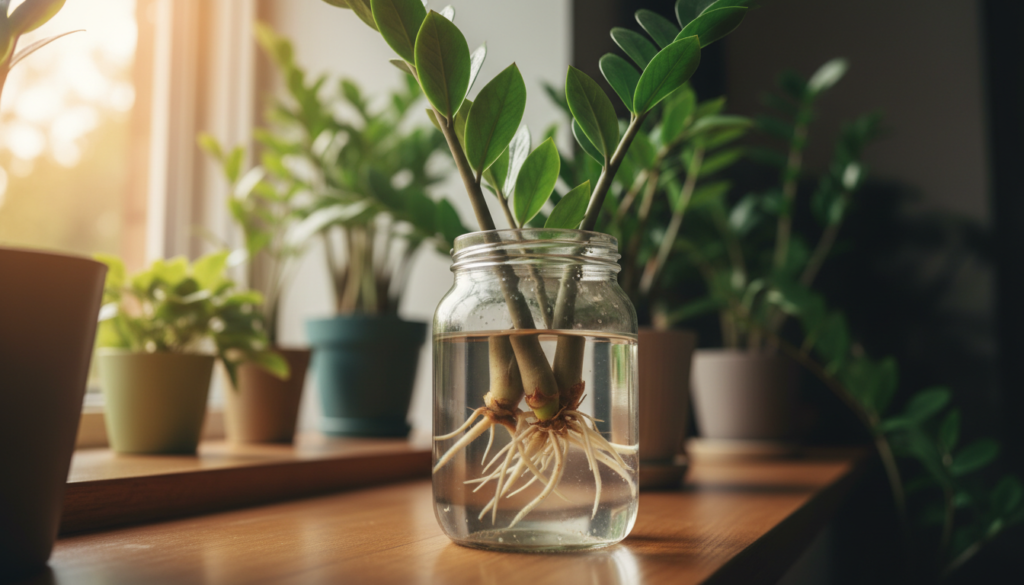
How to root stems in water (glass method) and beat algae
Cut a healthy stem below a node, remove lower leaves, and place the node in a glass of water. Keep the node submerged so roots can form.
Wrap the glass with paper or use an opaque container to reduce algae. Refresh water every 3–4 days and keep the glass in bright, indirect light.
Stem cuttings in soil: lower rot risk
Let the cut end callus for a few hours in a warm spot. Plant the stem into a well-draining potting mix and water lightly.
This soil method cuts rot risk and often produces stronger roots than extended water starts.
Leaf and petiole cuttings in soil
Insert single leaves about 2 cm (roughly 25% deep) into moist mix. Callusing seals the wound and helps prevent rot while roots and a new rhizome form.
Petioles (leaf stalks) often root faster than lone leaflets. Trim lower leaflets and plant the petiole into moist potting mix for better success.
Division: fastest way to get new plants
When repotting, remove the rootball while soil is somewhat dry. Gently expose and separate rhizome clumps so each piece keeps stems and a healthy rhizome.
Division gives immediate offsets and the quickest route to several new pots.
Which way to choose?
If you want speed and few new pots, choose division. For many new starts and patience, use leaf or petiole cuttings. If you prefer low rot risk and reliable roots, start stems in soil. Match the method to your available space and time.
Rooting Timelines and What to Expect During the Process
Root development is gradual; most starts show signs in a few weeks to several months. Expect slow, steady change rather than overnight results.

Typical stages you will see
Callus formation comes first if you let cuts dry a little. Next, tiny roots appear. After that a small rhizome or tuber starts to form.
Finally the root system stabilizes and the first new growth pushes up through the soil or medium.
Timing by method
Stem cuttings usually show progress faster — often weeks to a couple of months in water or soil. Leaf propagation can take up to a year before above‑ground new growth appears because the leaf must build a rhizome below the surface.
Water vs soil observations and what not to do
In water you may see roots sooner but also cloudy water, algae, or rot risk. Soil gives slower visible feedback but often steadier roots.
- Avoid overwatering.
- Don’t pull up cuttings to check roots.
- Keep conditions stable for months and resist frequent changes.
Aftercare for Newly Propagated ZZ Plants
New cuttings need a calm, consistent zone to shift energy from healing to growth. Follow a simple care plan to protect delicate roots and encourage steady growth.

Watering strategy
Water lightly, then let the soil dry before watering again. This helps prevent rot, the most common reason new cuttings fail.
If leaves yellow, make sure the mix is drying between waterings and consider repotting if the base stays soft.
Light and placement
Place new starts in bright, indirect light with a steady, warm spot. Keep the location consistent to reduce stress.
Potting up
Move cuttings into a small pot once roots measure about 1–2 inches. Use a well-draining potting mix so the soil won’t stay wet too long.
Choose a snug pot — not oversized — to encourage root development without excess moisture.
Common setbacks and fixes
- Yellow leaves: usually overwatering. Let soil dry; repot if rot is suspected.
- Mushy cuttings: trim soft tissue, re-callus the healthy end, and restart in fresh mix.
- Stalled growth: be patient. Maintain steady indirect light and avoid frequent moves or extra water.
“Letting the soil dry between waterings is the single best defense against rot.”
| Issue | Likely Cause | Action | Timing |
|---|---|---|---|
| Yellow leaves | Too much water | Hold watering; check base; repot if soggy | 2–7 days |
| Mushy cutting | Rot at cut | Trim to healthy tissue; re-callus; replant | Immediate |
| No visible growth | Slow root development | Keep steady light; wait; avoid disturbance | Weeks to months |
| Roots visible (~1–2″) | Established starter roots | Pot up into small pot with potting mix | When observed |
Conclusion
Quick recap: choose division when you want the fastest results, use stem cuttings for a balanced approach, and try leaf cuttings when you want the most new starts from one specimen.
Across every method, the top success factor is simple: avoid soggy conditions. Prioritize a well-draining mix and dry-between-watering routine to reduce rot risk.
Remember timing: progress often takes months, and slow growth can still mean a healthy outcome. Pick one method today and follow the steps earlier in this guide.
Once you learn to propagate plant material, it’s easy to build a small collection to enjoy or share with friends.