Surprising fact: more than 60% of home cuttings that start in a clear jar show visible roots sooner than those started blind in a pot.
This article compares two common ways to start cuttings and explains which choice suits your goals. Both approaches work well, but the “better” option depends on whether you want quick visible rooting, easy care, or a smoother long-term transition for the plant.
Some growers favor jars because they let you watch root growth and spot problems early. Others choose pots so the cutting adapts straight to a growing medium with less transplant stress later.
We’ll set clear expectations for readers in the United States: what supplies to gather, what to watch for in the first weeks, and how success is measured — from healthy roots to steady new leaves. Early risks include rot, mushy roots, nutrient gaps when using clear jars, and overwatering when using pots.
Key Takeaways
- Both methods can work; pick the one that matches your goal: speed, ease, or long-term growth.
- Jars offer fast, visible root growth but may need extra care before potting.
- Pots hide early roots but often make the transition to full growth smoother.
- Watch for rot, mushy roots, and nutrient gaps as early warning signs.
- Success depends more on healthy nodes and care than on a fixed timeline.
What to Know Before You Compare Water vs Soil Propagation
A quick look at nodes, aerial roots, and leaf shape clears up what matters most for rooting.
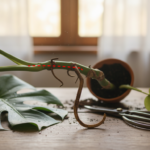
 showcasing its intricate aerial roots. In the foreground, emphasize the thick, organic roots gracefully curling and reaching towards a clear, water-filled container, hinting at propagation methods. The plant leaves are large, glossy, and perforated, providing a lush green backdrop in the middle ground. In the background, softly blurred, include a warm-toned room with a gentle sunlight filtering through sheer curtains, creating an inviting atmosphere. Use natural lighting to highlight the textures of the roots and leaves, captured from a low angle to enhance the sense of depth and detail, evoking a feeling of growth and nurturing life.")
Plant basics: nodes and the famous leaf holes
The Swiss cheese plant gets its name from leaves with natural holes. Those fenestrations look dramatic, but they do not decide success. What matters are the nodes. A node is a small bump on the stem where roots and new leaves arise. Without at least one node, a cutting usually will not form new roots or shoots.
Why aerial roots matter
Aerial roots grow from nodes to grab support and moisture in the wild. For cuttings, they give a head start. Keep them attached when possible—they often turn into the first sturdy roots.
Best time and realistic success markers
Spring and summer speed up growth; winter can slow things down and mean more waiting. Look for healthy white roots, fresh leaf growth, and steady overall growth as signs you’ve succeeded. Those three cues show a cutting is established and ready for the next step.
How to Take a Healthy Monstera Cutting That Will Root
Selecting the right piece matters most. Choose a firm section of stem with no soft spots and at least one visible node. A strong start raises your odds of fast root development and steady growth.
Where to cut
Aim for a segment about 6 inches long. Cut roughly an inch below a node at a 45-degree angle using clean pruners or a sharp knife.
Why let the cut end dry
Allow the fresh wound to dry to the touch for a few minutes so a light callous forms. This reduces the chance of rot when you place the cutting into a jar or pot.
Leaf and node count
Nodes are non-negotiable—each one can make roots. Leaves help supply energy but trim excess leaves to reduce stress and water loss.
- Quick checklist: node present, firm stems, no mushy tissue, clean tools, calloused end.
- Give cuttings a few days to settle before moving them again.
Monstera Propagation in Water vs Soil: Key Differences
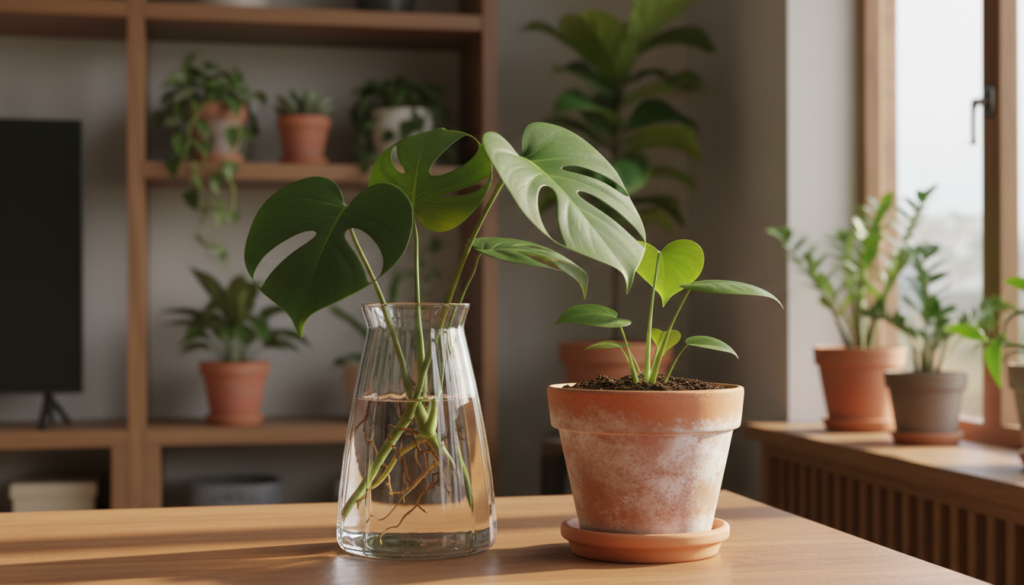
Choosing a jar or a pot changes how you track progress and handle problems as roots form.

Visibility: watching root development in a jar or guessing in a pot
Clear containers let you monitor root development daily. You can spot slimy tissue or slow growth fast and act.
In a pot, you wait for new leaves or firmer resistance when you tug the stem. That means surprises may show up later.
Speed and consistency: why some cuttings root faster than others
Timing varies by node maturity, aerial roots, light, and general cutting health. Two cuttings taken the same day can behave very differently over weeks.
Risk factors: rot, shock during transfer, and nutrient limits
Stagnant water risks rot if it isn’t refreshed. Overly wet soil can do the same. Roots started in clear jars may face shock when moved to potting mix.
Also, plain water lacks the mix of nutrients that a good medium supplies. Long-term growth in a jar often needs careful feeding.
Convenience and aesthetics: jars, vases, and temporary benefits
Jars and vases are low-commitment and pretty for short-term display. Pots suit a “set it and manage moisture” approach and can be more forgiving if you forget care now and then.
“Visible roots give confidence, but a steady pot can save trouble later.”
- Quick pick: choose a jar for monitoring and style, a pot for slower, steadier growth.
How to Propagate Monstera in Water (Step-by-Step)
Start with a clean glass container that keeps the stem upright. Use a jar or clear vase large enough so the node sits submerged while leaves stay dry.
Use room-temperature, filtered or distilled liquid to reduce mineral buildup common in hard tap. This helps avoid shock and keeps roots healthier over time.

Water care routines
Choose one of two routines: fully replace the liquid every week to prevent cloudiness, or top off weekly and do a full change only when needed to keep some nutrients. Both work—pick the one that fits your schedule and watch the jar for signs of algae.
Light and placement
Place cuttings in bright, indirect light. More sun can speed root growth, but avoid direct heat that causes algae and overheats the plant.
Checking root health
Healthy roots are white and firm. Black, mushy, or smelly tissue signals rot—trim bad sections and reset the liquid and container immediately.
Feeding while in liquid
Fertilize very sparingly. A diluted dose of a balanced product like Jack’s or Neptune’s when a new leaf appears can help, but overdoing it stresses roots and leaves.
“Roots often take weeks; patience beats constant fiddling.”
- Setup tip: node covered, leaves dry, room-temp liquid.
- Care options: weekly change or top-off routine.
- Watch for: white roots, clear smell; prune black tissue fast.
When to Move a Water-Rooted Monstera to Soil
Root size, not days, should decide when to pot up. Wait for several healthy roots that are white, firm, and roughly 6–10 inches long before using a potting mix.
Aiming for multiple thick roots helps the cutting handle the change in moisture and nutrients. Thin strands often fail after transfer, so be patient.

Picking a pot and preparing the mix
Choose a snug pot with good drainage. Too large a container can hold excess moisture and stress new roots.
Prep a loose potting mix that drains well. Make sure the node sits at the same level it did in the jar so leaves stay clear of the medium.
Gentle transfer and moisture plan
Handle roots carefully—don’t smush or twist them. Plant at the same depth and press the mix around the roots for support.
Keep the soil gently moist for the first few days, not soaked. This helps roots adapt from constant liquid to pulsed moisture without drowning them.
Extra tips to reduce shock
- Optionally water in with a little jar liquid diluted and a tiny dose of fertilizer to ease nutrient change.
- Use a support like a chopstick or stake for stability while roots gain strength.
- Expect a short pause in growth or slight droop; long decline means check drainage and moisture.
“Aim for beefy roots before potting; that choice cuts transfer losses.”
How to Propagate Monstera in Soil (Step-by-Step)
A simple plant-it-and-manage-moisture routine can take stress out of early root development. This approach is low-fuss once you set drainage and light conditions right.
Picking a pot with drainage and setting conditions
Choose a pot with clear drainage holes and a size slightly larger than the root ball. A snug container limits excess wet pockets that invite rot.
Getting nodes under the surface for stronger root development
Bury at least one node below the mix so roots form where they naturally should. Multiple buried nodes often mean more root mass and faster establishment.
Using an aerial root for a jumpstart (and what to do if you don’t have one)
If the cutting has an aerial root, position it to touch the mix. That speeds nutrient uptake and gives the cutting a head start.
No aerial root? Be patient. A healthy cutting with a node will still make roots over several weeks.
Soil and potting mix options: drainage-first blends
Use a drainage-first blend: equal parts perlite, orchid bark, and potting mix. Perlite adds airflow, bark keeps structure, and potting mix holds nutrients.
Moisture management: keeping soil gently moist without overwatering
Pre-moisten the mix lightly before planting. Keep the medium consistently damp but not soaked during early rooting weeks.
Overwatering is the fastest way to invite root rot—adjust frequency by feel and by checking drainage.
Support as it grows: chopsticks, stakes, or adding a moss pole early
Stabilize the cutting with a chopstick or stake until roots anchor. Adding a moss pole or sphagnum moss early helps the plant climb and encourages larger growth later.
“A steady pot with the right mix often beats constant tinker—set it up well and check moisture.”
| Step | What to do | Why it matters |
|---|---|---|
| Pot selection | Choose a snug pot with drainage holes | Prevents waterlogging and reduces rot risk |
| Node placement | Bury ≥1 node; bury more for extra roots | Nodes are root origin points for stable growth |
| Mix recipe | 1:1:1 perlite : orchid bark : potting mix | Balances airflow, drainage, and nutrient hold |
| Moisture | Keep gently moist; avoid soaking | Consistent dampness supports rooting without rot |
| Support | Use stakes or a moss pole (sphagnum moss OK) | Helps stems stay upright and promotes mature growth |
For watering rhythm tips during seasonal shifts, see adjusting watering schedules.
Troubleshooting Common Problems in Water and Soil
Troubles can show up fast; spotting the cause early saves roots and time. Use a calm, stepwise check when a cutting looks off. Small fixes often prevent bigger losses.
Root rot and cloudy liquid: prevention and reset
Diagnosis: if the jar or container becomes cloudy or smells, change the liquid and wash the container. If roots are black, soft, or slimy, prune back to firm white tissue.
Reset steps: clean the container, refill with room-temperature liquid, and place healthy roots back. Repeat weekly changes to avoid buildup.
To prevent rot, keep leaves out of the liquid, use clean tools, and avoid constant saturation in pots by ensuring good drainage.
Yellowing leaves and nutrient gaps
Yellow leaves and slow growth often signal nutrient limits or mineral buildup, especially when a cutting sits long-term in a jar. Hard tap can cause deposits that harm roots.
Fixes: use a balanced fertilizer at a quarter-strength and apply sparingly. If you suspect buildup, gently rinse roots and replace the liquid or flush the potting mix.
Slow growth after moving to mix
A short pause in growth after potting is normal as roots adjust. Keep the mix gently moist and place the plant in bright, indirect light.
- Check drainage and aeration if recovery stalls: amend the mix with perlite or bark.
- Review light, pot size, and moisture rather than changing care daily.
“Consistent conditions and patience over days and weeks usually restore steady growth.”
Conclusion
Conclusion — choosing your best route: The guide to monstera propagation in water vs soil shows both paths work. Use a clear jar if you want visible progress and quick checks. Choose a loose mix for a steadier start and fewer transplant steps later.
Non-negotiables: always start with a healthy cutting that has at least one node, keep conditions bright and stable, and avoid moisture extremes that invite rot.
If roots stay white and beefy about 6–10 inches, pot up. If you see slimy tissue, trim and restart the process. Remember, propagation takes patience; slight variation between cuttings is normal.
Practical takeaway: pick one method, follow the steps for several weeks, and adjust care based on root health and new growth rather than guessing.