Surprising fact: a single healthy leaf can take three to nine months to form roots and a tiny rhizome, which is why many growers call this the ultimate patience test.
What “zz plant leaf propagation” means: it’s the simple method of growing a new plant from one leaf cutting. The approach is real but slow, and success rewards patience more than speed.
People pick this way to create new plants for free, share with friends, or build a collection without dividing mature specimens. Expect to see roots first, then a small rhizome, then shoots over time.
You can root cuttings in water or soil; water shows progress, soil needs less fuss. The key factors are clean cuts, time to callus, and bright indirect light—not constant watering.
Timeline reality check: don’t expect a full rosette quickly; this method takes months because the species grows slowly. Follow simple steps, keep things clean, and avoid overwatering for the best chance of success.
Key Takeaways
- Leaf propagation is a slow but valid method to make new plants.
- Choose water for visibility or soil for lower maintenance.
- Clean tools, callusing, and the right light matter most.
- Expect roots first, then a rhizome, then visible shoots.
- Be patient—months are normal for visible results.
- Simple steps work well for beginners if you avoid overwatering.
Before You Start: Timing, Tools, and a Healthy Parent Plant
Before cutting, set up a tidy workspace and choose the warm months for best odds. Propagating works year-round, but the growing season in spring and summer usually speeds things up. Expect the process to take months; that slow pace is normal for this species.

When to try it and what “slow grower” means
Do this during active growth when light is strong but indirect. Faster roots and rhizomes form in warm, steady conditions.
Slow grower means patience: visible progress often comes in months, not weeks. That’s part of routine plant care.
Essential tools and supplies
Gather sharp, rust-free shears or scissors, a clean container for water, small pots, and a well-draining soil mix. A rooting hormone is optional but can boost confidence and consistency.
Sanitation and safety
Wipe blades with rubbing alcohol or hydrogen peroxide and rinse containers before use. Wash hands frequently and wear gloves if your skin is sensitive—the sap can irritate.
- Work on a clean surface
- Keep cuttings away from pets and kids
- Place cuttings in bright, indirect light once set up
zz plant leaf propagation Basics: Choosing and Prepping Leaf Cuttings
Begin with healthy, deep-green material—this small choice changes the results a lot. A careful selection gives each cutting the best chance to root and form a tiny rhizome at the base.

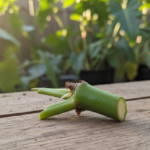
Pick the right section and where to cut
Choose mature, firm foliage that shows no yellowing or damage. Avoid young shoots and any stalks with soft spots.
Make a clean cut as close to the stem junction (petiole area) as possible so the cutting has a neat base for root formation. A sliced or crushed edge invites rot and slows progress.
Take multiple cuttings to boost your odds
Cut several leaf cuttings in one session. Some will root faster, some may fail.
- More cuttings increases the chance of visible success.
- Combine successful pieces later to fill a pot faster for nicer results.
Let the cut end callus and what to expect first
Let cut ends dry in a warm, airy spot for a few hours or overnight. Callusing seals the wound and cuts rot risk in both water and soil methods.
Expect roots first, then tiny rhizomes at the base; those rhizomes are the energy center that will later produce stems and new growth.
| Cut Quality | Likely Outcome | Why It Matters |
|---|---|---|
| Clean, close to stem | Higher rooting rate | Good base forms roots and rhizomes reliably |
| Torn or crushed | Higher rot risk | Damaged tissue retains moisture and decays |
| Multiple healthy cuttings | Better overall results | Some will root quickly, improving final pot appearance |
| Callused ends | Fewer failures | Wound seals; less rot in wet setups |
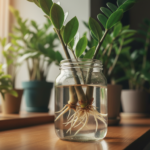
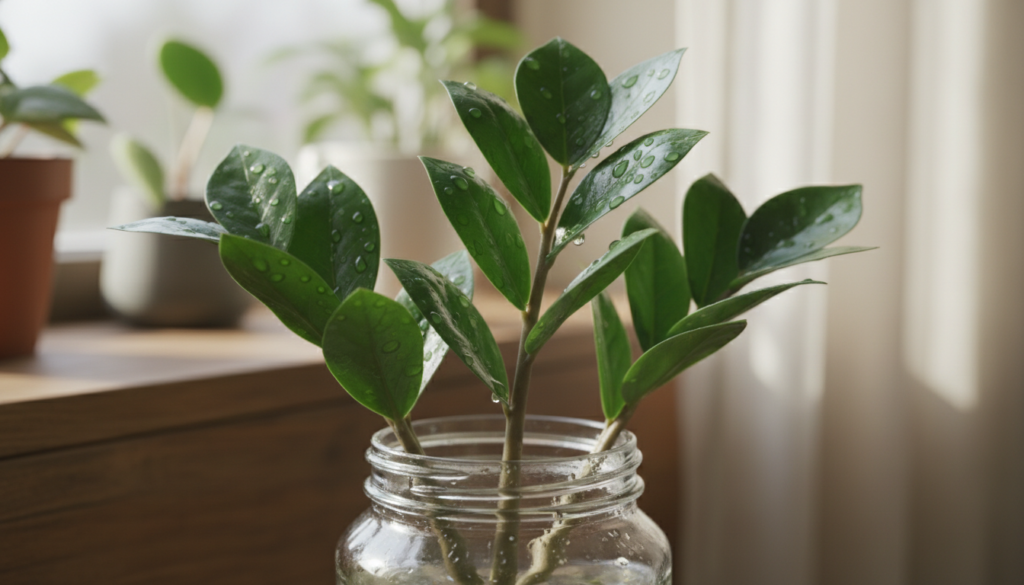
Leaf Propagation in Water: Step-by-Step Method for Rooting
Using water to start a cutting lets you see early development without disturbing fragile roots.

Set up the right container and water level
Choose a narrow clear container that holds the cutting upright. Place only the cut base in water so the broader tissue stays mostly dry. Submerging more than the base raises rot risk.
Placement and light
Keep the jar in bright, indirect light. Avoid direct sunlight that can overheat the water and stress the cutting.
Change schedule and why it matters
Refresh the water weekly, or every few days if it clouds. Clean water reduces bacteria, adds oxygen, and limits cloudy buildup.
What to expect and when to pot up
Small roots often appear in months. Look for tiny roots first, then a small rhizome at the base. When roots reach a few inches or a rhizome forms, transplant to soil.
Troubleshooting common issues
If rot appears, trim to healthy tissue, rinse the jar, and restart with fresh water. For stalled growth, increase warmth and indirect light. For cloudy water, clean the container and change water more often.
| Issue | Sign | Fix |
|---|---|---|
| Rot | Brown, soft base | Trim to healthy tissue; restart in clean water |
| Cloudy water | Film, odor | Rinse jar, change water weekly or sooner |
| Stalled growth | No roots after months | Move to brighter indirect light and steady warmth |
For related care tips on curling foliage and stress signs, see the curling leaves guide.
Leaf Propagation in Soil: A Low-Maintenance Way to Grow New Plants
If you prefer not to watch jars, placing cuttings in soil is a simple, steady path to new growth.

Choose a small pot with drainage holes and fill it with a gritty, well-draining potting mix. Pre-moisten the mix so it feels like a wrung-out sponge; this gives cuttings steady moisture without sogginess.
Planting depth and moisture targets
Insert the cut end about 1 cm deep so the leaf stays upright and the base contacts the mix. Keep the soil slightly moist early on—never soggy.
Water again only when the top 1–2 inches of soil dries. This routine reduces rot and encourages roots and tiny rhizomes to form over months.
Light and time tips
Place the pot in bright, indirect light and avoid direct sunlight that can scorch small pots and thin tissue.
“A gentle tug that feels anchored usually means roots are forming.”
- Treat soil propagation as the lower-maintenance method—you won’t need to babysit a jar of water.
- Check progress by feel, not digging; repot after roots and a rhizome appear (about three months).
- Combine several rooted cuttings into one pot to create a fuller cluster of new plants.
Aftercare: Once established, follow normal plant care—let the soil dry between waterings and avoid overpotting too soon.
Conclusion
This method asks for time and steady conditions, not constant interference.
In short: propagating by single cuttings is absolutely possible, but expect a slow timeline measured in months. The two main ways—using clear water for visible roots or soil for lower maintenance—both work well depending on your routine.
Start with healthy material, make clean cuts, let ends callus, and keep the light bright but indirect. Take several cuttings to improve odds; success is often a numbers game.
Judge progress by what happens below the surface—new roots and tiny rhizomes—not fast stems. Once established, treat each new plant like a mature specimen: let the pot dry between waterings and avoid heavy, wet soil.
Final note: if results feel slow, that’s normal. Consistent care through the growing season usually gets you to the finish line.