
Surprising fact: even inside homes, many plants show clear seasonal shifts—light can drop by more than 40% in winter, and heaters can halve indoor humidity.
This short guide lays out what to watch each week and what to tweak month by month so flowering and foliage plants stay steady all year. It centres on simple observation: light, water, and humidity first, action second.
The system has two layers: a weekly monitoring routine and a seasonal checklist that adjusts as your home moves through colder, drier months. Use the indoor plant care calendar monthly checklist as a starting framework for typical U.S. homes.
Different types—tropicals, succulents, and flowering varieties—follow the same rhythm but at different intensity. Personalize the steps to match each plant’s needs to avoid surprises like pest outbreaks, bud drop, or root issues.
Monitor first, act second prevents common mistakes such as winter overwatering or needless repotting. This structure also works well as a printable reference or as reminders for busy schedules.
Key Takeaways
- Seasonal light and humidity changes matter even inside your home.
- Use a weekly check plus a seasonal checklist for steady growth.
- Watch light, water, and humidity before making big moves.
- Adjust the framework for tropic, succulent, or flowering varieties.
- Fewer surprises mean fewer pests, less bud drop, and more blooms.
How Flowers Change With the Seasons (Even Inside Your Home)
Plants tell you when to change routines. Watch leaves, soil speed, and how buds hold up across the year. These cues show whether a specimen is in active growth or slowing down for winter.
Growing season vs. winter slowdown
Growing season (typically March–September) brings visible new leaves, faster soil dry-down, and a sharper response to feeding and brighter light. That is when you will see the most growth and blooms.
In contrast, winter (October–February) usually means little new growth, soil that stays moist longer, and higher risk of overwatering problems. Feed less and water sparingly.
Why transition months matter
March and October are not instant flips. Gradually ramp watering, light placement, and fertilizer up or down. Small steps prevent shock and improve bloom set and longevity.
Home microclimates and a simple rule
South versus north windows, vents, and drafty doors create microclimates. One spot can be a full season ahead of another.
- If you see faster growth, increase routine activity slowly.
- If growth slows, do less, observe more.
| Period | Signs | Watering | Feeding |
|---|---|---|---|
| March–September | New leaves, quick dry-down, active bud set | Increase as soil dries faster | Regular, light feeding |
| October–February | Little to no new growth, slow dry-down | Reduce; wait for soil to dry deeper | Hold or stop feeding |
| March/October (transition) | Mixed signals; gradual changes | Adjust slowly over weeks | Ramp up or taper gradually |
What to Monitor Weekly for Healthy Blooms
A quick weekly check prevents small issues from becoming big setbacks for your blooms.
Soil moisture is the top cue. Check below the surface with a finger, then lift the pot to judge weight. Water only when the root zone truly needs it—this beats fixed schedules every time.
Soil dry vs. evenly moist
“Soil dry” means the top and an inch below feel dry and the pot is light. “Evenly moist” feels cool and slightly firm and suits most flowering varieties. Succulents prefer longer dry periods.
Leaves and new growth
Scan leaves for pale new leaves, curling edges, spotting, or sudden leaf drop. These are early signs of nutrient trouble, water stress, or pest activity.
Temperatures and drafts
Avoid hot or cold blasts. Keep temperatures steady and away from vents or chilly glass to prevent bud drop and stress.
Humidity, airflow, and pests
Aim for moderate humidity (about 40–60% for many tropicals) to reduce brown tips. Good airflow cuts fungal issues. Inspect undersides and new growth weekly for pests like spider mites; spotting stippling or fine webbing calls for immediate isolation.
- 3–5 minute walk-by: check soil, scan leaves, assess light, and look for pests.
- Record what you see each week so trends link back to watering, light, or temperature changes.
| Check | What to look for | Action | Frequency |
|---|---|---|---|
| Soil moisture | Pot weight, finger test, root zone dampness | Water only if root zone is dry | Weekly |
| Leaves & new growth | Pale new leaves, curling, spotting | Adjust feeding, light, or water; inspect for pests | Weekly |
| Pests & environment | Stippling, webbing, drafts, hot vents | Isolate affected item; stabilize temperature and humidity | Weekly |
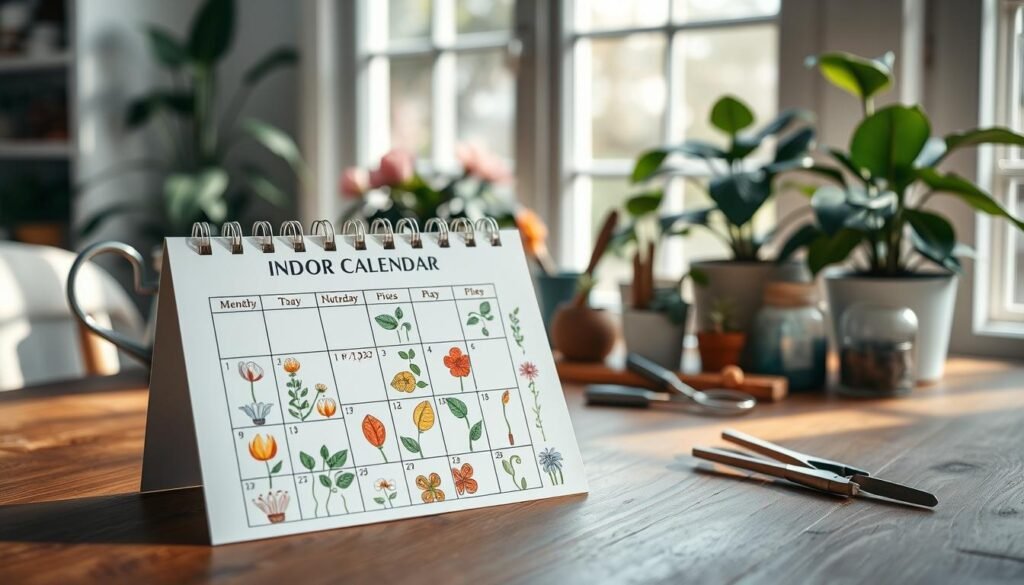
Indoor plant care calendar monthly checklist
Turn care into a habit with short weekly checks and a lighter monthly tune-up.
How the schedule works: a rolling monthly list highlights “what matters most right now” while a brief per week scan keeps issues small. Use notes to track water, feeding, and any leaf changes so patterns become clear over the year.
How often to check
During active growth, check soil moisture per week and act only if the root zone is dry. In winter, many pots need water every 2–3 weeks depending on size and light.
Set reminders
Make phone events that say “check moisture”, not just “water.” Also schedule feeding days (start fertilizing in March), pruning sessions, and weekly pest scans year-round.
Adjust expectations
Slower winter growth is normal. Stop or minimize fertilizing during dormancy and resist overwatering. Batch tasks: one quick weekly scan for all pots, plus a monthly reset for rotation, cleaning, and supplies.
| When | Main action | Notes |
|---|---|---|
| March | Start light fertilizing | Begin at half strength; increase as growth resumes |
| Growing season (Apr–Sep) | Weekly checks, water as needed | Monitor soil per week; prune and feed regularly |
| October–February | Reduce watering; stop feeding | Water every 2–3 weeks for many specimens; keep weekly pest checks |
January Checklist: Winter Dormancy and “Do Less, Observe More”
When days are short and heaters run, the best move in January is restraint. Slow growth means roots use less water. Your role is to watch for signs and prevent problems before they start.
Watering guidance: wait until the soil is dry several inches down, not just at the surface. When you do water, soak thoroughly and let excess drain; empty saucers so roots don’t sit in water.
Lower light reduces water use, so soggy soil can linger and harm roots. Keep pots away from cold glass and sudden drafts to avoid temperature swings that stress growth.
Quick January steps
- Clean windows and wipe dusty leaves to maximize limited light.
- Move specimens closer to light sources, but avoid touching cold glass.
- Scan undersides and leaf joints for fine webbing or speckled discoloration—early signs of spider mites.
“A weekly look is all you need this month; catch pests early and skip routine watering unless the root zone is dry.”
If you find mites or other pests, isolate the affected item immediately. Quarantine prevents one small problem from becoming a collection-wide issue.
| Issue | What to check | Action |
|---|---|---|
| Overwatering risk | Soil wet below 2–3 inches, heavy pot | Hold watering; improve drainage and empty saucers |
| Low light | Dusty leaves, pale growth | Clean windows, wipe leaves, move closer to light |
| Spider mites | Fine webbing, stippling on leaves | Isolate, treat with strong spray or miticide |
February Checklist: Prep for Spring Without Jumping the Gun
As daylight creeps longer, February is the time to plan and protect rather than jump into big changes.
Position this month as preparation. Gather supplies now so you can move quickly when steady new growth appears. Late winter can still bring the coldest nights, so treat changes with restraint.
Plan supplies and small tasks
- Supply list: fresh potting mix, slightly larger pots for root-bound specimens, sharp pruners, and a gentle fertilizer.
- Clean tools and check labels so you don’t scramble when days warm.
Watch for true new growth before increasing watering
Tiny shoots or unfurling leaves mean roots will soon use more water. Until those signs are consistent, keep watering conservative.
Protect from cold glass and drafts
Move items a few inches from windows at night and seal obvious drafts near doors. Cold exposure shows as dark patches or limp leaves—act quickly to warm the spot.
| Issue | Signs | Action |
|---|---|---|
| Persistent wet soil | Sour smell, heavy pot | Check roots only if symptoms persist; improve drainage and hold water |
| Cold damage | Dark patches, limp leaves after cold nights | Move away from glass, raise room temperature slightly, avoid sudden drafts |
| Early new growth | Small shoots, unfolding leaves | Gradually increase water and begin light feeding when steady |
Final tip: patience during February leads to stronger roots and brighter blooms in spring. Prep now, act later.
March Checklist: Growing Season Kickoff (New Growth, New Routine)
With longer days in March, you’ll notice faster soil dry-down and a clear uptick in new growth. Mark this time as the start of the growing season and shift to a slightly more active routine.
Watering changes: increase watering frequency based on how quickly pots lose weight, not the calendar. Shorten intervals only when the root zone actually dries; lift the pot to judge changes over a week to see trends.
Fertilizing restart: begin at half strength and raise concentration slowly over the next few weeks as growth becomes consistent. A gentle start avoids burn while boosting spring vigor.
- Look for roots circling the pot or coming through drainage holes—classic signs a specimen is root-bound.
- Repot into a container 1–2 inches wider with fresh mix and avoid overpotting to limit soggy soil problems.
Pruning and propagation: remove winter-damaged stems, trim leggy growth with clean tools, and take easy cuttings from vining species to tidy shape and make new plants. These small moves set up stronger growth.
Light acclimation: move items into brighter spots gradually over days to prevent leaf damage from sudden sun exposure.
Tip: restart weekly pest scans now—warmer, actively growing conditions let pests rebound fast.
| Action | What to watch for | How to act | Timing |
|---|---|---|---|
| Watering | Pots lighten faster; soil dry-down | Shorten intervals based on weight/finger test | Adjust over several weeks |
| Fertilizing | New leaves, steady shoots | Start at half strength; increase gradually | Begin in March, then every 2–4 weeks |
| Repotting | Roots circling; slowed growth | Move up 1–2 inches, fresh mix, avoid overpotting | March–April when roots active |
| Pruning & pests | Winter damage; early pest signs | Trim damaged stems; weekly scans and isolation if found | Weekly checks |
For more detail on adjusting schedules as light and seasons change, see adjusting watering schedules through the seasons.
April Checklist: Steady Growth and Stronger Light
April brings steadier light and a steady push of fresh growth—use this month to build simple, repeatable habits. Small weekly checks now prevent big setbacks when flowers and foliage speed up their pace.
Dial watering to soil moisture, not the calendar
Check the root zone before you water. Stick your finger an inch or two down or lift the pot to judge weight.
When the soil feels dry below the surface, water thoroughly and let excess drain. Avoid leaving pots sitting in water to prevent root issues.
Feed every couple of weeks during active growth
During spring growth, fertilize about every 2–3 weeks for most specimens. Follow label directions or use a slightly diluted mix for sensitive types.
Keep notes on what you feed and when so you can tweak the plan before May’s peak growth.
Inspect leaf undersides for early pests
Flip a few leaves weekly and check along the midrib and petioles. Early detection of pests stops infestations before they affect flowering.
Rotate for even growth and better flowering
Quarter-turn pots each week so stems don’t lean toward light. Even exposure helps buds set and yields more balanced flowers.
- Leaf hygiene: once a month wipe dusty leaves so photosynthesis stays strong under brighter spring light.
- Record what changes worked—these notes make May’s heavier growth easier to manage.
May Checklist: Peak Spring Growth and Bloom Support
May brings the season’s strongest push—growth accelerates and blossoms respond fast. Rapid growth and longer days mean pots dry faster and blooms appear if routines stay steady.
Water and soil moisture
Check soil moisture more often as the growing season warms. Smaller containers and sun-facing spots may need water twice as often on warm days.
Feeding and flowering support
Keep a steady fertilizing cadence to support flowering. Use regular, moderate doses—more is not better and can cause salt buildup.
Pinch, prune, and airflow
Pinch back tips to encourage branching and more flower sites. Light pruning also boosts airflow and reduces trapped humidity.
Outdoor timeout planning
Acclimate plants over 1–2 weeks: start in shade, raise brightness gradually, and shield from wind and harsh midday sun. Bring items inside before nights fall below about 50°F (10°C).
Quick tip: scan for pests before and after any outdoor move to avoid hitchhikers.
| Focus | Signs | Action | Timing |
|---|---|---|---|
| Watering | Faster dry-down, light pots | Check soil moisture; water when root zone is dry | As needed; increase checks in warm spells |
| Pruning | Leggy growth, poor airflow | Pinch tips; trim for shape and ventilation | Now through peak growth |
| Outdoor move | New exposure, wind risk | Acclimate slowly; protect from heat and sun | 1–2 weeks before full sun |
June Checklist: Summer Care Begins (Heat, Faster Drying Soil)
June triggers true summer conditions: longer sunlit hours and rising temperatures speed how fast pots dry out.
Monitor soil dry-down. In bright windows, small containers, or porous terra-cotta, some plants may need water two to three times per week. Always check moisture at the root level before you pour more in.
Boost airflow
Good circulation lowers heat stress and stops fungal problems. Use a gentle fan, space pots farther apart, and avoid stagnant corners.
Recognize heat stress
Drooping in the afternoon, curled leaves, or scorched patches are signs of overheating. Move shade, increase airflow, and keep moisture steady to help recovery.
Feeding and pests
Continue light feeding during active growth, but don’t raise concentration or frequency beyond your established schedule. Higher temperatures can speed pest activity, so keep weekly scans even when everything looks healthy.
Mid-year tip: add a simple hygrometer and a moisture meter to reduce guesswork during hot spells.
| Focus | Action | Timing |
|---|---|---|
| Soil moisture | Check root zone; water only if dry | As needed, often in summer |
| Airflow | Use fan; increase spacing | Daily during heat |
| Pests | Inspect and isolate if found | Weekly |
July Checklist: Heat Management and Mid-Summer Monitoring
July often acts as the season’s stress test, when sudden heat waves expose weak routines. High temperatures and bright sun through glass can cause rapid wilting and leaf damage, even if June felt easy.
Responding to heat waves
Check moisture more often during heat spells and water early in the day to avoid evening damp that attracts pests.
Temporarily move sensitive specimens back from hot windows or into bright indirect light until the worst passes.
Prevent sun-through-glass burn
Direct midday rays through glass can scorch leaves. Use sheer curtains, increase distance from glass, or shift things to filtered light.
Tell heat wilt vs. overwatering
Heat wilt shows limp, warm leaves while the soil is dry. Overwatering wilt feels soft and the soil stays wet. Always check soil before you water again.
Weekly pest monitoring
Warm, dry weather boosts pest pressure. Scan leaf undersides and new growth each week for early signs.
- Watch for spider mites: fine webbing or stippling on leaves is a red flag.
- If you find pests, isolate the affected item and begin treatment fast to prevent spread.
“Protect leaves now so flowering specimens keep energy for buds instead of repair.”
August Checklist: Late Summer Transitions and Pest Prevention
Late August often keeps July’s pace—don’t let the calendar trick you into easing routines. Many specimens still need the same watering and attention for a few more weeks as light and heat hold.
Keep watering consistent—don’t reduce just because summer is ending
Check soil dry-down and lift pots to judge weight before you water. Small containers and sun-facing spots may still need regular water sessions during heat spells.
Inspect items that spent time outdoors before bringing them inside
Rinse foliage if practical and scan undersides, stems, and the soil surface for hitchhiking pests. If possible, quarantine returning items for 1–2 weeks to catch any problems early.
Take final cuttings if you’re propagating before fall slowdown
August is a last strong time for rooting cuttings. Take final cuttings now so new growth has time to establish before days shorten.
Pest prevention matters now: one outdoor hitchhiker can become a winter-long issue once windows close and humidity drops. Clean pots and saucers to reduce fungus gnat sites and residue.
“Quarantine returning specimens when you can; early detection stops small issues from spreading.”
- Position August as late-summer consistency: keep watching soil and posture.
- Quarantine outdoors returnees for 1–2 weeks when possible.
- Take final propagation cuttings and clean pots/saucers to reduce pests.
- Keep notes on which specimens struggled most this season to guide fall adjustments.
| Focus | What to monitor | Action |
|---|---|---|
| Watering rhythm | Soil dry-down, pot weight | Water only when root zone is dry; keep same frequency as July if needed |
| Returning items | Undersides, stems, soil surface | Rinse foliage, quarantine 1–2 weeks, treat if pests found |
| Propagation | Rooting success, new shoots | Take final cuttings now; pot up for fall establishment |
| Hygiene | Saucers, pot residues, soil surface | Clean pots and saucers; remove spilled soil to cut gnat sites |
September Checklist: Early Fall Adjustments (Slower Growth Ahead)
September signals a gentle shift: daylight shortens and growth starts to slow. Treat this month as a transition rather than a crisis. Small tweaks now prevent problems later in the season.
Gradually reduce watering
Extend the time between waterings over several weeks. Let the top inch or two dry out more before you water again.
For moisture-loving specimens, avoid extreme drought—check the root zone weight and act if pots feel very light.
Taper fertilizer toward monthly, then pause
Move feeding to once a month early in September. As new growth slows, prepare to stop feeding entirely.
Adjust for changing light and days
Shorter days and a lower sun angle mean some plants need brighter spots. Move specimens a bit closer to windows or into rooms with stronger light.
Quarantine and tackle pests now
Separate any item that was outside or shows symptoms: use a spare room or place it a few feet away with dedicated tools. Treat affected specimens promptly to avoid spread.
“Early fall is the time to tidy placements and head off pest issues before heating and low humidity make them worse.”
- Declutter groupings for better airflow as windows stay closed.
- Check for pests weekly and isolate at first sign of trouble.
- Remember: slower growth is normal—don’t overwater or overfeed to force activity.
| Focus | Action | Timing |
|---|---|---|
| Watering | Extend intervals; check root zone weight | Over several weeks in September |
| Feeding | Shift to monthly, then stop as growth slows | Start now and reassess in a few weeks |
| Pest prevention | Quarantine outdoor returnees; treat immediately | At first sign or after outdoor exposure |
October Checklist: Switch to Winter Mode
Think of October as the switch: steady conditions now matter more than growth spurts. This month you stabilize routines so plants move into winter with less stress.
Hold repotting unless there is an emergency such as root rot. Recovery slows as light decreases, so avoid triggering fresh root growth that won’t get enough light to sustain it.
Reduce fertilizer to prevent salt buildup
Cut back or pause feeding this fall. When growth slows, nutrients can accumulate and cause root damage or leaf burn.
Humidity strategy for heating season
Heating dries air quickly. Aim for 40–60% humidity by grouping plants, using a humidifier, or placing trays of water near radiators.
Clean and rotate leaves
Wipe dust from leaves so they capture the lower available light. Rotate pots a little to even out exposure, but avoid constant moving.
Weekly pest scans and saucer checks
Scan for pests each week; spider mites and other mites thrive in warm, dry rooms. Check saucers and drainage now—slow drying can leave lingering water that stresses roots and invites problems.
- Stabilize placement: small moves to reduce drafts, not frequent repositioning.
- Quarantine: isolate any specimen with pests immediately to limit spread.
- Monitor humidity: add humidity in small steps to avoid fungal issues.
| Focus | Action | Why it matters |
|---|---|---|
| Repotting | Delay unless root rot or severe crowding | Limits stress and poor recovery during low light |
| Fertilizing | Reduce or pause | Prevents salt buildup and root damage |
| Humidity & placement | Group specimens, use humidifier, avoid vents | Protects leaves and reduces spider mite risk |
| Pest scans & drainage | Weekly checks; empty saucers if water sits | Early detection prevents wider problems |
November Checklist: Minimal Watering and Maximum Light
November asks for a quiet routine: less water and more light keep plants steady as growth slows for winter. The biggest win this month is avoiding soggy soil and unnecessary stress.
Water only when the pot feels lighter
Only water when the pot feels noticeably lighter and the soil is dry at root depth, not just on the surface. Lift the pot or use a finger test. This simple rule reduces root rot and overwatering problems.
Keep specimens away from vents and radiators
Heating vents and radiators create hot blasts and rapid drying. Those microclimates cause unstable temperatures and crisping of leaves. Move plants a few feet away and avoid long exposure to direct heat.
Accept slow growth and seasonal leaf drop
Some leaf loss is normal as energy shifts to roots. If many leaves fall quickly, check for overwatering, cold drafts, or sudden temperature swings before assuming disease.
- Maximize light: move pots closer to windows during daylight and wipe leaves so they absorb more sun.
- Reduce handling and rearranging—stability is a form of winter care.
- For tips on adjusting how often to water specific varieties, see this watering schedule.
Goal: keep soil just drier, give more light, and minimize stress so spring growth restarts smoothly.
December Checklist: Protect Blooms From Stress During the Darkest Days
Holiday traffic through doors and chilly nights mean this month is about buffering temperature swings and dry air. Treat December as a stress-prevention month: small changes now protect buds and leaves and keep flowers lasting longer.
Placement and stable temperatures
Keep pots away from frequently opened doors, leaky windows, and cold glass. Frequent drafts and sudden drops in temperature cause cold damage and bud drop.
Maintain steady temperatures around your specimens; fewer fluctuations help blooms hold and reduce shock.
Raise humidity to reduce brown tips and bud drop
Dry indoor air is the main cause of crisp edges and brown leaf tips in winter. Aim for about 40–60% humidity for many tropical varieties.
- Run a humidifier or group pots together to create a moist microclimate.
- Place trays of water near radiators (but not under pots) and avoid direct heat sources that dry the air.
Watch for pests and isolate quickly
Stressed specimens attract pests more easily. Continue weekly scans and isolate any item with visible pests or damage right away to limit spread.
Keep records of issues so you can spot repeat problems and adjust placement next season.
| Action | Why it matters | Timing |
|---|---|---|
| Move away from doors/windows | Reduces cold drafts that cause bud and leaf loss | This month |
| Increase humidity | Prevents brown tips and bud drop | Daily/continuous |
| Weekly pest scan | Find and isolate problems early | Weekly |
“Resist overwatering in December—check soil before you water, and note which specimens struggled so you can adjust placement and tools before January.”
Conclusion
A simple habit—observe first, act second—turns seasonal shifts into steady wins for your plants.
Monitor weekly for soil moisture and pests, and adjust routines each month as light and temperature change. Treat watering as a decision, not a date; use the calendar to prompt checks, not to force pours.
Save or print the checklist and set a few recurring reminders so tasks stay simple. Expect slower growth in winter and know that careful restraint pays off with stronger spring and summer recovery.
Start with the current month and move forward—no catching up needed. Follow seasonal cues and you’ll spot fewer problems and enjoy healthier, more reliable blooms year after year.