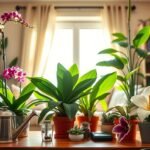
Surprising fact: nearly 60% of home growers report roots circling the pot before they notice any leaf trouble.
When a beloved bloom looks stuck, the cause is often either outgrowing its container or reacting to home stressors like dry air and low light. Common early signs are no new leaves, weaker stems, faster-drying soil, and fewer buds.
Most plants bounce back once you spot the issue and act. But diagnosis comes first: repotting at the wrong time or with poor soil can add more stress. This short guide helps you tell root-bound clues from other causes, and offers simple checks you can do in minutes—no special tools needed.
Follow along for quick at-home tests, a step-by-step repotting plan, and easy ways to restore healthy growth without guesswork.
Key Takeaways
- Look for stalled growth, leaning stems, and soil that dries out very fast.
- Not every slow spell means a new pot—assess light and watering first.
- Early action prevents root damage and poor flowering.
- Simple checks at home reveal root-bound plants in minutes.
- Repot carefully: the right timing and soil matter for a quick recovery.
Why growth stalls indoors and when repotting is the real fix
Slow growth and limp stems usually mean the green companion is prioritizing survival over new growth. When light, warmth, or stable conditions are missing, a houseplant conserves energy instead of making leaves or blooms.

How home conditions push plants into “survival mode”
Low light and cool rooms slow photosynthesis. The plant uses fewer nutrients and less water, then growth stalls even if you follow care tips.
Dry air, low humidity, and big temperature swings (below 60°F or sudden drafts) add stress. Winter often makes these problems worse.
Repotting versus adjusting care
Repotting helps when roots are crowded, soil is depleted, or drainage and aeration fail. Fresh mix restores nutrients and space so roots can take up moisture evenly.
“If basic care is right but the pot still dries too fast or the plant tips over, repotting moves higher on the list.”
- If light, stable temperature, and consistent watering are in place and issues persist → consider repotting.
- If the environment is poor (wrong light, drafts, dry air) → fix placement first; new soil won’t cure that.
Growth often slows in winter. For urgent root problems, act now; otherwise wait until active growth resumes. Next, we’ll check root-bound warning signs before choosing a new pot or mix. For related bud and drop cues, see buds drop before they bloom.
Root-bound warning signs that mean your indoor flower needs a new pot
Check the root ball first — it reveals the clearest signs your flower needs more space. A quick physical check saves time and avoids guesswork.

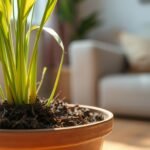
Roots poking out or mirroring the pot
If roots push through drainage holes or the root mass keeps the pot’s shape, that is the clearest tell. Gently tip the plant out (support stems) to confirm how much of the container is root versus soil.
Soil dries too fast after watering
Crowded roots leave less soil to hold moisture. You may water often, yet the surface goes soil dry quickly because water channels around the dense root ball instead of soaking in.
Weak stems, stunted growth, and yellowing leaves
Tight roots limit nutrient uptake, so growth slows, stems wobble, and a few leaves yellow or drop despite normal care. Tired, compacted soil and uneven moisture are common underlying issues.
- Circling roots make water run through instead of absorbing evenly.
- Compacted soil may pool water or leave patches that stay wet while others dry.
- Flowering plants often rebound after repotting, but some plants tolerate crowding longer.
Indoor plant stopped growing reasons that aren’t solved by repotting
Fresh potting mix helps only if roots are the issue. If a houseplant is slow to respond, check the room first. Many troubles trace back to light, temperature, or humidity rather than a tight root ball.

Insufficient light
Low light causes leggy stems, paler leaves, and fewer blooms. Moving closer to an east, west, or south-facing window often improves growth more than repotting.
Too much direct sun
Harsh midday sun can scorch leaves and wash out color near south windows. Most indoor plants prefer bright, indirect sunlight rather than hot, direct rays.
Temperature swings and drafts
Cold nights by a window or blasts from vents stress foliage. Stable temperature helps prevent stalled growth and leaf damage.
Low humidity and dry winter air
Heated rooms dry the air, causing crispy edges and bud drop. A humidifier or grouping pots can restore steady leaf health.
Dormancy and over-caring
Some species slow down with the season — this is normal. Constant moving, frequent changes, or excess fertilizer can make problems worse. Try one change at a time and allow time for recovery.
“Diagnose light, water, pests, and air before assuming the pot is the problem.”
Next: a quick health check to pinpoint whether light, water, pests, disease, or true root crowding is at fault.
How to confirm the issue with a quick at-home plant health check
A quick, calm check can tell you whether the issue is water, pests, disease, or a crowded root ball. Follow a short routine so you stop guessing and start confirming.
Check soil moisture the right way
Push a finger about 1 inch into the soil. If it feels moist, don’t water. Adding water when the mix is still damp often causes root rot, mildew, and other disease.
Overwatering signs include yellowing and dropping leaves, moldy patches on the mix, and dark or mushy roots.
Inspect leaves and stems for sap-suckers
Look under leaves and at leaf joints for tiny bugs. Sticky honeydew or gray/white shed husks points to aphids, scale, mites, or mealybugs.
Look for disease cues
Botrytis appears as a fuzzy gray-brown coating. Powdery mildew shows white dusting. Fungal leaf spots are dark with yellow margins.
- Fast routine: check soil, then foliage, then stems, then the room.
- If you find pests or disease, isolate the houseplant from other plants right away.
- Decide next steps from what you see: treat pests/disease or adjust water and light; repot only if soil is exhausted or roots are crowded.
“Most houseplants improve when you match care to what the plant is actually showing you.”
How to repot an indoor flowering plant without shocking it
Timing and technique make the difference between a smooth transplant and shock. Spring is the best time because active growth helps recovery. Repot now only if the root ball is clearly crowded or the specimen is healthy enough to handle a move.

Choose pot size and soil carefully
Pick a pot one size larger — not a giant jump — and be sure it has drainage holes. Good drainage stops water from pooling and reduces rot risk.
Avoid garden soil. It compacts, holds pests, and drains poorly. Use a quality potting mix with peat, compost, sand or perlite, and a small starter fertilizer when needed. Use specialty mixes for orchids, succulents, or African violets.
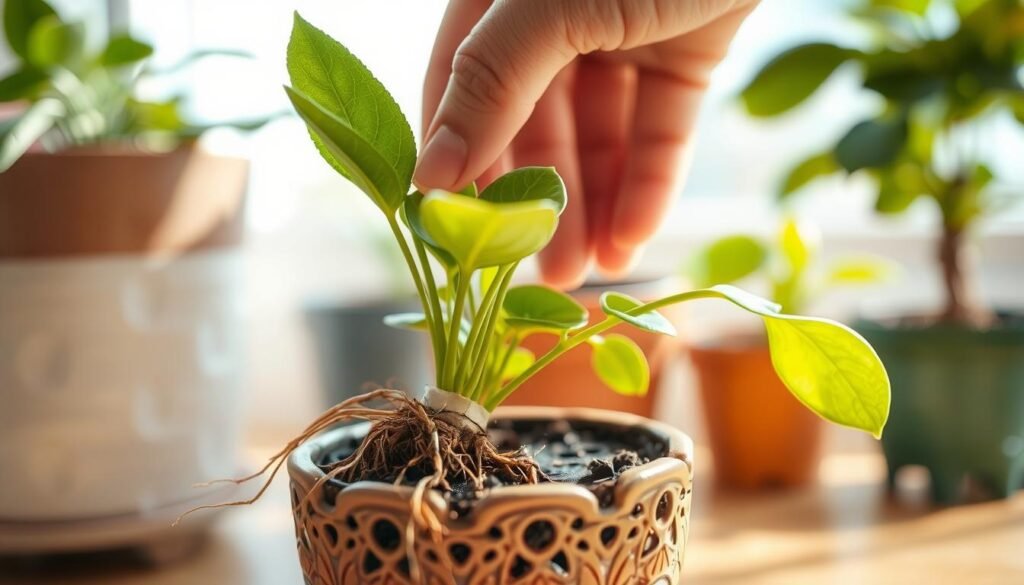
Step-by-step repotting steps
- Water lightly if the root ball is very dry so roots bend, but avoid soggy soil.
- Support stems, tip the pot, and slide the root mass out.
- Inspect roots: trim any rotten bits and tease circling roots to point outward.
- Set the root ball at the same depth in fresh mix; backfill and tap gently — don’t compact hard.
Aftercare and expectations
Water once to settle the mix, then wait before heavy watering. Keep the plant in bright, indirect light and avoid strong sun for the first week if leaves look stressed.
Some pause in top growth is normal. The goal is steadier moisture and healthier root space, not instant flowering.
“Repot only when the plant needs space — done right, it encourages stronger roots and steadier blooms.”
How to restore growth after repotting with better light, water, and nutrients
Repotting gives roots room, but recovery depends on the care that follows. Small adjustments to light, watering, and feeding speed up new root establishment and steady leaf return. Aim for stable, gentle changes so the houseplant can settle without extra stress.
Dialing in light and placement
Map the window to the light type: south often gives full sun, east and west suit bright indirect, and north gives medium to low light. Most flowering plants do best with bright, indirect light near an east or west window.
Avoid sudden moves into hot sun right after repotting; leaves can scorch while roots are unsettled.
Watering strategy to prevent rot and avoid soil dry extremes
Keep the mix evenly moist but never waterlogged. Use the finger test to check the top inch before watering. Overwatering causes root rot, while letting the soil dry fully can drop buds and slow growth.
Feeding basics and timing
Use fertilizer sparingly after repotting. Nitrogen (N) supports leafy growth, phosphorus (P) helps roots and flowers, and potassium (K) strengthens stems and blooms. Wait until you see new growth before resuming a light, balanced feed.
Humidity, airflow, and pest prevention
Raise humidity in dry months and keep gentle air movement to stop stagnation. Use sterile soil, inspect new plants, wipe leaves, and watch for gnats. Sticky yellow traps and neem or insecticidal soap work if pests appear.
“Track progress for a few weeks: firmer stems and fresh leaves mean recovery is on track.”
- What to watch: new leaves, firmer stems, and steady moisture uptake.
- If nothing improves after a month, reassess light, temperature, and pests.
Conclusion
A quick recap: the clearest signs you need to act are root crowding, soil that dries very fast, or a specimen that won’t stay upright—while many stalled-growth problems trace back to light, water, or dry air rather than the pot itself.
Diagnose calmly: check roots, then room conditions like sunlight, humidity, and window placement before you repot. This rules out other reasons and saves shock.
Simple action plan: do the at-home check, correct the easiest variable (light or watering rhythm), then repot only when the root ball or poor soil clearly shows it needs space.
Give recovery time. A short pause after transplant is normal; steady care and the right amount of light help growth.
Stay consistent and patient. Yellow leaves can look alarming, but most plants and houseplants bounce back when the root space, pot, and routine match what the plant is actually getting. Follow these tips and watch new leaves appear.