Surprising fact: nearly 70% of hobby gardeners report stretched, sparse growth after a year in a pot, usually because of low light or uneven care.
This guide strips away guesswork. The clear goal is to solve “leggy indoor plant how to fix” by shortening stems, building denser foliage, and restoring a balanced shape without overdoing it.
Healthy, compact growth rests on three basics: enough light, smart pruning, and steady care over time. Start with a quick assessment, then boost lighting, trim above nodes, and re-root cuttings to thicken the pot.
Expect practical steps, not vague tips. We’ll show a straightforward way to assess symptoms, choose the right pruning method for your houseplant, and prevent shortfalls by rotating pots and adjusting for winter light.
Key Takeaways
- Light is first: correcting light usually gives the fastest improvement.
- Trim above nodes and replant cuttings to rebuild fullness.
- Prevention needs rotation and seasonal adjustment.
- Different species need tailored approaches—vines vs. compact growers.
- Steady care over time beats quick fixes.
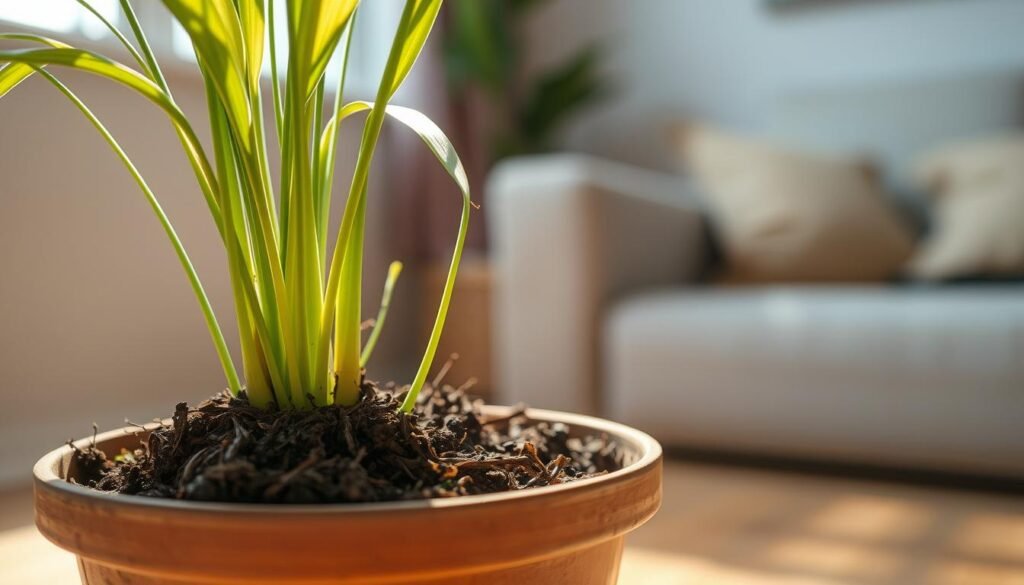
What a Leggy Plant Looks Like Indoors and Why It Matters
You can spot problematic stretching when leaves cluster only at the top and stems look thin. This pattern signals that light and energy are out of balance for many houseplants.

Common signs of leggy growth
leggy growth usually shows long gaps between leaves, paler or smaller foliage, and a top-heavy silhouette.
Lower leaves often drop as the plant shifts resources upward. Stems may lean toward windows or a single light source.
Why sparse leaves and long stems weaken overall growth
When a specimen prioritizes upward reach, plant growth focuses on stems rather than leaf production. That reduces photosynthesis and makes stems brittle.
How to tell normal vining habits from true legginess
Some vines naturally trail. True legginess shows unusually long internodes and a stringy look, not an intentional trailing form.
| Feature | Normal vine | Leggy issue |
|---|---|---|
| Leaf spacing | Evenly spaced leaves along stem | Wide gaps, leaves near tips only |
| Foliage density | Balanced foliage | Sparse foliage, smaller leaves |
| Stem behavior | Flexible, purposeful trailing | Leaning or brittle stems |
Why Houseplants Get Leggy Growth in the First Place
Several everyday factors—light, season, fertilizer, and placement—drive stretched growth. Understanding these lets you pick the right fix before you prune.
Insufficient light and phototropism:
Insufficient light and phototropism toward a light source
When usable light is low, a plant stretches toward light because it needs sunlight for photosynthesis and basic energy. Stems bend and lengthen toward the brightest light source, which makes growth uneven over time.
Seasonal changes and shorter winter days
Shorter days and low sun angles in winter reduce sunlight indoors. Even spots that feel bright in summer can become low light in the cold season. That seasonal dip often triggers rapid, weak growth.
Nutrient imbalance from overuse of fertilizer
Too much fertilizer forces fast growth. If light can’t support that push, new shoots stay thin and fragile instead of compact and sturdy.
Uneven exposure by a window
A pot placed beside a single window gets strong light on one side. Over weeks this causes lopsided stretching unless you rotate the pot regularly.
| Cause | What it does | Signs | Quick check |
|---|---|---|---|
| Low light | Stretching toward source | Long gaps between leaves | Measure light near window |
| Seasonal change | Less sunlight overall | Sudden thin growth in winter | Compare summer vs winter spots |
| Excess fertilizer | Fast but weak shoots | Pale, soft stems | Review feeding schedule |
| One-sided window exposure | Lopsided lean | Growth favors window side | Rotate pot weekly |
Note: factors often stack. Low light plus heavy feeding and winter conditions means plants may stretch quickly. Before cutting, diagnose which cause is most likely in your room right now.

leggy indoor plant how to fix with a Quick Assessment
Start with a quick visual check before reaching for scissors or fertilizer. A few minutes of careful observation tells you whether pruning will help or if light must change first.
Check the light level and placement before you cut anything
Stand back and scan the whole specimen. Look for leaning, long gaps, and dropped lower leaves.
Look for stretching stems, leaning toward light, and dropped lower leaves
If stems angle toward one side, the spot likely lacks usable brightness. Note how many hours of enough light the spot gets and whether it comes from only one direction.
Decide if you need to move plant, add grow lights, or both
- If the spot is dim, move plant closer to the window but avoid sudden sun scorch.
- If home light is low or it’s winter, add grow lights for steady coverage.
- For one-sided exposure, do both and rotate the pot weekly.
Practical tip: this short assessment takes minutes and prevents wasted pruning. Check scorch risk when moving a shade species and adjust placement gradually.
Improve Light Conditions for Healthy, Compact Growth
A small shift in light conditions often returns a fuller, sturdier silhouette within weeks. Bright, evenly distributed brightness fuels photosynthesis and helps new stems form thicker, not longer. Consistent exposure is the long-term prevention that keeps stems short and foliage dense.
Aim for bright, indirect sunlight
Bright, indirect sunlight supports healthy growth without burning leaves. Most common species do best where the sun is strong but filtered through a curtain or bounced off a wall.
Move the pot closer to a window without scorching leaves
Shift the pot in small steps over several days. Watch for crispy edges or pale spots; those mean the spot is too hot. Gradual moves let the foliage adapt and avoid shock.
Use grow lights when natural sunlight isn’t enough
If daylight is unreliable, full-spectrum grow lights supply steady intensity. Set lights on a timer for 10–14 hours in winter months to mimic natural conditions and support healthy growth.
Rotate the plant over time for even growth on every side
Turn the pot a quarter turn each week or at every watering. This simple routine prevents one-sided stretching and encourages balanced foliage around every side.
Boost light coverage with reflective surfaces
Use white walls, a light curtain, or a small mirror to bounce usable light into shaded areas. These low-cost tricks increase effective sunlight without extra equipment.
Quick tip: small, household changes in placement and lighting often beat complicated fixes. Consistent conditions stop reaching and start compact, healthy growth.

Pruning Leggy Houseplants to Trigger Bushier New Growth
Smart cuts at the right spots send growth hormones where you want leaves and branches.
Where to cut: locate a node—the tiny bump where a leaf meets the stem—and snip just above it. That encourages new buds and branching at the node, which produces denser foliage and thicker stems.

Why this works and when to prune
Pruning redirects energy and hormones toward lateral shoots, so new growth appears at nodes rather than at remote tips.
Prune during the active growth season (spring through early fall) for fastest recovery. If you trim in dormancy, add light and be patient as regrowth will take longer.
Vining types and the “75% rule”
Many vining plants tolerate—and thrive after—hard cuts. For very long, spindly stems, removing up to 75% can reboot shape and encourage branching.
“Cut above a node and watch new shoots appear in a few weeks.”
Hygiene and expectations
Use clean scissors and wipe blades with isopropyl alcohol before and after trimming to reduce disease risk.
Expect buds at nodes first; leaves and fuller growth follow over weeks, not days.
| Action | When | Result |
|---|---|---|
| Cut above a node | Active season | Branching and new growth at cut point |
| Hard prune (up to 75%) | Severely spindly stems | Faster shape reset for vining plants |
| Sanitize scissors | Before and after | Less disease spread |
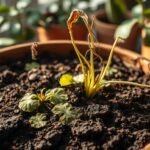
Propagate Cuttings to Fill Out the Pot and Plant Back for a Fuller Look
Don’t toss healthy cuttings—use each stem to create fresh growing points in the same pot. The core idea is simple: each cutting must include a node because that’s where roots form.
Quick steps:
- Cut a long stem with at least one node and remove the lower leaf to expose it.
- Make sure the node sits below the soil line or underwater so roots can emerge.
Water vs soil rooting
Water propagation makes roots easy to see and is low-effort. Soil propagation often helps a cutting transition faster once it’s planted back in the pot.
Plant back into the same pot
Tuck several rooted cuttings around the rim and near the center to add density. This spreads new growth across the pot and creates a bushier look.
Moisture and light
Make sure the potting mix stays lightly moist while cuttings root. Check every couple of days and ease back into normal watering after roots form.
| Method | Pros | Cons |
|---|---|---|
| Water rooting | See roots, low setup | Longer shock when moved to soil |
| Soil rooting | Smoother transition back into the pot | Harder to monitor early roots |
| Plant back strategy | Fills pot, increases growth points | Needs steady light and moisture |
Conclusion
Restore fullness by treating light as the foundation, then use pruning and propagation to rebuild density.
Main takeaway: a stretched specimen is usually a light issue first. Fix the light source and provide enough light, then follow a simple repair loop: assess → improve light → cut above nodes → root cuttings and plant back → maintain with rotation and seasonal tweaks.
Make prevention a routine. Rotate pots, watch winter shifts, and avoid heavy feeding when brightness is low. Excess fertilizer pushes fast growth without the energy needed for sturdy stems.
Keep soil healthy and well draining so roots deliver steady energy for compact growth. Do light shaping trims during active months and use propagation to refill the pot over time.
Quick reassurance: with steady care, most plants show noticeably fuller foliage within weeks and stronger growth within a couple of months.