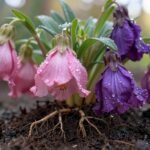
Surprising fact: nearly 70% of flowering struggles indoors trace back to light that is too dim or inconsistent. That explains why brown tips often arrive with an empty bloom stalk.
Brown leaf tips are not just ugly. They are dried or burned tissue and a clear signal the plant is stressed. When tips turn brown and buds fail, the usual culprits are light, watering, or sudden environmental shifts.
Most houseplants that bloom need brighter, steadier conditions than leafy-only species. Expect change over weeks, not overnight fixes. Stabilize care, check roots, and reduce drafts or dry air for a steady recovery.
This guide will walk through humidity and HVAC swings, watering and root checks, light placement by a window, salt build-up from fertilizer, and seasonal rest cues. It is for people growing orchids, holiday cactus, anthuriums, kalanchoe, hoya, lipstick plant, bromeliads, and small citrus.
Key Takeaways
- Brown tips usually mean dried or burned tissue and point to stress, not just age.
- Light intensity and consistency are the top reasons blooms fail.
- Fixes require steady care over weeks, not instant solutions.
- Check humidity, roots, fertilizer salts, and temperature swings first.
- Diagnose first, then adjust growing conditions, then use bloom cues.
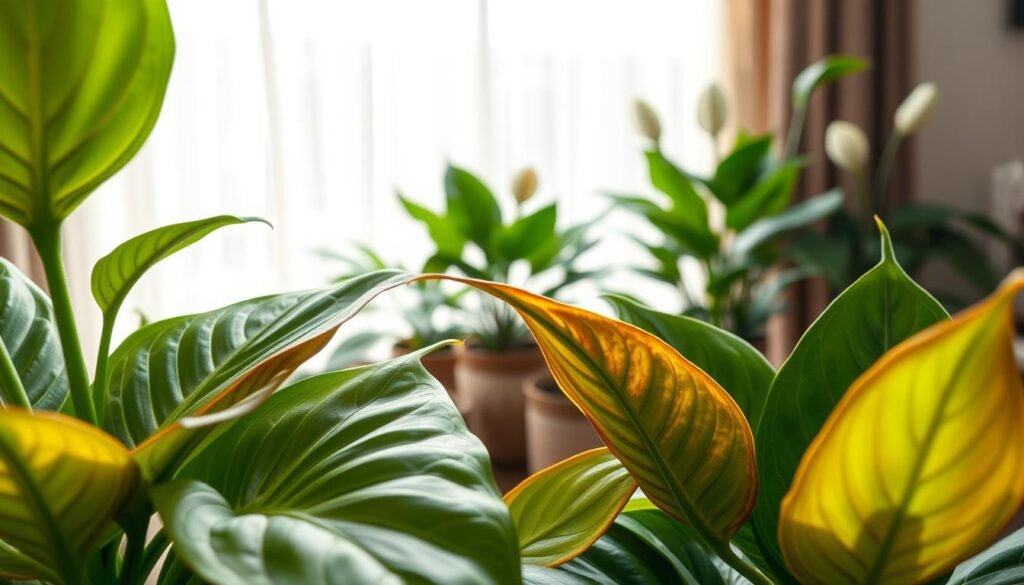
What Brown Leaf Tips Really Mean for Indoor Flowers
Brown tips are a clear signal a plant is under stress. In plain terms, the leaf tip has lost moisture faster than it can replace, or the tissue has been chemically burned by salts or sun-scaled by sudden bright light.

Dry air and stalled buds
Low humidity dries leaf edges and can halt bud development, especially for tropical species. Heating season often drops room humidity and causes crispy margins.
Watering problems and root damage
Both overwatering and underwatering produce brown tips. Mushy roots usually mean rot from staying too wet. Repeated drought stress also causes tip browning because damaged roots cannot support buds even when foliage looks fine.
Light near a window
Too much light through hot glass can scorch tips and make patchy brown marks. Too little light weakens growth and reduces buds, so placement matters.
Fertilizer and salt buildup
Excess fertilizer concentrates salts in the pot and burns root tips. Monthly flushing with plain water can reduce salt buildup and protect leaf edges.
Temperature stress and drafts
Cold drafts from doors or windows and hot blasts from vents both cause leaf-edge browning and bud drop. Sudden swings interrupt steady growth.
“Match the symptom — crispy versus mushy, uniform versus patchy — to the likely cause before changing everything at once.”
| Symptom | Likely cause | Quick check |
|---|---|---|
| Crispy, uniform tips | Low humidity or underwatering | Feel soil moisture; use a humidity tray |
| Mushy, brown base | Root rot from overwatering | Lift plant, inspect roots |
| Scorched patches near window | Sudden increase in bright light | Move slightly back from glass |
| Edges yellowing then browning | Fertilizer salt burn | Flush pot with plain water monthly |
| Bud drop and edge browning | Temperature swings or drafts | Monitor room temperature and vents |
Diagnostic mindset: observe whether tips are crispy or soft and whether damage is uniform or patchy. Match that pattern with the list above before changing care.
Get the Light Right for Strong Growth and More Blooms
Bright, steady light is one of the quickest ways to stop leggy growth and keep buds forming on favored bloomers.
Bright, indirect light means a spot near a sunny window but shielded from harsh midday sun. In a real home, that’s an east-facing sill or a south window with a sheer curtain.
Reading plant feedback
Leggy stems and pale leaves mean not enough light. Bleached patches and crispy edges mean too much direct sun or a sudden increase in intensity.
Placement tips by window
East windows give gentle morning rays; south and west can be intense and may need filtering. Move plants a few inches at a time over several days to avoid shock.
Darkness, night length, and grow lights
Many bloomers need real darkness—often 8 hours or more, and some require 12–14 hours for bud set. Leaving lamps on late can delay flower formation.
Light consistency rule: keep daily hours steady. Small shifts are fine; sudden changes cause stress and brown tips.
Watering and Soil Fixes That Prevent Brown Tips
Start with a clear watering rhythm: soak the pot until water runs from the drainage holes, then wait until the mix dries to the level your specific plant prefers.
Water deeply, then wait
Frequent light watering keeps media constantly damp and stresses roots. That low-evaporation state suffocates roots and often causes mushy, brown-tipped leaves.
Drainage and potting mix basics
Use pots with holes and avoid leaving saucers full. Decorative cachepots can trap runoff and keep the root zone wet.

- Quick soil-check: finger test for the top inch, lift the pot to judge weight, and note slow drainage as a red flag.
- Refresh mix when growth slows, water pools on the surface, or sogginess persists despite less watering.
- Choose airy mixes that drain well; compacted or old soil holds salts and moisture, which shows up as tip burn.
“Healthy roots are the engine for strong flowering and fewer brown edges.”
For seasonal changes in schedules, see this guide on adjusting watering schedules for flowering houseplants so your plant gets the right cycles through the year.
How to Make Indoor Flowers Bloom Again
Before expecting another showy set of blooms, confirm the plant’s foundation is strong.
Start with a simple healthy-plant checklist:
- Firm, white roots and loose, well-draining soil.
- Fresh leaves with even color and steady new growth.
- No salt crust on the surface and no soggy media.

Deadheading and pruning spent blooms
Remove spent blooms promptly. Cut back old flower stems so energy shifts from seed set into fresh buds.
Timing care over weeks
Change one thing at a time: light first, then watering, then feeding. Track progress over weeks rather than days.
Recognizing bloom cycles
Some plants are near-continuous bloomers; others need a defined rest period or seasonal cue. Match expectations to the plant’s natural period.
| Checklist item | What to expect | When to act |
|---|---|---|
| Roots healthy | White, firm, not mushy | Now — repot if compacted |
| Leaves vigorous | New growth and rich color | After light adjustments, within weeks |
| No salt buildup | Clear surface, normal watering | Flush monthly if needed |
If growth returns but no buds appear, revisit light intensity and night darkness before adding more fertilizer.
Fertilizer and Plant Food: Feeding Blooms Without Burning Leaf Tips
Because soilless potting media hold little in the way of nutrients, regular feeding keeps potted specimens vigorous during active growth. A steady, light plan gives plants what they need without stressing roots.

What most pots lack and why a routine matters
Commercial mixes drain well but do not replenish minerals. Outdoors, soil recycles nutrients; in a pot, those stores vanish with watering and harvest. Add food on a gentle schedule for steady flowering and repeat blooming.
Phosphorus: myth, value, and limits
Phosphorus is important, but more is not always better. Pushing high-phosphorus formulas can backfire by stressing roots or even inhibiting flower set in some species. Plants need a balance rather than a single boosted number.
Prevent fertilizer burn: practical rules
- Dilute more than the label suggests: use half or three-quarters strength for most liquid feeds.
- Match feeding to growth: feed lightly during active months and cut back during rest periods.
- Monthly flushing: run plain water through the pot to wash out salts and prevent tip burn.
“Less is more: start with a bit less fertilizer and step up only if the plant shows lively growth and lighter green leaves.”
| Issue | Cause | Quick fix |
|---|---|---|
| Brown tips after feeding | Salt buildup from overfertilizing | Flush pot and reduce dose |
| Slow flowering | Unbalanced nutrients or weak feed | Use a balanced formula at conservative strength |
| Weak leaves with few blooms | Underfeeding or poor media | Feed during growth, refresh mix if compacted |
Temperature, Humidity, and Rest Periods That Trigger Flowering
Many bloom-forming plants rely on gentle seasonal shifts rather than constant thermostat settings.
Day-night temperature drops often prompt bud formation. A modest fall in night temperature—about 5–10°F cooler than daytime—helps orchids and other species set new buds without shocking roots.
Practical orchid example
Orchids commonly respond well when nights sit near 55–65°F after flowering. Keep daytime temps steady, then allow cooler nights for several weeks. This rest period encourages fresh bud initiation.
Common indoor stressors that harm buds
Heat vents, radiators, drafty doors, and cold window glass at night all cause brown tips and bud drop. Watch for sudden swings and move vulnerable pots away from direct heat or chilly panes.
Simple, home-friendly humidity fixes
- Group plants to create a microclimate of higher humidity.
- Use a pebble tray with water, keeping the pot above the waterline.
- Run a small humidifier for steady moisture during dry winter days.
Higher humidity helps tropical species hold buds and keeps leaves flexible during heated months. When air isn’t crashing low, buds are less likely to desiccate and drop.
Tip: introduce seasonal changes slowly—drop nights a few degrees over days, not hours—so plants adjust without stress.
| Trigger | What it does | Quick action |
|---|---|---|
| Cooler nights | Signals bud set | Lower thermostat 5–10°F after flowering |
| Low humidity | Causes brown tips and bud loss | Group pots, use tray, or run humidifier |
| Seasonal darkness | Encourages holiday bloomers in fall | Provide longer nights and slightly cooler temps for several weeks |
Rest periods are not neglect. A calmer phase with cooler nights and reduced watering often primes plants for a stronger active growth phase and better flowering in the next cycle.
Plant-by-Plant Re-Blooming Playbook for Common Indoor Flowers
A targeted playbook for each species removes guesswork and helps stressed plants restart their flowering cycle. Pick your plant below and follow the concise routine for better buds and steadier growth.
Orchids (Phalaenopsis)
Light should be bright but filtered—an east-facing window or a shaded south spot works best. Keep steady humidity and avoid waterlogged roots.
After flowering, allow nights to cool a few degrees for several weeks; this rest period often prompts new buds.
Christmas cactus
Provide long, uninterrupted dark nights (about 12–14 hours) and cooler fall temperatures near 50–55°F for roughly six weeks.
Once buds set, resume normal care and moderate watering so buds open without dropping.
Anthuriums
Anthuriums reward bright, indirect light, regular watering when the top soil feels slightly dry, and balanced fertilizer at low strength.
Steady warmth and consistent care keep these plants flowering more often.
Kalanchoe
Place in a very bright spot and reduce night lighting during the fall and winter period to recreate long nights.
Avoid overwatering; letting the soil dry a bit between waterings helps the plant focus on flowers.
Bromeliads and citrus (potted)
Bromeliads like bright light without harsh sun, steady moisture in the central cup, and higher humidity. Patience is key; reblooming can take months.
Small citrus need strong sun, even moisture, and regular feeding so they can set another flush of flowers when ready.
Hoya and lipstick plant
Keep bright light, careful watering, and supportive humidity. Never remove a hoya flower spur—those spur sites produce repeat blooms.
Lipstick plants prefer evenly moist (not soggy) soil and light feeding during growth for steady flowering.
“Match the cue to the species: night length for long-night bloomers, cool nights for orchids, and steady warmth for continuous bloomers.”
| Plant | Key cue | Top care note |
|---|---|---|
| Orchids | Cooler nights after flowering | Bright, filtered light; humidity; avoid soggy roots |
| Christmas cactus | 12–14 hours darkness in fall | Cool nights ~50–55°F; then normal watering |
| Anthuriums | Bright indirect light + steady warmth | Water when top soil dries slightly; balanced feed |
| Kalanchoe | Long nights in fall/winter | Very bright spot; avoid overwatering |
| Bromeliads / Citrus | Light and moisture balance | Higher humidity for bromeliads; citrus needs strong sun & food |
Conclusion
A few browned edges often point to one or two care gaps rather than a lost cause. Brown tips are a clear signal that light, watering, salts, temperature, or humidity are out of balance for your plant.
Start in this order at home: stabilize watering and soil drainage, upgrade light, then fine-tune fertilizer and humidity. Fixing roots and leaves first gives the best chance for steady growth and more flowers.
Act like a detective. Change one variable at a time and watch for new leaves and fresh growth over a few weeks. Small, steady steps often beat big, sudden changes.
Remember: more is not always better—too much sun or fertilizer burns leaves, and too little light quietly blocks buds. Check light placement monthly, water deeply then wait, flush salts now and then, and keep plants away from drafts and vents for healthier tips and better blooms.