Surprising fact: most houseplants only need repotting once every three to five years, yet many are moved far more often and suffer for it.
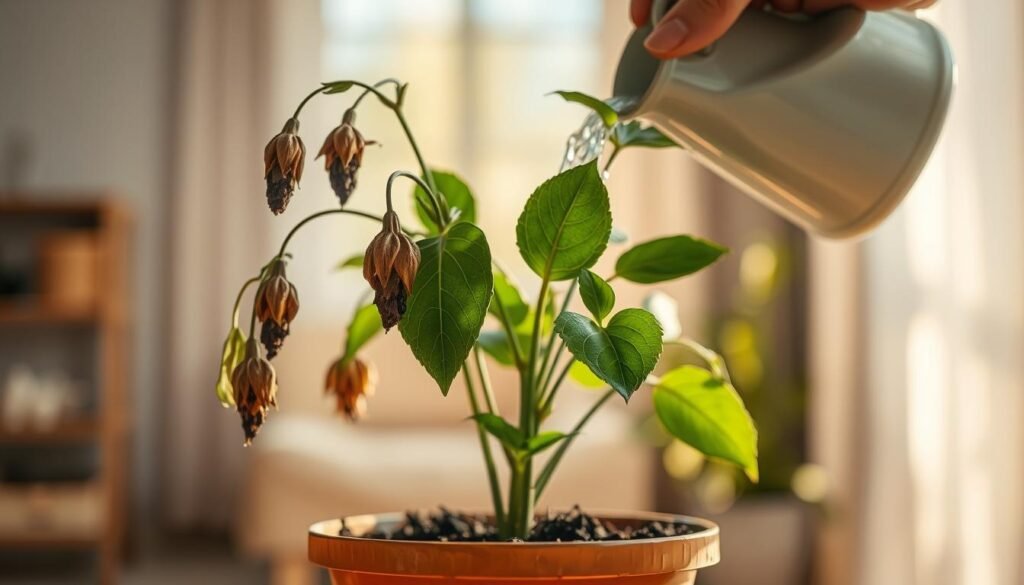
If your plant looks limp, yellow, or stopped growing, you can act fast. This short guide helps you stabilize a struggling pot and then decide whether repotting is really the right fix.
First, we’ll show quick triage steps: check soil feel, root visibility, and simple growth or foliage signals that point at watering, light, or drainage problems rather than root crowding.
Next, you’ll see clear repot-timing signs and a safe, step-by-step process for stressed plants. We include container tips to avoid trapped water and root rot in decorative pots.
For seasonal watering cues and the finger test for moisture, read our practical guide on adjusting watering schedules.
Key Takeaways
- Stabilize the plant first with a quick triage of soil, roots, and foliage.
- Many houseplants only need repotting every 3–5 years; avoid needless stress.
- Watch for clear signs like fast-drying soil, top-heavy pots, or salt crust.
- Use a nursery pot inside decorative containers to prevent trapped water.
- Follow simple post-repot watering habits and observe recovery closely.
Quick triage for a dying indoor flowering plant
Begin with a short diagnosis: figure out whether the issue is water, drainage, or root space before you change the pot or mix.
Check soil moisture with your finger, not the calendar. Push a finger down near the root zone. If the soil feels cool and slightly damp, hold off on water. If it is dry at depth, the plant may need water even if the surface looks moist. Heat, air flow, light, and pot size change drying rates, so dates on a calendar are unreliable.
Spot underwatering vs overwatering
Too-dry soil often shows up as dull foliage and little new growth. Too-wet soil can reduce root air and still cause wilting or leaf drop.
Fast stress clues to log now
Look for sudden leaf drop, limp stems, or dull color. Lift the pot to check weight and smell the soil—musty scents point at poor drainage or rot.
- Pause fertilizing if the soil is soggy or bone-dry; stabilize water and air around roots first.

Once moisture is corrected, the next question is whether the plant may need a new container or refreshed potting mix for long-term recovery.
When to repot indoor flowers: the clearest signs it’s time
Look for clear, physical clues that tell you the plant has outgrown its home. These cues help decide if refreshing potting soil and a new container will actually help recovery.
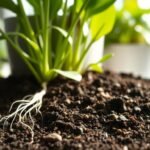
Roots pushing out or visible at the surface
If many roots emerge from drainage holes or appear on the soil surface, the root zone is crowded. Not a single stray root, but a mass pushing out is the true sign.
Circling roots when you remove plant
Gently take the plant from the current pot. If you see roots tightly circling the pot wall, those circling roots limit water and growth and need addressing.
Soil dries quickly between waterings
When the soil loses moisture fast, a dense ball of roots holds little potting medium and causes more frequent water needs. Fresh potting soil or a slightly larger size fixes that.
Stalled growth, small leaves, or a top-heavy plant
Smaller new leaves, little growth, or a plant that tips over often means the container no longer matches plant size or plant needs.
White, salty crust on potting soil
A white crust shows salt buildup from hard water and fertilizer. Replace as much old potting soil as possible to reset the root zone.
Best time and frequency
Late winter into spring is the best time—more light helps recovery. Most houseplants need repotting only every three to five years; act on clear signs, not habit.
Choose the right container and pot size to prevent repeat decline
Fixing the container is the quickest way to stop soggy soil and suffocated roots. Pick a container that balances drainage and the plant’s size so the root zone stays healthy.

Why drainage holes in the bottom are non-negotiable
Drainage holes at the bottom are essential. Without holes bottom exit, water can pool and starve roots of air, making correct watering almost impossible.
Make sure the pot has at least one clear opening so excess water leaves and fresh air returns to the root zone.
How to use decorative cache pots safely without trapping water
Keep the plant in a nursery pot with drainage holes, then place that pot inside the decorative container. After watering, pour out any collected water from the outer container.
If dumping is difficult, elevate the inner pot on stones so it never sits in pooled water. Use a bamboo skewer as a simple dipstick to check hidden water depth.
Picking a new pot that’s only slightly larger
Choose a new pot about 1–2 inches wider than the current pot. A much larger size leaves too much potting mix wet and raises root rot risk.
Plastic vs clay vs ceramic: match pots to your watering habits
Clay dries faster and helps people who tend to overwater. Plastic and ceramic hold moisture longer, which suits those who forget frequent watering.
Once the container choice is right, the next step is prepping fresh potting mix and a calm workspace so the transfer is quick and gentle.
Prep your plant and potting mix before repotting
Set up everything within arm’s reach so the plant spends only minutes out of soil. A calm prep cuts stress for roots and speeds recovery.

What to gather
Checklist: fresh potting mix, a new pot that is only slightly larger, a saucer, clean shears, and a protected workspace.
Fresh means a clean, well-aerated mix. Add a small amount of mineral soil if you want fewer repeat changes over the years.
Keeping the same pot instead of upsizing
If you want plant size to stay manageable, keep it mildly rootbound. Many houseplants bloom better with a snug root zone.
As an alternative, prune up to about one-third of the roots at the bottom and replace old soil with new potting mix. This refreshes nutrients without adding more room for top growth.
| Item | Purpose | Tip |
|---|---|---|
| Fresh potting mix | Restores aeration and nutrients | Add mineral soil for stability |
| New pot / saucer | Proper drainage and fit | Choose +1–2 inches larger |
| Shears / workspace | Clean cuts and fast work | Protect surfaces and keep roots moist |
Repotting checklist: how to repot a stressed indoor flower plant safely
Use this clear checklist to move a stressed specimen without causing more damage to fragile roots. Work slowly and keep tools and potting mix ready so the plant spends minimal time out of soil.

Remove the plant from the current pot
Squeeze plastic pots or tap the rim if rigid. Slide a butter knife or small shovel around the edge to loosen soil, then support the base while you lift. Never yank; steady support protects delicate roots.
Massage and loosen the root ball
Gently tease the root ball with fingers to free circling roots. This restores air spaces and improves water flow into the core so the plant hydrates evenly again.
Trim circling, dead, or mushy roots
Cut circling roots so they can grow outward. Remove any dead or sloughing pieces; mushy roots spread rot if left in place. Use clean shears and work calmly.
Replace old soil and set planting height
Shake off excess old soil and replace much of the mix while keeping healthy roots intact. Set the top of the root ball at the same height it sat in the old pot—planting deeper risks stem rot.
Backfill and finish
Add fresh potting soil around the sides, firm lightly to remove air pockets, and leave a small gap at the top for water. Water gently so water moves through the new mix and into the roots.
| Step | Action | Why it matters |
|---|---|---|
| Remove plant | Loosen pot, support base, lift gently | Prevents root tearing and stem damage |
| Loosen roots | Massage root ball lightly | Restores air and water flow |
| Prune roots | Trim circling and rotten roots | Stops rot and encourages outward growth |
| Replace soil | Keep healthy roots, swap old mix | Refreshes nutrients and drainage |
| Set height & backfill | Same root-ball height, firm lightly | Prevents stem rot and air pockets |
Watering and drainage after repotting to stop the decline
After a careful transfer, how you water next decides whether recovery succeeds or fails. Post-transfer watering is where many recoveries succeed or fail because fresh potting mix behaves differently than old, compacted soil.
Water slowly until it runs out the holes
Water slowly and thoroughly so the new mix wets evenly. Keep pouring until about 10% of what you applied comes out the drainage hole at the bottom.
This 10% runoff confirms the potting mix is fully wetted and helps flush built-up salts. It also prevents dry pockets that can leave parts of the root ball isolated.
If the soil was extremely dry, re-wet in stages
Bone-dry mix can repel water. In that case, pour half the usual amount, wait five minutes, then finish the rest.
This staged method lets the root ball absorb moisture instead of letting water run off the surface. It saves fragile roots and helps a thirsty water plant regain balance.
Always empty excess water from saucers and cache pots
Make sure any water that collects in a decorative container or saucer is emptied soon after watering.
“Standing water in a cache pot creates anaerobic conditions that destroy roots.”
Never let the pot sit in pooled water. That practice prevents anaerobic rot and keeps drainage working as intended.
Expect a short-term change in watering frequency after moving into a larger pot
After moving into a larger pot, the soil holds more moisture and you will often water less frequently at first.
As roots grow and use more water, the frequency will rise again. Watch weight and surface moisture rather than a calendar.
| Action | What to do | Why it matters |
|---|---|---|
| Initial soak | Water slowly until ~10% drains out | Ensures even wetting and salt flush |
| Staged re-wet | Apply half, wait, then finish | Resolves hydrophobic, bone-dry mix |
| Empty saucers | Remove collected water after watering | Prevents anaerobic rot and root death |
| Monitor frequency | Check pot weight and surface moisture | Adjust as roots expand in larger pot |
Conclusion
Conclusion
Close the process with a calm plan: triage moisture first, inspect roots and soil signs, then fit the specimen with the right container and care routine.
Follow this simple flow: stabilize soil moisture, confirm repotting signals like roots escaping or a salty crust, and move gently into a slightly larger new pot or the same pot with fresh mix. Use containers with clear drainage holes and empty any collected water after a soak.
Remember the rule most houseplants need repotting only every three to five years; act on clear signs and match pot size to plant needs. If decline continues, check light, temperature, and chronic water habits rather than adding more nutrients.