Surprising fact: up to half of indoor flowering failures trace back to soggy roots rather than lack of light.
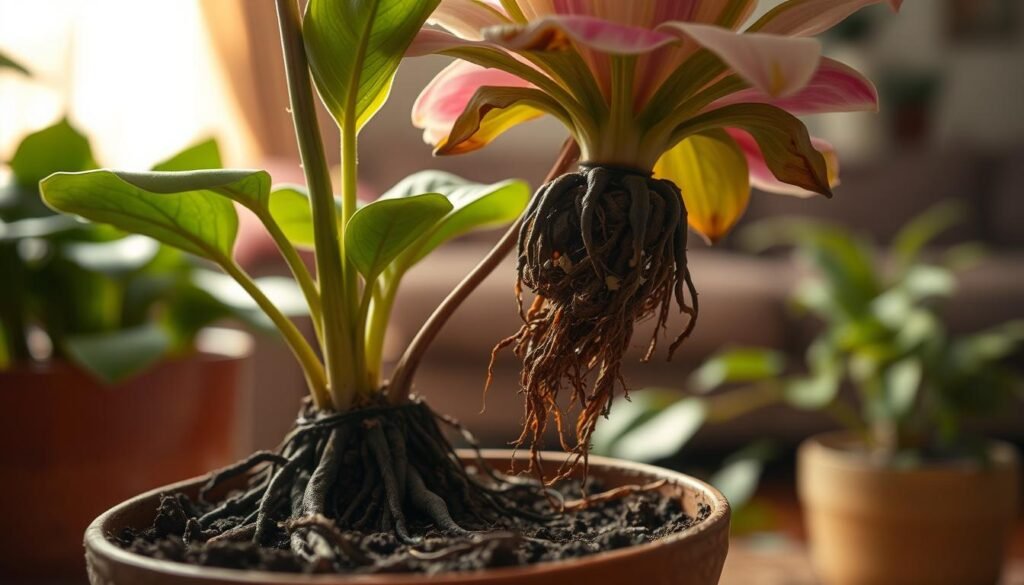
Root rot is a fungal breakdown of roots when soil stays waterlogged and lacks air. It stalls growth and steals energy that would feed buds and flowers. A plant can look leafy while its roots decay, then fail to bloom.
This guide focuses on practical ways for homeowners in the United States to protect flowering houseplants. Expect clear signs you can spot fast: wilting despite wet soil, yellow leaves, mushy roots, and a sour smell. We also preview simple fixes: adjust light placement, check the top 1–2 inches of soil before watering, improve drainage, and prune or deadhead to redirect energy.
Follow a quick diagnostic flow: check light first, then assess watering and soil, review nutrition, and lastly prune. Remember, some species are grown mainly for foliage and may never produce abundant flowers indoors, so plant choice matters as much as care.
Key Takeaways
- Root rot often causes stalled flowering even when foliage seems healthy.
- Check light, then soil moisture, then nutrition when diagnosing bloom issues.
- Let the top 1–2 inches of soil dry before watering to avoid waterlogged roots.
- Improve drainage and prune spent blooms to help plants redirect energy.
- Choose flowering varieties suited for home light levels for best results.
Why Your Indoor Plants Aren’t Blooming (Even If the Leaves Look Great)
Many healthy-looking houseplants never set buds because indoor conditions often miss a few key cues. A plant can have lush foliage and still prioritize survival over flowering. Flower production costs energy, so a plant will favor leaves when light, moisture, or seasonal signals are only marginal.
Not every houseplant will flower indoors—and that’s normal
Some species simply won’t reproduce well inside a typical home environment. Tropical or rainforest natives may need high humidity, steady warmth, or long daylight cycles that are hard to mimic.
Light is the most common reason plants won’t bloom
Even with green, healthy leaves, insufficient light intensity or too few hours of light prevents bud formation. Low-light clues include leggy stems, small or pale leaves, and buds that abort or drop.

Seasonal cues and dormancy can be required for buds to form
Some bloomers need a dormancy-like period. For example, Christmas cactus requires long nights and cooler fall temps, while many orchids respond to a modest nighttime drop after blooming.
- Reliable indoor bloomers: peace lily, anthurium, lipstick plant (bird of paradise needs strong light and space).
- Next steps: confirm your plant species can flower, then optimize light, soil and feeding.
| Cause | Visual Cue | Quick Fix | Best Candidates |
|---|---|---|---|
| Low light | Leggy growth, no buds | Move nearer a bright window or add a full-spectrum lamp | Peace lily, anthurium |
| Wrong seasonal cue | Buds drop or never form | Provide cooler nights or longer darkness periods | Christmas cactus, orchids |
| Home environment mismatch | Healthy leaves, no flowers | Choose species suited to your light and humidity | Lipstick plant, bird of paradise (with space) |
Learn more about seasonal light and bloom timing in this short guide: why houseplants know it’s winter. Once you confirm a plant can flower, the next sections will cover lighting setup, watering, and feeding steps.
How to Get More Blooms on Indoor Plants With the Right Light Setup
Bright, steady light is the single most useful change that nudges many flowering houseplants toward regular buds.

Bright, indirect light means a well-lit room near an east, south, or west window. Use a sheer curtain or move the pot a foot back from direct rays. That gives high light without burning leaves.
Daily hours and steadiness
Most flowering houseplants need a higher amount of light than foliage varieties. Aim for roughly 6–10 hours of steady brightness per day. Consistent exposure matters as much as peak intensity.
Rotation, scorch prevention, and season tips
- Rotate potted plants weekly to even out growth and support uniform flowering.
- In summer, pull pots a bit away from hot afternoon sun; glass can magnify heat and scorch blooms.
- In spring, increase exposure gradually rather than jumping from low light into intense sun.
- Use a full-spectrum LED when natural light is low in winter or in shaded apartments.
| Situation | Placement rule | Quick benefit |
|---|---|---|
| Bright window, filtered | Near window, behind sheer curtain | High light without burns |
| Low natural light | Full-spectrum LED for 8+ hours | Consistent day length and intensity |
| Hot afternoon sun | Move 1–2 ft back from glass | Prevents scorched leaves and wilted blooms |
Watering and Soil Basics That Support Flowering (and Help Avoid Root Rot)
D roots need air and predictable moisture if a plant is going to spend energy on flowers. Start by learning a simple rule: water only when the top inch or two of soil feels dry. That check adapts for pot size, season, and home conditions.

Water wisely: keep soil lightly moist, never soggy
Keep soil slightly damp during active growth, but avoid standing wetness. Oxygen-starved roots can’t move water and nutrients, so overwatering will stall growth and reduce budding.
Use drainage-friendly pots and soil
Choose pots with drain holes and an airy potting mix that won’t compact. Avoid decorative cachepots that trap runoff; empty saucers after each session so roots aren’t sitting in water.
Timing your watering and why it matters
Don’t water on a fixed calendar. Check the top soil, then water when dry. Repeated small top-offs and routine watering are classic patterns that lead straight to root stress.
- Make sure the pot drains freely and soil dries predictably.
- Watch for a perk after watering — not days of droop.
- If root rot is suspected, cut back watering and inspect soil smell and texture before resuming regular care.
Feed the Bloom: Fertilizer, Nutrients, and Plant Food Without Overdoing It
Balanced feeding during active spring and summer growth gives buds the steady fuel they need. Use a gentle, regular schedule rather than heavy doses that promise instant results.
Phosphorus plays a clear role in bud and bloom formation. Look for formulas with moderate extra phosphorus if a species is known to respond, but never at the cost of root or leaf health.
Keep these safe feeding habits in mind:
- Dilute concentrated fertilizer and apply on moist soil.
- Feed during the active growth window, then ease off as growth slows.
- Avoid doubling doses; excess causes salt buildup and leaf edge scorch.
Fertilizer buildup is simply salt accumulation in the potting mix. Symptoms include crispy leaf margins and stalled growth. Flush pots occasionally with water and match feed frequency to light and vigor.
Bioactive versus synthetic
Bioactive mixes include microbes and micronutrients that support long-term soil life and often reduce salt issues. Synthetic NPK products deliver quick nutrients but can add salts over time if misused. For lasting, reliable flowering, choose moderation and consistency.
| Type | Main benefit | Watch for |
|---|---|---|
| Balanced fertilizer | Even nutrition for leaves, roots, and flowers | Follow label rate; dilute if unsure |
| Higher-phosphorus mix | Supports bud formation in responsive species | Use sparingly; pair with good drainage |
| Bioactive formulas | Improves soil life and long-term health | Often pricier; allow time for benefits |
Final note: gentle, steady feeding protects roots and reduces the risk of rot. Combine measured nutrition with good watering and drainage for a reliable flowering routine that lasts for years.
Pruning and Deadheading Techniques That Trigger More Flowers
Careful snipping and cleanup often send a plant clear signals to produce fresh flowers. Deadheading is simple: remove spent flower heads so the plant redirects energy into new flower formation instead of seed set.
What to remove: look for wilting petals, browning edges, and dropping blooms. Snip these away promptly to keep the pot tidy and productive.

Where to cut
For many species, snip just below the flower head where it meets the stem. For long-stem blooms, cut at the stem base. Use sharp shears and make clean cuts; tearing invites disease.
Cleaning and timing
Prune in the morning when tissue is turgid. Clean tools between plants, especially after trimming a soggy or stressed specimen.
Orchid caution and routine
Orchids can rebloom from nodes in some varieties. Check species notes before cutting a spike; some need a rest period first.
- Remove yellowing leaves and trim leggy growth so the plant focuses energy on healthy growth and future flowers.
- Do quick weekly checks on potted plants to catch fading blooms early.
- Less decaying material improves airflow and reduces stress that harms roots and slows growth.
| Action | Where | Benefit |
|---|---|---|
| Deadhead spent blooms | Below flower head | Redirects energy into new flowers |
| Trim leggy stems | At node or base | Promotes compact growth and more flower sites |
| Remove yellow leaves | At leaf base | Reduces disease risk and conserves energy |
Conclusion
Conclusion
A steady, small set of habits will often revive stalled flowering and keep houseplants healthy year-round.
Start by confirming your plant can actually flower indoors, then prioritize bright placement. Dial in enough light, master soil and drainage, check the top inch or two before you water, and feed gently during active growth.
Keep a simple rhythm: weekly rotation and light checks, a soil moisture check before watering, monthly drainage checks, and seasonal fertilizer adjustments. Deadhead and prune to encourage repeat blooms and healthier growth.
Remember: many issues trace back to missing light or soggy roots. Healthy roots make flowering possible, so avoid extremes and pick the right spot for each plant. Apply these friendly tips for your species and season, and enjoy leaves or flowers—both are wins.