Surprising fact: over half of indoor flower failures link back to decay that began unseen under the soil, long before leaves wilt or yellow.
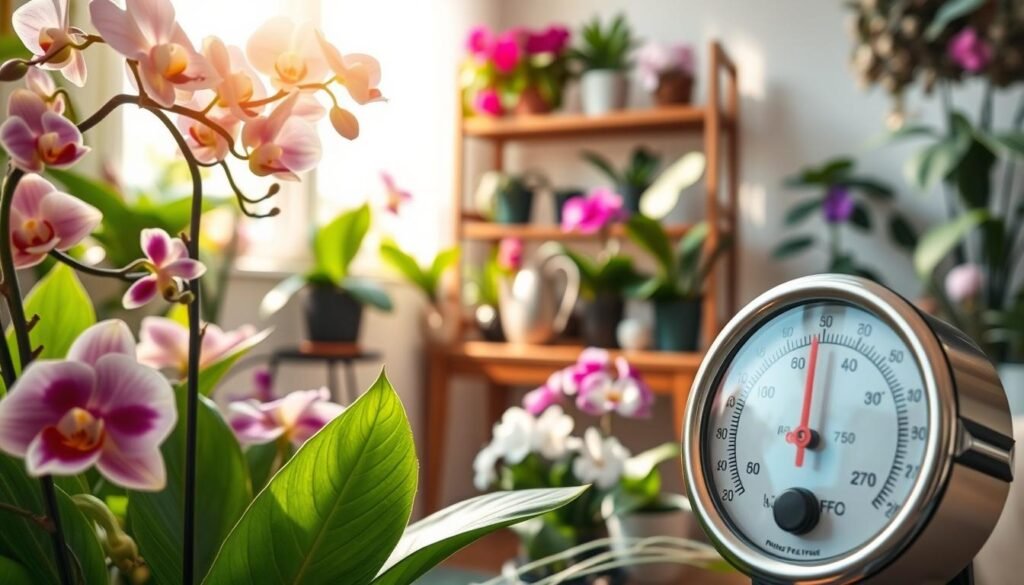
This short guide explains why room temperature matters for potted blooms and how warmth, airflow, and light change drying time. Root rot thrives when the mix stays wet and oxygen is low, and its signs often mimic drought, pests, or nutrient lack.
The plan is simple: pause watering, check the roots, trim damaged tissue, and repot into fresh mix. Warmer rooms speed evaporation and plant transpiration, while cool corners keep soil wet and raise risk.
We’ll walk through quick checks, practical tips for drying pots, and clear steps that break the panic loop of wilting → add more water → spread of decay. This is geared to indoor flowers and common houseplants in U.S. homes, especially those in low light or pots with poor drainage.
Key Takeaways
- Many issues start below the soil; inspect roots when symptoms appear.
- Warmth, airflow, and light help soil dry faster and reduce risk.
- Pause watering, trim damaged roots, then repot in fresh mix for best odds.
- Yellow leaves, mushy roots, and smelly soil often point to decay problems.
- Fast action improves recovery, though some cases cannot be saved.
Recognizing root rot early in indoor plants
Small changes in growth are often the first quiet clue that trouble is brewing under the surface. New shoots may appear smaller or arrive less often even when care routines stay the same.
Why that happens: damaged roots cannot move water and nutrients well, so overall growth slows and the pot struggles to support normal leaf and stem development.

Above‑soil signs to watch
Leaves may wilt as if thirsty, yet the potting mix feels damp. Yellowing often shows first on older, lower leaves, then brown edges or blotches appear and leaves drop.
Those same marks can mimic underwatering, pests, or nutrient shortages. Symptoms alone can mislead you; inspecting the roots is the only sure check.
When to act today
- Sudden, widespread wilting across a pot
- Repeated yellow leaves despite normal watering
- Sour or rotten smell from the soil
- Fungus gnats swarming the surface
Rule of thumb: rule out root rot first because it can worsen quickly. If the mix stays wet and oxygen is low, that combination invites rot-causing organisms. For gentle watering guidance, see adjusting watering schedules.
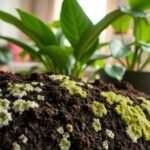
What root rot is and why it happens in potted plants
Roots breathe through tiny air pockets in the mix; lose those pockets and trouble starts. Root rot means roots begin to die and decay, so the plant can’t absorb water even when the soil stays wet.

How wet soil and low oxygen trigger rot in plant roots
When potting mix stays saturated, air spaces vanish. Roots then “suffocate” and tissue weakens. That damage invites decay and fast loss of function.
Common pathogens linked to plant root rot
Several fungi cause similar symptoms. Pythium and Phytophthora are often named first. Fusarium and Rhizoctonia also appear in listings.
“These organisms thrive where moisture stays high and oxygen is low.”
- Setup problems: dense mixes, oversized pots, poor drainage, low light, and cool spots hold wet soil longer.
- Watering timing: repeated wetting before the mix dries causes many cases more than single heavy pours.
Tip: indoor flowers face higher risk because airflow and light usually fall short, slowing dry down and giving fungi a foothold.
How root rot spreads around your home
Fungal organisms that harm roots often travel far beyond one pot, hitching rides on water, soil, and tools.
Water-borne spread happens in plain sight. When runoff from an infected container is reused, that water can carry spores into the next pot. Shared saucers, pooled trays, and a single bottom-watering bin used for many plants speed this process.
Everyday habits that spread spores
Common culprits include multiple pots sitting in one drip tray, pouring tray water back into other pots, and using a communal soak tub without changing the water each time.
Soil, tools, pests, and persistence
Spores can hide in old mix and wake when the soil becomes wet and oxygen-poor again. Pruners, scoops, and hands move fungi from pot to pot if not cleaned. Fungus gnats add risk; larvae and adults can carry fungal agents and signal persistently damp soil.
Containment steps: isolate the suspect pot, stop sharing water sources, and wash saucers and tools. Remember: spread does not always cause disease—favorable wet, low-oxygen conditions let rot take hold.
| Vector | Typical example | Quick containment |
|---|---|---|
| Water | Reused runoff, shared bins | Discard runoff, change bin water, dry trays |
| Soil & spores | Old potting mix, dusty pots | Use fresh mix, avoid reusing soil |
| Tools & hands | Unclean pruners, scoops | Sterilize blades and utensils |
| Pests | Fungus gnats, larvae | Let surface dry, use sticky traps |
How to fix root rot without killing plant
Stop watering at once. That single step often prevents spread in mild cases and gives you time to assess moisture and conditions that caused the issue.

Unpot and inspect
Gently support the base and ease the plant from its pot. Loosen soil with care so you don’t tear remaining roots.
Healthy roots are firm and pale. Damaged roots are dark, mushy, may flake, and can smell foul.
Rinse and reveal
Use lukewarm water to wash away old potting mix. This shows the true extent of damage and removes contaminated soil clinging to the root ball.
Trim and sanitize
Sterilize shears, then cut back every soft or discolored section into firm tissue. Be decisive—leftover decay keeps spreading.
- Sanitize tools as you work.
- Take a few tip cuttings as insurance for propagation if the main specimen fails.
- Consider a labeled systemic fungicide when decay is advanced; read directions carefully.
- Soak pots and tools in a 1:1 mix of 3% hydrogen peroxide and water for 10–15 minutes, then rinse and dry before reuse.
Next step: repot plant into fresh, well-draining mix and a suitable pot to reduce chance of reinfection.
Repotting after root rot to prevent reinfection
After trimming damaged roots, the next priority is a fresh, well‑draining home for the remaining roots. Repotting matters because old soil can hold spores that restart rot even after you remove decay.

Why you shouldn’t reuse old soil
Don’t reuse contaminated soil. It often contains dormant spores that wait for wet, low‑oxygen conditions. Tossing used soil is usually cheaper than losing the entire plant again.
Pick the right pot and size
Always use a container with drainage holes so excess water can escape. Terracotta pots help wick moisture and speed drying, which aids recovery.
After root trimming, choose a slightly smaller pot that fits the reduced root ball. Too much extra mix around a small root mass stays wet and invites repeat rot.
Choose an airy potting mix
Use a free‑draining potting mix amended with perlite, pumice, or bark. That structure boosts airflow and improves drainage near the roots.
- Drainage habit: empty saucers after watering.
- Match the plant: some species need more even moisture but still benefit from aeration.
“Fresh potting mix and good drainage are the best reset after an infection.”
Aftercare: helping your plant recover over the next days and weeks
A gentle recovery plan over the next weeks gives damaged roots room to regrow and new leaves a chance.
Set a clear timeline. The first few days are for stabilizing moisture. Avoid watering for about a week as a baseline, then check the soil. If the mix feels dry an inch below the surface, water thoroughly and let excess drain.
Prevent the “wilted so I watered more” trap
Drooping can be stress, not thirst. Adding extra water can make rot return. Wait, test the mix, and resist small daily sips that keep soil damp.
Light, airflow, and warmth
Move the pot into bright, indirect light or add a gentle grow lamp. Raise air movement with a small fan and keep the room mildly warm. These tweaks speed drying and support root regrowth.
Prune and monitor
If many roots were removed, trim a few older leaves so the reduced root mass can cope. Watch for firmer stems, upright leaves, and tiny new shoots as good signs.
| Timeframe | Green flags | Warning signs |
|---|---|---|
| 1–7 days | soil drying, firmer stem | persistent wet soil, sour smell |
| 1–3 weeks | small new leaves, steadier posture | yellowing, continued collapse |
| If rot returns | — | unpot, trim, repot with fresh mix |
Drainage check: confirm holes are clear and saucers are emptied after watering. If the problem recurs, review pot size and soil structure.
Conclusion
Catching symptoms early and acting calmly gives most indoor specimens a strong chance of recovery.
Quick steps matter: pause watering, unpot and inspect the roots, rinse away old mix, trim damaged tissue, then repot into an airy, well‑draining medium in the right-size container.
Prevent future issues by keeping soil from staying soggy, improving drainage and airflow, and cleaning tools and trays rather than sharing runoff between pots.
Adjust your watering schedule with the seasons and room conditions—cooler, darker stretches need less frequent attention. If the original cannot recover, take insurance cuttings; that way your effort still yields new growth and learning for next time.