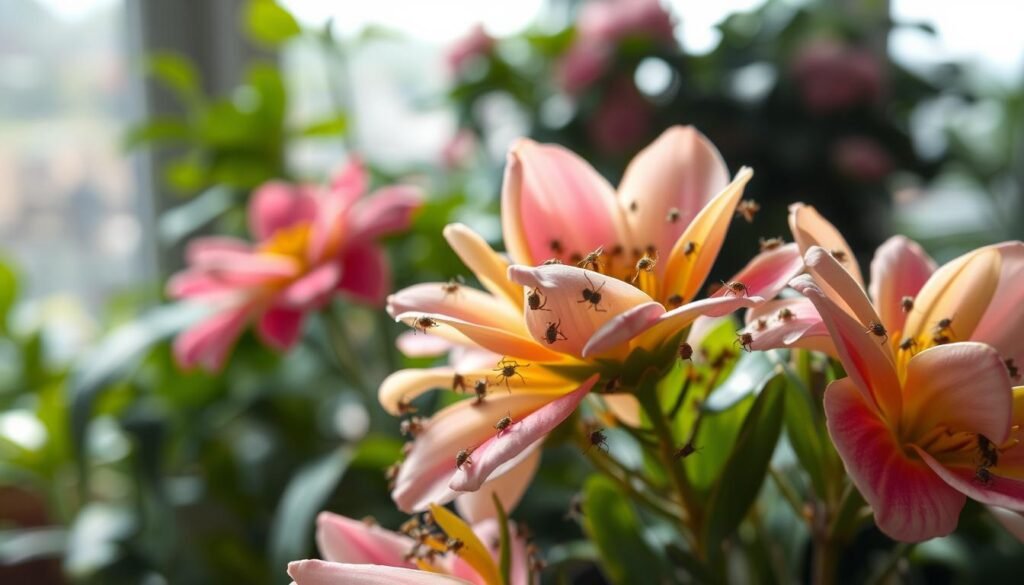
Surprising fact: A single spider mite can lay hundreds of eggs, and infestations can go from unseen to severe in just weeks, leaving tender leaves and blooms mottled and weak.
Spider mites are tiny sap-sucking pests that thrive when conditions are dry. They damage soft foliage fast, so flowers in the home or garden often show trouble first.
This short guide aims to help you spot early signs, reduce plant stress, and tighten up your water habits so flowers recover and stay vigorous.
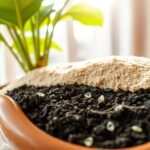
We introduce a practical method — using a shallow dish and a pot with a drainage hole — that supports steadier moisture in the root zone without constantly wetting the soil surface. Experts like Savannah Toal, Kate Ferguson, and Chris Satch note that combining this approach with occasional top water helps avoid mineral buildup and keeps pests like fungus gnats at bay.
You’ll also get quick treatment steps: isolate affected flowers, clean leaves, and adopt a watering strategy that supports recovery. Remember the core safety rule: always use pots with drainage holes and never leave a pot sitting in standing water after watering.
Key Takeaways
- Spider mites reproduce fast and show up on tender blooms first.
- Early detection, isolation, and leaf cleaning limit damage.
- Use a shallow dish method and pots with drainage for steadier moisture.
- Combine this method with occasional top water to prevent salts.
- Consistent water care reduces stress and boosts plant resilience.
- Never leave pots sitting in standing water after you water.
Spotting spider mites early on indoor flowers and why watering style matters
Catch spider mites early by learning the subtle leaf changes they cause before webs appear. Quick checks and steady care make a big difference for flowering pots.
Early signs to watch: Look for fine stippling or speckling on leaves, dull or dusty-looking foliage, tiny webbing in leaf joints, and blooms that fade or become distorted.
Small checks you can do right now
Inspect leaf undersides, run a light finger along the midrib and petiole, and tap a leaf over white paper to see tiny moving dots. These quick steps catch infestations before they escalate.
Why surface dryness and stress worsen the problem
The Home and Garden Information Center says stress shows when a plant is too dry or too wet. Wilting, gray-green leaves, yellowing, or leaf drop are common signals.
- Inconsistent water routines cause swings between dry and drenched, weakening resistance to pests.
- Forced-air heat, sunny windows, and fast mixes can dry the top soil while deeper layers stay damp, confusing care decisions.
| Sign | What it means | Quick action |
|---|---|---|
| Speckled leaves | Early sap loss from mites | Inspect nearby growth and isolate affected pots |
| Tiny webbing | Population increasing | Clean leaves and start direct treatment |
| Faded blooms | Stress affecting flowers | Stabilize water habits and humidity |
| Dusty foliage | Heavy feeding or debris | Wipe leaves and monitor new shoots |
Prevention tip: Aim for a steady root-zone moisture pattern rather than constantly wetting the surface. For more on correct water routines, see an easy watering schedule guide.
bottom watering indoor plants to protect roots and reduce common moisture-related problems
For steadier moisture control, stand the pot in a shallow dish of water and allow the mix to wick moisture upward.
What it is: Place a pot with drainage holes into a saucer, sink, or tray filled partway with water so moisture climbs into the potting mix from below. This bottom watering method helps the root zone hydrate without soaking the top layer.

Why the plant takes only what it needs
The plant draws water by capillary action during a timed soak. Many growers find this feels safer than guessing how much to pour because the root system limits uptake.
Healthier roots and less rot
Moisture moving upward encourages roots to grow down. That builds a fuller root mass and can cut the chance of root rot if you allow the potting mix to dry between soaks.
Fewer fungus gnats and must-haves
Keeping the soil surface drier makes the top layer less attractive to gnats. What you must have: pots with drainage holes, a watertight saucer or basin (or sink), and a well-aerated potting mix that wicks evenly.
| Step | Soak time | Sign to stop |
|---|---|---|
| Small pots | 10–30 minutes | Top feels lightly moist |
| Medium to dense root balls | 30–60 minutes | Air bubbles slow or stop |
| Do not exceed | Up to 6 hours maximum | Soil becomes muddy or waterlogged |
Quick note: In homes with spider-mite pressure, even hydration helps. Mites thrive on stressed flowers, so steady water routines reduce stress and raise resilience.
How to bottom water houseplants safely in a pot, sink, or container
A reliable soak routine helps houseplants take up only the moisture they need while the surface stays drier. Follow a simple sequence so the potting mix wicks water up, roots rehydrate, and you avoid excess water sitting under the pot.

Set the water level so moisture wicks up through the mix
Place the pot with a drainage hole into the saucer, sink, or storage container first. Add lukewarm water around the pot so the level comes partway up the side.
Tip: In a basin setup, fill closer to the rim so moisture climbs quickly. Do not float the pot.
Soak time guidelines by pot size and root ball density
Small pots: 10–30 minutes. Medium or dense root balls: 30–60 minutes. Watch the mix, not just the minutes.
Experts recommend stopping well before six hours. Kate Ferguson and Savannah Toal note denser roots often need longer soaks than loose mixes.
What to expect, how to drain, and avoiding excess water
Air bubbles are normal as trapped air escapes. You’ll know the pot is done when the top feels evenly damp, the weight increases, and bubbling slows.
Remove the pot, let it drip until it no longer sheds water, and empty the saucer or sink. Never leave a planter sitting in standing water.
When this method is a bad fit and quick troubleshooting
Avoid this approach for bulb species such as alocasias and any pots that stay wet or lack airflow. If the surface never moistens, the mix may be hydrophobic or compacted — consider repotting into a better-draining potting mix.
When to water and how to avoid overwatering indoors
A quick check before you water saves a lot of stress for the root system and the foliage above.
Finger test and the two-inch rule
Insert a finger about two inches into the soil. If it feels dry at that depth, it’s usually time to water.
Exceptions include succulents and cacti, which need longer dry spells. Use this rule as your basic cue for most houseplants.

Weight-check method for fast checks
Lift the pot right after a thorough soak to learn the “heavy” feel. Later, lift the pot again—when it feels much lighter, the next time to water is near.
Why a fixed schedule backfires
Humidity, temperature, light, and growth change how fast soil dries. A calendar can’t read the root zone, so scheduled water can cause overwatering or underwatering.
Quick habit: before any scheduled date, pause and do the finger or weight check. That small step prevents the most common problem—adding too much water too often.
| Check | What to look for | Action |
|---|---|---|
| Finger test | Dry 2″ deep | Water now (except succulents) |
| Weight feel | Noticeably lighter | Plan to water that day |
| Leaf signals | Wilting or yellowing | Confirm with soil and weight before adding much water |
Consistent, proper hydration supports recovery from spider mites and helps flowering plants regain vigor.
Pairing bottom watering with top watering to prevent mineral buildup and boost plant growth
Occasional surface rinses clear salts that can slow growth and harm roots.
Why a surface flush helps: Relying only on a capillary soak can let dissolved minerals concentrate as water evaporates. That buildup shows as slowed growth, brown leaf tips, leaf drop, or a crust at the soil line or near the drainage hole.

How to leach safely: Remove any crust, then run plain water through the potting mix until it flows out the drainage hole. Use at least twice the pot’s volume and let it drain fully each time.
Never let a pot sit in drained water. Empty saucers so roots don’t sit in excess water and risk damage.
- Hybrid way: water from the top until the tray fills, wait ~10 minutes, repeat until the tray stays full, then discard tray water after a day.
- Water choices: avoid softened water; prefer rain, distilled, or tap left to rest overnight.
Quick routine: Use capillary soaks most of the time, but top water every 4–6 months to flush salts. Cleaner soil means healthier root function and stronger growth for your houseplant blooms.
Conclusion
A quick, weekly inspection can stop minor infestations before they harm blooms.
Key takeaway: Catch spider mites early so your flowers recover fast, and improve how you water to cut plant stress,
Use the capillary soak method for steadier root-zone hydration, a drier surface, and a practical way to avoid guessing how much water a pot needs.
Always drain fully and never let houseplants sit in standing water after a soak. Make the finger test or weight-check a habit so the method does not become overuse.
Top water occasionally to flush minerals if you fertilize or have hard tap water. Inspect leaves weekly, isolate and treat quickly if mites appear, apply bottom watering thoughtfully, and watch new growth over time.