Quick promise: this guide helps you spot signs of overwatering flowering houseplants and fix the problem fast, without guessing or sticking to a rigid watering routine.
Overwatering indoors happens when roots sit in waterlogged soil and cannot breathe. It often looks like wilting, yellow leaves, or soft stems — easy to mistake for underwatering at first.
Stop watering right away if you suspect trouble. Let the soil dry through the pot, remove any standing water, and check drainage holes before deeper rescue steps.
This piece is for US indoor gardeners who keep blooming plants in lower light or cool rooms where moisture lingers. You’ll get visual clues for leaves, stems, soil, and pests plus simple checks so you don’t act on a single sign.
Roadmap: basics → why it happens → symptoms → confirmation → fastest fix → serious rescue → long-term setup → conclusion.
Key Takeaways
- Overwatering is a leading cause of indoor plant decline; roots need air, not constant water.
- Look at leaves, stems, and soil together before changing care.
- If in doubt, stop watering and let the pot dry; remove standing water first.
- Low light and cool rooms increase risk — check pots and drainage.
- This guide gives quick checks plus steps for a faster rescue.
Overwatering basics for indoor flowering plants
What most people call overwatering is really a habit of rewetting soil before it can dry properly. That habit matters more than the single amount you pour in one session. A fixed schedule can backfire if the potting mix still holds water.

Why frequent wetting hurts roots
When potting soil stays saturated, air pockets fill with water and oxygen drops. The roots can’t breathe and become weak.
That creates ideal conditions for root rot. Rotting tissue stops absorbing water, so plants may wilt even when the pot feels wet.
Proper watering versus constant wetness
Proper thorough watering means watering until you see drainage, then waiting for the mix to dry below the surface.
By contrast, constant wetness comes from watering again too soon. Think of managing oxygen + moisture in the root zone, not just pouring more water on top.
Quick preview: later sections will show how to test below the surface and what to do fast if the roots are stressed.
Why flowering houseplants get overwatered so easily indoors
Shorter days and cooler rooms quietly change how much water a plant uses. In winter and low light, growth slows and plants pull far less water from the soil. The same routine that worked in summer can leave the root zone too wet.
Low light also slows evaporation. That means surface checks can be misleading: the top may feel fine while the mix below holds moisture for much longer.

How pot, mix and room conditions trap moisture
Compact or fine potting mixes hold water around roots because they lack air pockets. That slows drying time and raises the risk that roots will sit in excess water.
Pot material matters. Terracotta wicks and dries faster, while ceramic and plastic can retain moisture and extend wet time in the soil.
Poor airflow, humid bathrooms or cool corners make drying worse. Plants in cache pots or trays that hold runoff never get a good chance to breathe.
| Factor | Effect on soil | What to watch for | Quick fix |
|---|---|---|---|
| Low light | Slower uptake and evaporation | Soil stays damp below the surface | Reduce water amount and check deeper moisture |
| Fine potting mix | Poor air and slow drainage | Root zone remains wet after watering | Amend with chunky material for better air |
| Pot material & drainage | Terracotta dries; plastic holds water | Pots without holes trap excess water | Use pots with drainage holes and avoid closed trays |
| Poor airflow | Humidity stays high around soil | Longer wet time, pest pressure | Increase air movement and remove standing water |
Small care changes—moving a plant, turning on heating, or the shift into spring—change drying time. Watch how the soil dries and adjust water amounts, not just watering schedule, to match current conditions and your own experience.
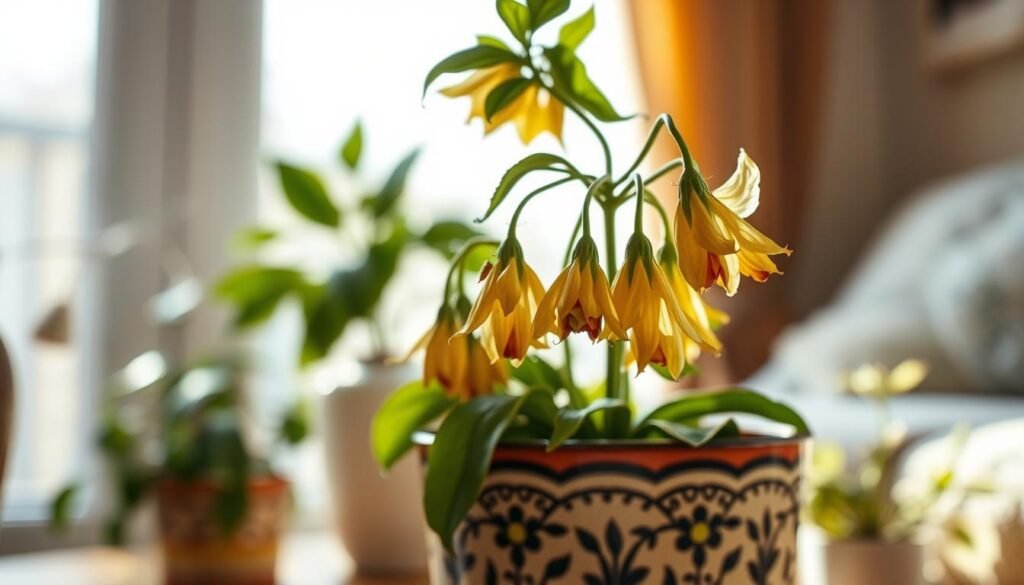
Signs of overwatering flowering houseplants
A cluster of visual clues will tell you when a plant is sitting in too much water. Read the leaves, stems, and soil together to avoid a false alarm from one isolated issue.

Yellow, limp foliage versus dry, crispy leaves
Yellowing leaves that feel soft and droopy usually point to excess moisture. They look limp rather than dry and papery, which is common with underwatering.
Wilting while the soil is wet
Wilting even though the soil is wet is a red flag. Roots may be failing to take up water because they are stressed or suffering root rot.
Sudden leaf drop
Watch for multiple leaves falling at once, both old and new. Sudden leaf drop often signals declining root function from prolonged saturation.
Mushy stems and rotten smell
If the stem base feels soft or the soil line gives off a rotten odor, decay is likely present. That mushy feel means tissue is breaking down.
Brown spots, mold, and gnats
Brown spots or edges with yellow halos can mean bacterial trouble encouraged by poor airflow and excess water.
Fungus or mold on the soil surface — even tiny mushrooms — shows the top stays too moist. Adult fungus gnats hovering near the pot and larvae in the mix also point to persistently damp soil.
| Visible clue | What it means | Quick check |
|---|---|---|
| Soft yellow leaves | Roots not absorbing; too much water | Inspect lower leaves and soil moisture below surface |
| Wilting with wet soil | Root stress or root rot | Lift pot to feel weight and check drainage |
| Mushy stem / bad smell | Tissue decay at the root crown | Gently probe base and smell the soil line |
| Soil mold / mushrooms | Persistent surface moisture | Remove top layer and let dry; improve airflow |
| Fungus gnats | Breeding in wet organic mix | Use yellow traps and let mix dry between waterings |
Tip: Look for a cluster of these clues rather than panicking over one single mark. That will help you confirm a true moisture problem before changing routine.
How to confirm the problem before you change your watering routine
Don’t trust the top layer. The surface can look dry while the root zone stays soggy. Confirm soil moisture throughout the pot before altering your watering routine.

Use a finger or a wooden stick to check deeper
Push a finger or a wooden chopstick down into the soil to the root zone. If your finger feels cool and damp, or the wood darkens, the mix is still wet and you should wait longer before watering.
Use a moisture meter and inspect drainage holes
Insert a moisture meter into several spots to spot trends rather than one reading. Check through drainage holes for pooled or persistently wet mix near the bottom — that often means excess water is trapped.
Pot weight and recent care review
Lift the pot to compare weight when wet versus dry; this quick check helps you learn watering time. Also review recent care changes: cooler rooms, less light, or recent feeding can slow drying and mimic other problems.
| Check | How to do it | What it tells you |
|---|---|---|
| Finger / stick | Insert 2–3 inches into soil | Detects moisture in the root zone |
| Moisture meter | Measure multiple spots; note trends | Gives objective soil moisture readings |
| Drainage holes | Look for wet mix or standing water | Shows if water is draining or trapped |
| Pot weight | Compare heavy vs. light lift | Quick feel for wet versus dry pot |
Quick diagnostic note: Yellow leaves or drop can have many causes. Pair these checks with visual clues before changing care. Once you confirm the soil is staying too wet, stop watering and remove any standing water immediately.
The fastest fix for an overwatered flowering houseplant
Pause all watering now and give the pot time to dry through, not just at the top. This is the fastest safe move for mild cases: letting excess water leave the root zone restores oxygen and gives stressed roots a chance to recover.
Immediate action plan
Do this first: stop watering for the next few weeks and empty any drip trays or cache pots right away. Do not let the bottom of the pot sit in runoff.
How to check drying progress
Re-check soil moisture every few days using a finger, a wooden chopstick, or a moisture meter. Test several spots and the area near the drainage holes to confirm the mix is dry throughout the pot, not only at the surface.
How to water later
When you resume, water thoroughly until it runs from the drainage holes, then let the pot drain fully. Avoid “small sips” that keep the soil perpetually damp.
- Use pot weight to learn wet vs. dry—lifting helps you time future watering.
- Be patient: plants can look worse before improving as roots regain function.
- Caution: if mushy stems, strong odors, or severe leaf loss appear, move to root inspection and repot steps immediately.
When the damage is serious: rescuing roots and resetting your setup
Severe decline calls for unpotting and a hands-on root check rather than more patience. If you see a mushy crown, a foul odor, or steady wilting while the soil stays wet, escalate to root inspection now.
Unpot and inspect: healthy versus rotten
How the roots should look: healthy roots are white to pale yellow and feel firm. Rotten roots are dark, soft, slimy or mushy and often emit a foul smell.
Trim, sterilize, and stop spread
Use sharp pruners or scissors to remove all mushy tissue. Wipe tools with alcohol between cuts to prevent spreading rot. Discard severely decayed root pieces and the saturated soil around them.
Repot and reset drainage
Choose fresh indoor potting soil and a clean pot with drainage holes. If you reuse the pot, wash it thoroughly with hot water and mild detergent before planting.
| Step | What to do | Why it helps | Notes |
|---|---|---|---|
| Inspect roots | Remove plant and check root color/texture | Confirms extent of rot | Look for white/yellow vs brown/black |
| Trim rotten roots | Cut mushy tissue; sterilize tools | Stops spread of infection | Use alcohol wipes between cuts |
| Repot | Use fresh soil + pot with holes | Restores clean medium and drainage | Discard saturated old soil |
| Improve long-term | Add perlite, bark, charcoal; increase airflow | Boosts air pockets and dries soil evenly | Terracotta helps wick moisture; plastic holds water |
“After repotting, water until it drains, then return to moisture-based care rather than a fixed schedule.”
Final way forward: water only when the mix is dry through, keep airflow up, and choose pots and soil that suit your experience and room conditions. This reset gives the roots the best chance to recover and keeps rot from returning.
Conclusion
The simplest way to keep plants healthy is to learn when the soil actually needs water. Make a habit to check soil moisture before every watering and adjust your routine for lower light or cooler rooms.
Prevent problems by matching watering to each plant’s needs. Ensure good drainage, remove standing water, and use breathable mixes and terracotta for heavy-handed waterers.
Remember the highest-signal clues: limp yellow leaves, wilting in wet soil, sudden leaf drop, mushy stems or odor, surface mold, and fungus gnats. If a pot feels persistently heavy, stop watering and let it dry through to remove excess water.
If a plant doesn’t rebound after drying out, inspect roots and repot promptly. Early action saves most plants.