Want to turn one Ficus elastica into several showy housemates? This guide makes that simple. You can multiply a single specimen with basic tools and a bit of timing.
Ficus elastica is prized for its thick, glossy leaves and it roots well when actively growing in spring and early summer. Two clear routes work best: stem cuttings for beginners and air layering for a hands-on approach.
Successful results mean healthy new roots, steady shoots, and a young specimen that moves into regular care without rot. Expect variability: light, temperature, and humidity all shape outcomes.
This piece is a step-by-step how-to with timing, tools, and troubleshooting. Be cautious: the milky sap can irritate skin and eyes, so use gloves and wipe tools clean after each cut.
Key Takeaways
- Ficus elastica roots best in active spring-to-summer growth.
- Choose stem cuttings for ease; pick air layering for higher success with large stems.
- Look for healthy roots and new leaves as signs of success.
- Wear protection—sap may irritate skin and eyes.
- Adjust care for light and humidity; results vary by home conditions.
- For related advice on light and recovery, see this guide about leggy indoor growth: leggy stems and light recovery.
Why Propagate a Rubber Plant (Ficus elastica) at Home?
You can expand your collection or reshape an overgrown specimen by rooting cuttings at home. Practical reasons include filling out a leggier stem, making a backup, sharing with friends, or shortening a tall specimen after pruning.
What to expect: timelines, success rates, and new growth cues
Expect patience. Stem cuttings often take weeks to months to set firm roots in soil. Air layering usually shows roots in about 6–10 weeks. Watch for resistance when you gently tug a cutting, new leaf buds, and steady, not sudden, growth.
| Method | Typical Time | Success Cue |
|---|---|---|
| Stem cutting | Weeks to ~3 months | New shoot or firm roots when tugged |
| Air layering | 6–10 weeks | Visible roots in moss wrap |
| Water rooting | 2–8 weeks | Several inch roots, ready to pot |
Safety first: latex sap irritation and basic handling tips
Ficus elastica produces milky latex sap that can irritate skin and eyes and is toxic if swallowed. Wear gloves, protect surfaces, and keep cuttings away from curious kids and pets.
Clean cuts and warm, bright conditions boost success rates. With simple sap management and steady indoor care, propagation at home is straightforward and rewarding.
Best Time and Conditions for Rooting Rubber Plant Cuttings</h2>
Cuttings started in warm, active months root faster and recover more reliably.
Why spring to early summer gives the fastest growth
Spring to early summer is the best time because the specimen is in active growth. New shoots and stems are forming tissues that readily become roots.
Avoid winter attempts. Cool, slow growth delays rooting and raises failure risk.
Target temperature, light, and humidity for reliable rooting
Aim for a warm room around 70–77°F (21–25°C). Keep cuttings away from cold drafts and sudden swings in temperature.
Place them in bright, indirect light. Direct sun can scorch leaves; too little light often causes leaf drop and stalled growth.
Higher humidity helps. It reduces water loss from leaves while the cutting has no roots, improving survival.
“Consistent warmth, steady light, and gentle humidity are the three simple ingredients for reliable rooting.”

| Factor | Target | Why it matters |
|---|---|---|
| Season | Spring–early summer | Active growth speeds root formation |
| Temperature | 70–77°F (21–25°C) | Warmth stimulates root tissue development |
| Light | Bright, indirect | Supports photosynthesis without stress |
| Humidity | Higher than average | Reduces leaf water loss before roots form |
| Water | Lightly damp media or clean jar | Avoid soggy conditions to prevent rot |
Set a consistent spot and avoid moving cuttings often. Keep conditions steady for several weeks and check moisture regularly.
Tools and Supplies You’ll Need</h2>
Prep makes success easier. Gather a compact kit before you start: a sharp knife or pruning shears, gloves, a small starter pot with drainage holes, and an airy soil mix. Add a clear plastic bag or dome to raise humidity while roots form.
Clean blades and why sharp matters
A sharp, sanitary blade gives a clean cut that heals quickly. A tidy cut end lowers infection and rot risk and helps new root tissue form.
Sanitize tools with soap and water or rubbing alcohol between cuts, especially if you make multiple cuts from the same specimen.
Picking the right pot and drainage
Use a small pot so soil stays evenly damp without holding excess water. Drainage holes are non-negotiable; they prevent waterlogging and root loss.
Choosing a rooting medium
Peat-free starter mixes hold moisture while staying airy. A well-draining potting soil works too and eases the later move into a larger pot.
Both options give good support in a warm, bright environment; choose based on availability and long-term plans for the young plant.
Humidity cover and rooting hormone
Covering the pot with a clear plastic bag or dome creates a mini greenhouse. Vent it daily to prevent mold and to balance humidity and fresh air.
Rooting hormone can speed root formation on slower sections or thicker stems, but it’s optional for healthy, vigorous cuttings in warm conditions.
Keep it tidy: paper towels for sap, a tray to catch loose soil, and a stable spot to avoid knocks make the process cleaner and safer.
rubber plant propagation Methods: Cuttings vs Air Layering</h2>
Deciding between cuttings and layering comes down to size, patience, and how established you want the new start to be.
Stem cuttings: easiest method for most indoor gardeners
Stem cuttings are the simplest route. You remove a short section of stem with a node and some leaves, then encourage roots in soil or water.
This method needs minimal gear: a sharp blade, a jar or pot, and loose mix or clean water. It is fast to set up and suits quick multiplication.
Air layering: slower setup, stronger start for bigger stems
Air layering roots a stem while it stays on the parent. You make a wedge cut, pack moist sphagnum, and wrap with plastic until roots appear.
Layering takes more time and fuss, but it often yields a larger, well-rooted section that transplants with less shock. Expect visible roots in about 6–10 weeks.
“Choose cuttings for speed and numbers; choose layering when you want a sturdier, larger new specimen.”
- Pick cuttings if you want quick multiples and you have small to medium stems.
- Pick air layering for thick stems, low-humidity homes, or when you prefer a stronger start.
How to Take a Healthy Rubber Plant Cutting</h2>
Start by spotting a sturdy stem that shows active growth and clear nodes—these are rooting hotspots.
Choose the right stem: pick a mid-aged shoot about 4–6 inches (10–15 cm) long, or up to 8 inches for larger cuts. Avoid very new tips and old, woody sections.
Check the node: look for the small bump where a leaf attaches. This node is where roots form, so ensure one or two nodes are included in your cutting.
Where and how to cut
Make the cut just below a node at a slight angle. An angled cut increases surface area and keeps water from pooling on the wound.
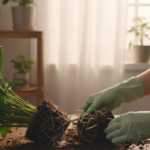
Leaf and sap prep
Remove lower leaves so they won’t sit in soil or water and cause rot. Keep one or two top leaves to support photosynthesis.
Let milky sap bleed for a moment, then dab or rinse the cut end with a damp cloth. Wear gloves—sap can irritate skin and eyes—and clean any drips quickly from surfaces.
Handling tips for better results
- Avoid crushing the stem or tearing leaves; use a sharp blade for clean cuts.
- Shade the fresh cutting from harsh sun until roots form.
- Label your cutting with date and method so you can track progress and care.
How to Root Rubber Plant Cuttings in Soil</h2>
A simple soil setup—good drainage, a buried node, and steady humidity—starts roots on the right path.
Step-by-step: Fill a small pot with a well-draining seedling mix or light potting soil. Make a hole, insert the cutting so the node sits just under the surface, and firm the mix so the stem stands upright. Place the pot where light is bright but indirect and the temperature is steady.
Cover the pot with a clear plastic bag or dome to raise humidity. Use small stakes if the plastic would touch leaves. Vent the cover daily to prevent mold and stale air.
Keep the soil lightly damp—mist the surface if it starts to dry. Avoid heavy watering; soggy mix leads to rot and slows root formation.
What to watch for
Expect slow progress: some cuttings need several weeks to show roots, and home setups can take up to three months. Look for firmer leaves, a new growth point, or gentle resistance when you tug—these are readiness cues.
- Avoid low light, cold rooms, and overwatering—each raises failure risk.
- Once roots form, remove the plastic cover gradually and move the young specimen to normal room humidity.

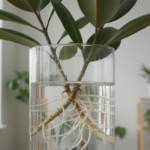
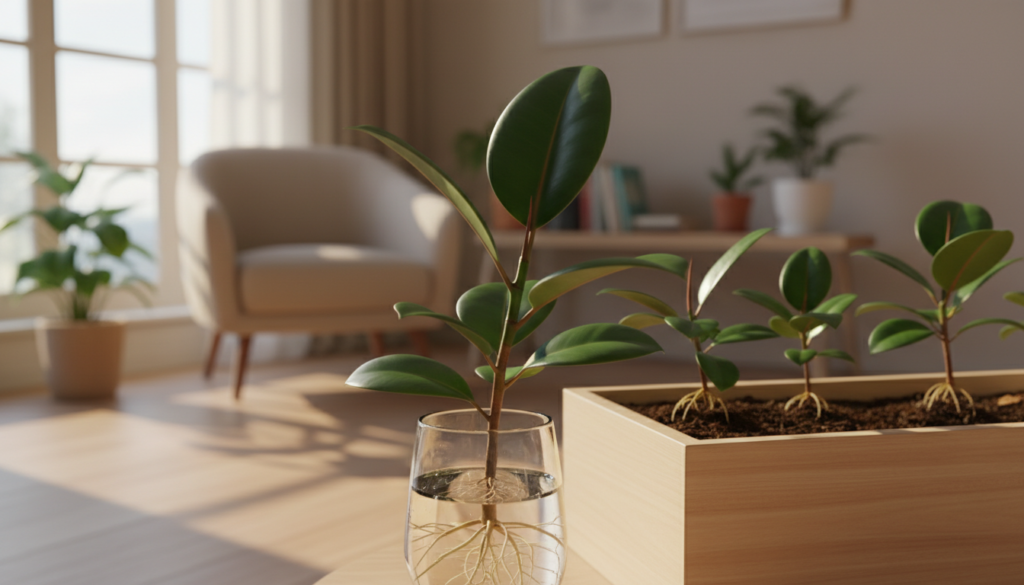
How to Root Rubber Plant Cuttings in Water</h2>
Water rooting lets you watch root growth day by day, making it satisfying and foolproof for many home growers.
Why water works: It’s easy to monitor progress and spot problems early. This method is great when you want to see roots form without disturbing the cutting.
Setting up the jar
Use a clear jar and fill it with lukewarm water. Place the cutting so only the cut end and the lower node sit under water.
Keep all leaves above the waterline to reduce rot. Position the jar in bright, indirect light and out of drafts.
Water quality and hygiene
Change the water every three days. Rinse the jar if it becomes cloudy and remove any yellowing leaves right away.
Clean water prevents slime and bad smells that signal trouble.
When to pot up and transplant tips
Roots often appear within a week. Wait until a root reaches about 7 cm (3 inches) before potting.
Pre-moisten the soil in a small pot. Plant gently to avoid snapping the new root and keep humidity slightly higher for the first week.
| Sign | Healthy | Trouble |
|---|---|---|
| Root color | White to pale cream, firm | Blackening or brown, mushy |
| Stem condition | Plump and steady | Slimy, soft, or emitting sour smell |
| Water | Clear with occasional fine particles | Cloudy, foul odor, film on surface |
Quick checklist: warm water, leaves clear of the jar, fresh water every ~3 days, and pot when roots are strong. Simple care at this stage sets the young specimen up for healthy, steady growth.
How to Propagate Rubber Plants with Air Layering</h2>
Air layering is the go-to method when you want a substantial, well-rooted offshoot from a mature specimen without removing the whole branch.
 branch demonstrating the air layering propagation technique. In the foreground, focus on the section of the branch wrapped in moist sphagnum moss and plastic wrap, showcasing the roots beginning to form. The middle ground should feature lush green foliage of the Rubber Plant, with vibrant, glossy leaves highlighting the plant's health. The background should be softly blurred, suggesting a warm, natural light environment, like a sunlit indoor gardening space. The atmosphere is calm and nurturing, emphasizing the gentle process of plant propagation. Use soft, diffused lighting to create an inviting feel, with a shallow depth of field to draw attention to the air layering technique.")
Best stems to layer
Pick a strong, healthy stem with active growth and no signs of pests or disease. Choose a branch thick enough to hold a good root mass when separated.
Making the wedge cut
Make a diagonal cut into the stem, no deeper than halfway. Wipe away sap and insert a clean match or thin wedge to keep the cut open.
Wrapping and humidity
Pack moist sphagnum moss around the wound, then wrap tightly with plastic and tie above and below. The moss holds humidity and the plastic keeps it stable.
Timeline and potting
Expect visible roots in about 6–10 weeks. Check progress by gently opening a small section of the wrap or looking through the plastic if clear. When roots fill the moss, cut below the new root ball and pot the section gently.
Tip: Use a little rooting powder at the cut for a faster start, and keep the new pot warm and shaded while it settles.
Aftercare for Newly Rooted Rubber Plants</h2>
The goal of aftercare is simple: stabilize the young specimen so new roots expand without stress, leaf loss, or rot.
Light placement
Place your rubber plant within about 1.5 m of a bright window. Bright, indirect sunlight supports steady growth.
Avoid low-light spots—the result is often leaf drop and slow recovery.
Watering and root rot prevention
Let the top third of soil dry before you water again. When you water, use lukewarm water and soak until it drains from the pot.
Avoid frequent small sips of water; constantly wet soil invites root rot and weak roots.
Fertilizer and repotting timing
Wait to feed until you see active new growth. Start with a weak, balanced feed and increase slowly if the specimen responds well.
Repot only into the next-size pot with good drainage. Limiting transplant shock keeps moisture levels predictable and supports steady growth.
Tip: Keep the environment warm and draft-free. Stable temperature and steady light make the biggest difference at this stage.
Common Problems When Propagating Rubber Plants and How to Fix Them</h2>
A sudden stall in root development is common, and it often points to simple environmental fixes. Start by checking the node, then review warmth, light, and humidity.

Cutting won’t root: dialing in warmth, light, and humidity
If a cutting shows no roots after several weeks, confirm the node sits just under the surface. Increase room warmth and move to bright, indirect light.
Raise humidity with a ventilated cover and keep soil lightly moist but never waterlogged.
Mushy stems or sour soil smell: early signs of root rot
Mushy tissue or a sour odor means rot. Remove the cutting, trim back to firm tissue, and repot into fresh, well-draining mix.
Avoid standing water; low-oxygen soil invites rot and slows root growth.
Leaf drop and yellowing
Leaves that yellow or fall often point to low light, cold drafts, or overwatering. Stabilize temperature and reduce watering until roots form.
Mold under plastic: airflow fixes
Frequent condensation and white mold mean too little air. Vent the cover daily, wipe excess moisture, and lower misting to stop mildew.
| Sign | Likely cause | Quick fix |
|---|---|---|
| No roots | Too cool or low light | Increase warmth and move to brighter spot |
| Smell / soft stem | Root rot | Trim, repot, use airy mix |
| Mold under cover | Poor airflow | Vent daily, reduce humidity |
Tip: Ficus elastica often reacts to stress with sap and leaf drop. Clean tools and steady conditions improve your chances on the next try.
Conclusion</h2>
Finish strong: give new cuttings steady warmth, bright indirect light, and balanced humidity. Good conditions and patience are the simplest route to healthy roots.
Choose your method: propagate rubber plant clones via soil or water cuttings for ease, or use air layering when you need a sturdier start on thicker stems. Both methods work when you follow basic steps.
Key make-or-break details matter: cut below a node, manage sap safely, keep humidity up, and avoid waterlogged soil in a pot or tray. Results take time—often weeks to months—so steady conditions matter more than constant tinkering.
Next step: pick one method, gather a few supplies, and start with a single cutting at home. With stable light, careful watering, and gentle repotting, new growth will turn those roots into lasting plants.