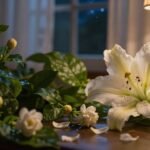
Surprising fact: up to 40% of house gardens fail to bloom because roots are cramped or they lack the right supplemental light.
This guide helps you repot potted blooms the smart way and choose a grow setup that actually coax buds in typical U.S. homes. We’ll cover when to move a plant, pot and soil basics, and a practical shopping framework.
Learn how fresh soil and room for roots work with good light to make flowers show up. Kody J. Ketterling says quality grow fixtures can “mimic what the outside world does” and trick plants to bloom. That matters because many healthy-looking pots still never set buds.
Expect clear, test-informed advice and real examples: clip-on, pendant, floor-stand, bar, and bulb retrofits. By the end you’ll have a short list of features to pay for and ones to skip so you do not overspend or buy an underpowered option.
Key Takeaways
- Repot when roots crowd the pot or soil drains poorly.
- Fresh soil + root room help, but proper supplemental light is often the missing piece.
- Choose a grow option by spectrum, intensity, coverage, photoperiod, placement, and safety.
- Match fixture format to your space: clip, pendant, floor, bar, or bulb retrofit.
- Focus on features that affect flowering, not gimmicks, to save money.
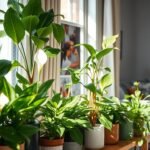
Why indoor flowering plants need supplemental light at home
Rooms can look bright but still leave pots short of steady, usable sun. Glass filters and window depth cut intensity. Seasonal shifts also shorten the total usable day, which slows bud set and growth.
How grow lights “fake plants out” to encourage growth
Supplemental fixtures mimic outdoor cues. They add consistent hours and the right spectrum to keep a plant on a healthy rhythm.
“grow lights mimic what the outside world does and fake the plants out and encourage them to grow.”
That “fake” effect boosts leaf production, strengthens stems, and builds reserves that help buds form.
Why winter days and low-window light change results
Shorter, low-angle days from December to February can stop a pot that bloomed in summer from making buds. Supplemental lighting often only needs to add targeted hours at key times, not run all day.
- Glass and distance reduce usable illumination.
- Timed, focused grow light use can restore steady growth rhythms.
- Match a fixture to the plant’s needs and your home’s layout before buying.
| Issue | Why it matters | Quick fix |
|---|---|---|
| Window glare only | Filtered spectrum, low intensity | Use a small grow light for key hours |
| Short winter days | Insufficient daily photoperiod | Extend day with timed supplement |
| Tight shelf or apartment | Distance from natural source | Choose targeted bars or clips |
Signs your flowering houseplants aren’t getting much light
Many houseplants silently struggle when they don’t get steady, usable light. Look for simple, visible clues before you change soil or boost fertilizer. Correcting the light often fixes issues faster than feeding more.
Leggy stems, leaning, and smaller leaves
Stretching and thin stems mean a pot is reaching toward a brighter source. New leaves may be smaller as the plant spreads its energy.
Why this happens: the plant prioritizes vertical reach to find energy, which weakens stems and harms future blooms.
Yellowing leaves, leaf drop, and loss of variegation
Leaves that yellow or fall off can signal stress. This can overlap with watering problems, so check soil moisture first.
If a specimen loses its variegation, it often reverts to greener tissue to make more chlorophyll. That is a survival move, not a permanent loss.
Failure to set buds or bloom indoors
A plant can stay alive yet not reproduce. When energy is tight, it won’t form buds.
- Common patterns: leggy stretching, leaning toward windows, and smaller new leaves.
- Quiet signs: slower growth, longer gaps between leaves, and thin stems that can’t hold flowers.
- Quick check: is the pot reaching toward the window or lamp?
Buyer takeaway: fix intensity, hours, and distance before increasing feed. Most of these symptoms clear within weeks once the light issue is solved.
| Symptom | Probable cause | Quick action |
|---|---|---|
| Leggy stems | Low usable light; reaching behavior | Raise source or add a targeted lamp |
| Yellowing leaves | Stress from low energy or watering overlap | Check moisture, move closer to bright hours |
| Loss of variegation | Plant reduces patterning to boost chlorophyll | Increase steady exposure, avoid sudden moves |
| No buds | Insufficient energy for reproduction | Give longer photoperiod and more intensity |
How much light do indoor plants need for growth and blooms?
A clear rule of thumb — lumens per square foot — turns vague advice into a shopping number.
Practical intensity ranges
Low: ~10–15 watts or 50–250 lumens per square foot.
Medium: ~15–20 watts or 250–1,000 lumens per square foot.
High: >20 watts or more than 1,000 lumens per square foot. Full-sun types and many seedlings often need ~2,000–3,000 lumens.

Why seedlings and sun lovers need more
Seedlings build compact stems and stored energy. Weak brightness makes them tall and thin.
Higher intensity helps buds form on sun-loving varieties and keeps herbs compact and productive.
Match plant type to room exposure
- North windows → low ranges.
- East/west → medium ranges.
- South/southwest → high ranges; use supplemental lighting if your room still falls short.
| Plant category | Lumens/ft² | Quick action |
|---|---|---|
| Shade-tolerant | 50–250 | Use lower setting, less runtime |
| General bloomers | 250–1,000 | Medium intensity, timed hours |
| Seedlings & full-sun | 2,000–3,000 | Strong panels or close bars |
Best light for indoor flowering plants: spectrum basics that impact blooming
The colors emitted by a fixture directly influence whether a plant builds leaves or blooms.
Full-spectrum led bulbs mix reds, blues, and mid-range tones in one package. That balance supports roots and leaf growth now and helps buds set later. In buyer terms, a true full-spectrum option reduces swapping bulbs between stages.
Full-spectrum LED and what it means across stages
Why it matters: a steady white spectrum keeps growth compact and avoids stretching after repotting. Many shoppers pick a 3000K 40W LED like Soltech Aspect when they want a cozy room glow that still drives growth.
Red vs. blue: simple roles
Blue peaks boost photosynthesis and strong leafy structure. Red peaks signal reproduction and encourage blooming. Choose a unit with strong red output if steady flowering is the goal, but keep the spectrum balanced.
Color temperature and comfortable room glow
Kelvin measures color. A 3000K bulb feels warm and homey. Cooler color choices look clinical but can suit workspaces or propagation shelves. Many prefer white full-spectrum over purple “blurple” options because it looks normal in living spaces.
- Practical tip: prioritize full-spectrum with red emphasis plus enough coverage after repotting.
Bulb type and fixture options: LED bulbs, fluorescents, and more
Choosing the right bulb type changes how much usable energy reaches a pot and how often you’ll replace a lamp.
LED vs fluorescent: efficiency, lifespan, and disposal
LEDs use less power, run cooler, and last far longer than legacy options. That saves running costs and reduces how often you swap bulbs.
Fluorescents are affordable up front and work in many fixtures. But they contain mercury, so proper disposal matters. True full-spectrum fluorescents can be harder to find today.
Why incandescent and halogen run hotter and can stress leaves
Incandescent and halogen bulbs put out heat, not efficient usable photons. That heat forces you to place the source farther away, cutting usable intensity and raising stress risk.
“Swapping in a full‑spectrum LED bulb into an existing lamp is often the simplest retrofit that makes a real difference.”
When a simple LED bulb swap is the best retrofit move
If you already have a safe, adjustable lamp, choose a named option like a GE Grow LED bulb and retrofit the socket. It costs less than a new fixture and gives immediate gains.
Buy tip: pick bulb-only when you need a plug‑and‑play update. Buy a dedicated fixture when you need broader coverage or aim control for multiple pots.
| Bulb type | What to expect | Quick decision point |
|---|---|---|
| LEDs | Low power use, long life, cool operation | Good retrofit, lower long‑term price |
| Fluorescents | Lower upfront cost, contains mercury | Workable short term; check disposal rules |
| Incandescent/Halogen | High heat, short life, risk of leaf burn | Avoid near foliage; use only if distance is large |
Light intensity and coverage: choosing a grow light that fits your space
Measure the shelf, table, or tray you plan to illuminate first. A unit that slightly exceeds that footprint gives even coverage and fewer dim edges.

Understanding lumens, watts, lux, and PPFD
Lumens describe visible brightness to the eye. Use them to compare bulb-style options quickly.
Watts show electrical draw, not usable photons. Compare watts to efficiency (lumens per watt).
Lux measures light at a surface. It’s handy for room tests with a smartphone app.
PPFD (photosynthetic photon flux density) is the most useful metric for growers. It shows actual photons hitting leaves and helps predict bud performance.
Coverage area and practical layout advice
Ad boxes often list a 4×4 or similar coverage. That may suffice for general growth but flowering power usually peaks in the center.
Kody J. Ketterling recommended using more light than you think you need. That reduces edge dimming and future-proofs a growing collection.
Beam spread, reflectors, and centre intensity
Wide beam angles give more uniform spread, but intensity still falls toward edges. Reflectors and diode placement can push usable photons into the canopy.
Mars Hydro’s TS1000 is an example: a dense center diode layout and reflector design focused strong performance in the middle zone.
Match shape to space: panels work for trays and corners, bars suit shelves, multi-arm lamps reach scattered pots, and single bulbs help one specimen.
| Metric | What it tells you | Quick buyer action |
|---|---|---|
| Lumens | Visible brightness; easy cross-check | Use for bulb swaps and quick comparisons |
| PPFD | Photons hitting leaves; predicts bloom success | Pick units with higher center PPFD for buds |
| Coverage claim | Area at lower intensity; often general growth | Choose a unit that exceeds your measured footprint |
| Beam spread / reflector | How even the canopy lighting will be | Prefer wider spread or built-in reflectors to reduce hotspots |
Decision checkpoint: measure your usable footprint, then pick a unit with coverage that comfortably exceeds it. This simple step avoids weak edges and keeps your set-up flexible as pots change.
Photoperiod and hours of light: timers, schedules, and flowering triggers
Plants read the clock in darkness as much as in daylight; timing matters more than nonstop brightness.
Photoperiod is simply the plant’s day/night schedule. A steady cycle helps a specimen set buds and stay vigorous. More hours isn’t always better, especially when flowering depends on changes in day length.
Why no plant needs 24 hours light
Running a lamp around the clock can stress tissue and confuse growth rhythms. That often causes weak stems and poorer bloom signals.
Give a predictable dark block each 24‑hour period so hormonal cycles that trigger buds can operate normally.
Short‑day flowering species and uninterrupted darkness
Some species—Christmas cactus, kalanchoe, and poinsettia—require long, continuous nights to bloom. They often respond when daily light drops below about 12 hours.
Even a brief living‑room lamp that turns on at night can cancel that dark signal and delay or prevent flowers.
Built‑in timer vs plug‑in timer vs smart schedules
- Built‑in timers: Convenient and integrated; check they keep settings after outages.
- Plug‑in outlet timers: Cheap and reliable; a practical fallback if a fixture lacks a timer.
- Smart schedules: Offer ramps, remote control, and sunrise/sunset routines that mimic natural shifts.
“Confirm a timer’s behavior after power loss; some will need reprogramming and can interrupt a flowering cycle.”
Simple starter schedule: try 12–14 hours light, 10–12 hours dark for general bloomers, then shorten to ~10–12 hours light and longer nights for short‑day varieties. Use the timer to keep this steady and watch leaf and bud response to tweak hours and intensity.
| Issue | Quick fix | Buyer check |
|---|---|---|
| Random night lighting | Move lamp or use a timer | Does the timer keep settings after outage? |
| No built‑in timer | Use an outlet timer | Is the outlet timer rated for the fixture’s power? |
| Want flexibility | Choose smart schedule | Can it ramp and mirror sunrise/sunset? |
Placement and distance in inches: getting the lamp height right
Place your fixture at the right height to give leaves steady, even exposure without burning tips. Start with a measured gap so you have a baseline to adjust as plants grow.
Typical LED starting range (about 6–12 inches)
Use ~6–12 inches as a starting point for many houseplants and seedlings. This spacing helps reduce legginess and gives even coverage without wasting output.
Flowering fixtures that recommend more clearance (about 12–18 inches)
Some high-output fixtures advise 12–18 inches. Wider clearance avoids bleaching and glare when a fixture produces stronger photons and broader coverage.
Adjusting as plants grow to prevent legginess and reduce glare
Read the plant: tall, spindly stems mean the source is too far or weak. Pale, curled, or crisp leaves mean it is too close or intense.
Raise the lamp as the canopy gains height and rotate pots so blooms form evenly instead of only on the brightest side.
Angle lights to limit room glare where people sit. Secure cords and bases so the lamp stays stable and away from water.
| Issue | Suggested inches | Action |
|---|---|---|
| Seedlings / young growth | 5–12 | Start close to prevent stretching; raise gradually |
| General house specimens | 6–12 | Balance coverage and intensity; watch leaf color |
| High-output flowering fixture | 12–18 | Increase clearance to avoid bleaching and glare |
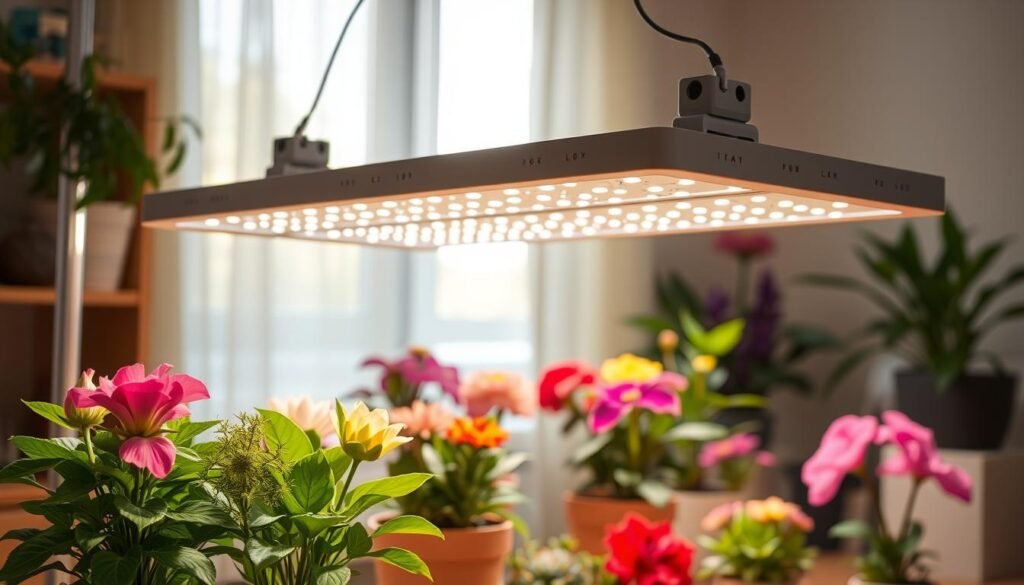
Grow light styles that make sense for real rooms
Pick a fixture style that fits your living layout, not the other way around. Match form to function and your daily routine to get steady results without cluttering a room.

Clip-on and gooseneck options for shelves and tight spaces
Clip-on goosenecks like the GooingTop models save footprint on crowded shelves. You can aim one lamp at multiple pots and bend the neck as seedlings or foliage grow.
Why people like them: tiny footprint, flexible angles, and simple clipping to a shelf or tray.
Floor stands and tripods for tall specimens and flexible layouts
Floor stands such as the LBW Grow Light with Stand suit larger specimens and groupings. Height is adjustable, so you can raise the source as a canopy grows.
They also move easily around furniture and keep cords off traffic paths.
Pendant-style fixtures that blend with décor
Pendants like the Soltech Aspect work where aesthetics matter. These fixtures look like statement lamps and keep a corner tidy while bathing a display in steady coverage.
Choose finishes and cord lengths that match the room and protect pets or kids from low cords.
Stackable bars and light-stand systems for seed-starting
Stackable units such as Gardener’s Supply LED Stack-n-Grow deliver even bars of light across trays. That prevents weak, collapsing seedlings and speeds uniform growth.
They save floor space and make a compact garden station you can expand.
- Clip-ons = shelves and small space; aimable and low footprint.
- Floor stands = tall pots, flexible placement, easy access to water.
- Pendants = decor-friendly coverage for a living room corner.
- Stackable systems = efficient seed-starting and multi-tray setups.
| Style | Good match | Quick tip |
|---|---|---|
| Clip-on / Gooseneck | Shelves, compact space | Use a sturdy clamp and watch tilt as pots grow |
| Floor stand / Tripod | Tall specimens, grouped pots | Position away from walking paths; secure base |
| Pendant | Living room corners, design-forward homes | Match finish and cord length; hide cords safely |
| Stackable bars | Seedlings, multi-tray stations | Space trays evenly and keep bars 6–12 inches above canopy |
Buyer guidance: pick a style that fits your daily life and garden habits. Think watering access, walking paths, pet and kid safety, and whether the setup will be permanent in your home. A sensible choice makes care easier and saves time.
What to look for when shopping: features that matter for flowering plants
Smart shopping begins with a shortlist of technical features, not the flashiest finish.
Full-spectrum modes should include mixed red and blue output so buds and leaf growth both get support. Many top-rated panels offer warm, red/blue, and mixed presets. Mars Hydro TS1000 is high-performing but note it lacks an internal timer, so plan an external outlet timer or smart plug.
Control and acclimation
Dimmers and multiple brightness levels let you ease a specimen into stronger output after repotting. They also help match intensity across seasons and reduce shock. A built-in timer that holds settings after power loss is especially useful.
Adjustability and expandability
Choose fixtures with adjustable arms, rails, or hanging length so bulbs stay the right distance as canopy height changes.
Daisy-chaining means you can link several units on one circuit, expanding coverage without extra outlets. That is handy when you grow a small shelf or a wider garden.
Heat, energy, and operating cost
LEDs run cooler than legacy bulbs and draw less energy over long hours. Cooler operation reduces scorch risk and keeps units closer to foliage. Lower draw also cuts monthly operating cost, which matters when you run a steady schedule.
- Checklist: full-spectrum with red emphasis, dimmer, reliable timer, adjustable mounting, daisy-chain option, low heat / high energy efficiency.
- Reality check: buy performance (spectrum, intensity, coverage) before premium extras or decorative finishes.
| Feature | Why it matters | Buyer action |
|---|---|---|
| Full‑spectrum modes | Supports both leaf growth and buds | Choose mixed red/blue presets |
| Dimmer & timer | Acclimates growth; keeps schedule | Verify timer hold after outage; add outlet timer if needed |
| Daisy‑chain | Easy expansion of coverage | Confirm max units per chain and cord rating |
| Heat / energy | Safety near foliage and running cost | Prefer efficient led panels and check watt draw |
If you want a short policy note with purchases or affiliate claims, see our disclaimer.
Best grow light picks by use case: flowers, seedlings, herbs, and décor
Match the fixture style to the job: panels, bars, bulbs, or clips each solve a specific setup need.
Quick shortlist: choose style by purpose rather than trend. Below are tested examples and practical placement tips.
Flowering-focused panels
Mars Hydro TS1000 is a red-rich, full-spectrum panel with strong center output. Place bloomers in the high-intensity zone about 12–18 inches above the canopy to encourage buds.
Seed-starting bars
Gardener’s Supply LED Stack-n-Grow uses horizontal bars. Keep bars close to trays to prevent leggy seedlings and to build sturdy stems.
Small-collection controls
AeroGarden Trio offers three arms, app control, and dimming. It’s ideal for mixed herbs and small groups where fine-tuning and timers matter.
Bulb-only retrofit
GE Grow Light LED Bulb is an easy swap for existing lamps. Use it when the fixture can get within recommended inches; avoid bulb-only fixes if the source sits far from foliage.
Clip-on for tight space
GooingTop clip-on runs on USB and offers timer intervals (4/8/12 hours). Confirm whether settings hold after power loss.
| Use case | Recommended model | Placement | Why it works |
|---|---|---|---|
| Blooming | Mars Hydro TS1000 | 12–18 inches | Red-rich center, daisy-chain capable |
| Seedlings | LED Stack-n-Grow | 5–8 inches | Close, even bars prevent legginess |
| Small mix (herbs) | AeroGarden Trio | 6–12 inches | Multi-arm, app control, dimmer |
| Retrofit bulb | GE Grow LED Bulb | 6–12 inches (fixture dependent) | Easy swap; best when lamp is near canopy |
| Compact shelves | GooingTop clip-on | 4–12 inches | USB powered, timer intervals |
Price, value, and long-term cost: picking the best grow without overspending
Count expected hours per year to compare real operating cost between options.
Upfront price is only part of the picture. Cheaper fluorescents or an old incandescent lamp save money today but can cost more in replacements and disposal over a few seasons.
By contrast, quality led units cost more up front but cut energy use and last far longer. That reduces what you pay in power and replacements when a fixture runs many hours each day.

What features drive the price
Smart controls, dimming, stronger diodes, bigger coverage, and included stands add to a unit’s sticker price. Some add convenience; others change long-term value.
- Smart/app options: ease of scheduling and remote control.
- Dimmer and presets: smoother acclimation after repotting.
- Stronger diodes and wider coverage: fewer units to buy.
- Stands and mounts: saved accessory cost and faster setup.
Simple budgeting framework
Decide the minimum intensity and coverage your beds need, then add comfort features like a timer or dimmer if budget allows.
Practical rule: a modest unit you use every day beats a powerful panel that is awkward and rarely turned on. Prioritize reliability and ease of use over extras that you won’t use.
| Factor | Short-term cost | Long-term cost | Buyer note |
|---|---|---|---|
| Fluorescent | Low | Medium (shorter lifespan, disposal) | Good for short runs; check recycling rules |
| Incandescent / Halogen | Very low | High (inefficient, hot) | Avoid near foliage; high energy use |
| LED / leds | Higher | Low (energy savings, long lifespan) | Best long-term value for year-round use |
| Premium features | Adds to sticker | Variable (depends on use) | Buy only the controls you’ll actually use |
Using grow lights alongside repotting and routine care for better blooms
Repotting often pauses visible growth while roots settle; steady cues help plants resume pushing new shoots. After a move, aim for calm changes rather than sudden boosts in intensity. That reduces shock and speeds recovery.
Timing changes: repotting shock, new growth, and light adjustments
Right after repotting, give a plant a moderate amount of light and a predictable schedule. Start with shorter hours or a lower intensity setting on your grow light and increase over one to two weeks.
Acclimation plan: begin with 8–10 hours per day at a mid setting, then add 1–2 hours or raise intensity every 3–4 days if leaves look perkier. Use a timer or dimmer so adjustments are gradual.
Grouping plants with similar lighting needs to simplify care
Group sun lovers under the strongest fixture and keep shade-tolerant specimens at the edges or on a lower bar. Zoning one room helps you manage water, hours, and placement without constant moving.
- Center: strong coverage for bloomers.
- Perimeter: medium exposure for foliage-focused pots.
- Shelf or separate stand: low output for shade types.
Tie watering to light: brighter conditions increase water use. Re-check soil moisture routines after adding a grow light and adjust watering intervals to match faster drying.
| Change | Immediate action | Follow-up (1–2 weeks) |
|---|---|---|
| Repotting | Moderate hours, lower intensity | Increase hours/intensity as growth resumes |
| Moved under stronger fixture | Use dimmer or shorter run time | Watch leaves; raise lamp to 6–12 inches if pale or bleached |
| Mixed collection | Group by need; zone the room | Rearrange only after observing response |
Bottom line: consistent hours, correct pot size and soil, and steady care routines are the combo that most often turns green but inactive pots into repeat bloomers.
Safety and comfort in a living space
Controlling where a fixture points and when it runs protects eyes and keeps a home tidy. Use sensible placement so a room stays comfortable while your plants thrive.
Eye comfort, glare control, and keeping bright light contained
Aim downward so a lamp does not shine across seating areas. Shades, reflectors, or short hoods help keep beams focused on the pots and out of eye level.
Tip: pick warmer color temperature if the area doubles as a living space; it cuts perceived glare and feels less harsh at night.
“Place the beam where it belongs — on the canopy — and the room will feel normal even with long run hours.”
Cable management, stable stands, and avoiding tip-over setups
Secure tripods and tighten clamps on multi-arm fixtures so a curious pet or child cannot tip a lamp. Tabletop units should sit on level surfaces and be weighted if the base feels light.
Route cords away from watering zones and along furniture legs. Use clips or tape to remove tripping hazards in tight spaces.
| Issue | Quick fix | Suggested inches |
|---|---|---|
| Glare into seating | Lower beam, add hood or shelf lip | Angle downward; avoid eye level |
| Tip-over risk | Balance base, secure clamps | Keep 12–18 inches clearance around base |
| Cord hazards near water | Clip cords, relocate outlet | Keep cords 6–12 inches from pots |
Timers are a comfort feature too: automated on/off keeps the schedule steady and stops late-night brightness in shared space. Follow manufacturer guidance on clearance from leaves and raise a fixture as the canopy grows to prevent stress and reduce glare.
Conclusion
Small, timed changes to exposure and distance usually yield faster, visible gains than new soil alone.
Buying formula: choose a full‑spectrum LED with enough red, match intensity and coverage to your footprint, then lock in steady hours with a reliable timer. This simple order keeps decisions clear and cost sensible.
Most non‑blooming cases trace back to insufficient usable photons, especially in winter. Start fixtures about 6–12 inches above the canopy; some high‑output units do better at 12–18 inches.
One bulb in a lamp can revive a single specimen, while shelves and trays often need bars or panels. Make small, measurable moves: inch the fixture closer, add an hour or two, and watch stems firm and buds form.
Repot thoughtfully—avoid overpotting—and support recovery with steady care. Prioritize proven basics: efficient LEDs, true full spectrum, adequate coverage, and a timer/dimmer before paying for extras.