Surprising fact: you can turn one healthy houseplant into a small collection in a single season — many home gardeners report tripling their plants within weeks when they use the right technique.
This how-to guide explains the philodendron propagation node cut approach so you can turn one healthy plant into multiple new ones at home. In plain terms, a node is a tiny growth center on a stem where roots and shoots form; including it makes success much more likely.
What to expect: we’ll compare water vs. soil methods, show how to pick the right stem, manage leaves, and move a new plant to aftercare. Most success comes in active-growth seasons like spring and summer.
Realistic timeline: think in weeks, not days — light, temperature, and humidity in U.S. homes will affect results. By the end of this article you’ll know which method fits your space, schedule, and comfort level.
Key Takeaways
- One healthy philodendron can become several new plants with a simple node cut method.
- Include the node and provide warmth, light, and consistent moisture for best results.
- We cover both water and soil rooting so you can pick what suits your space.
- Expect visible roots in a few weeks; full establishment takes longer.
- This is an affordable way to grow your houseplants collection and share with friends.
Why Nodes Matter for Philodendron Cuttings
Roots usually start at the little bumps along a stem, so learning to spot them is the key to success. These small growth points are where the plant concentrates the tissue needed to make new roots and shoots.

What a growth point is and why roots form there
The growth point appears as a tiny bump where a leaf joins the stem. It often sits near a joint or an aerial root. Cells there stay active and can turn into roots when given moisture and warmth.
Choosing the best stem for success
Pick a firm stem with at least one visible growth point and one to two healthy leaves. Avoid mushy, yellowing, or pest-damaged sections. Aerial roots are a bonus — they show the stem is ready to make new roots.
When a piece won’t become a full plant
A single leaf without a growth point may live for a while in water, but it won’t develop into a complete plant. If the growth point stays above the water or soil line, rooting often stalls. Placement matters as much as selection.
Best-candidate checklist: uniform color, glossy leaves, no spots, and a plump, unshriveled growth point.
When to Propagate and What to Gather for Success
Before you handle stems, set up a warm, bright spot and gather sterile tools to improve results. Timing and prep matter. Aim for seasons when the plant grows fastest so rooting happens sooner and with less stress.
Best time in the United States
Spring through summer is ideal. Many homes see the strongest growth from March onward. New leaves unfurling, longer internodes, and small aerial roots are signs of active growth. When you spot those, you’ll know the plant is ready for propagation.

Tools and materials to prep
Make sure your shears or scissors are sharp and sterilized. Clean tools reduce infection and rot.
- Sharp, sterilized shears or scissors and gloves
- Clean container for water (rainwater works well)
- Small pot with drainage and a well-draining mix (peat + perlite)
- Optional: sphagnum moss and rooting hormone
Practical conditions: keep a warm spot with bright, indirect sunlight and steady humidity. Avoid cold drafts and direct heat vents. Finally, make sure the environment stays stable while roots form to give new plants the best start.
Philodendron propagation node cut step-by-step
Follow this clear step-by-step routine to prepare a healthy stem and place it where roots can form reliably.
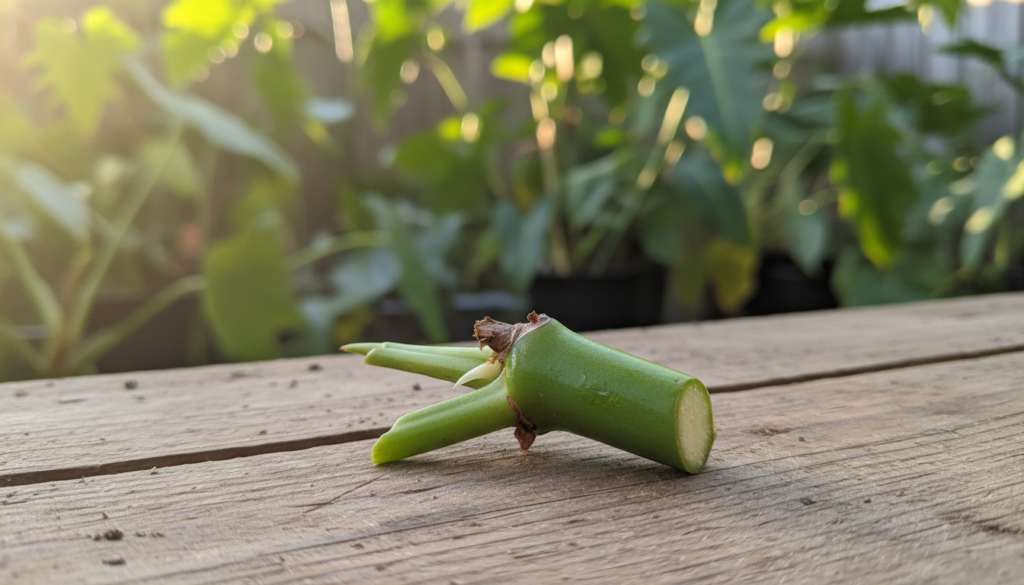
Find healthy points and aerial roots
Look for a firm growth point and any aerial root — that aerial root is a helpful bonus and speeds early rooting.
Make a clean cut and size the piece
Use sterilized shears and slice just below the growth point so it stays on the plant cutting. Aim for a 4–6 inch stem with the node included and 1–2 healthy leaves.

Trim leaves to prevent rot
Remove leaves that would sit in water or touch wet soil. Keep only a couple of leaves to support photosynthesis without excess moisture loss.
When to use rooting hormone
Rooting hormone helps most if you plant in soil, if your home is cool or dry, or with thicker stems that root slowly. It is optional but can improve success.
Where to place the cutting and timeline
Place cutting in bright, indirect sunlight—near a filtered window works well. Check weekly: early on, stems should stay firm and free of mush.
- Weeks 2–4: expect white root nubs in water or gentle resistance in soil.
- If nothing happens: confirm the growth point touches the medium and revisit light, temperature, and humidity.
Quick tip: keep conditions steady—warmth and steady moisture beat extremes for steady growth.
Rooting Methods That Work: Water Propagation vs Soil Propagation
Choose a reliable method based on your time, space, and how hands-on you want to be. Both water and soil methods root in about 2–4 weeks under good conditions.
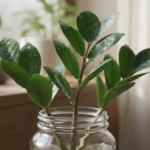
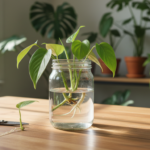
Water basics and how to maintain it
Use a clean glass or jar and fill with fresh water. Submerge the growth point while keeping leaves above the waterline to reduce rot.
Change water every few days, or immediately if it gets cloudy. Clean water keeps oxygen levels up and prevents bacteria.
Soil setup for steady results
Pick a small pot with drainage. Fill it with a well-draining soil mix—peat or potting soil plus perlite works well.
Plant the growth point about one inch deep and firm lightly. Keep the medium lightly moist, not soggy.
Humidity tricks and choosing a method
Use a clear plastic tent or dome to boost humidity, then add gentle airflow to prevent mold. This helps in dry, heated homes.
Tip: choose water if you want to watch roots form; choose soil if you prefer fewer transfers and less weekly upkeep.
| Feature | Water | Soil |
|---|---|---|
| Visibility | Easy—watch roots grow | Hidden until you pot up |
| Maintenance | Change water every few days | Keep medium lightly moist |
| Best for | Small apartments with bright windows | Busy schedules, fewer transitions |
Aftercare for New Plants Once Roots Form
Once roots show clearly, the next steps focus on gentle acclimation so new plants thrive long-term. Proper aftercare reduces transplant shock and helps the new root system build strength.

Transplanting from water to potting soil without shock
When it’s ready: wait until roots are at least 1–2 inches long and look healthy, not just tiny nubs. Stronger roots handle the switch to soil better.
Gentle transition: pot the cutting into moist potting soil and keep the medium evenly damp for 1–2 weeks. Avoid letting it dry out completely while roots adjust.
Light, watering, and humidity for steady growth
Keep the plant in bright, indirect light and steady warmth. Direct sun can stress new growth.
Water thoroughly, let excess drain, then re-water when the top inch starts to dry. This balance prevents rot while supplying oxygen to roots.
If home air is dry, raise humidity with a pebble tray, humidifier, or by grouping plants together.
Tip: small, consistent steps beat big changes. Patience now saves trouble later.
| Goal | Action | Timing |
|---|---|---|
| Acclimate roots | Pot into moist potting soil; keep damp | First 1–2 weeks |
| Light | Bright, indirect light; avoid direct sun | Ongoing |
| Watering | Thorough soak, drain, then wait for top inch to dry | Weekly or as needed |
| Monitor | Watch for wilting, yellowing, or mushy stems | First month |
Conclusion
Turn a single healthy stem into a steady source of new plants by following a simple routine. The most important rule: include a real node, make a clean cut, and keep conditions stable while roots form.
Both water and soil propagation work well; pick the way that fits your schedule and how much you want to watch progress. Keep tools sterile, provide bright indirect light, steady warmth, and patience for 2–4 weeks.
Be sustainable—take only what the parent can spare and grow your collection slowly. Try one or two cuttings first, track changes weekly, and adjust light or moisture rather than starting over.
New plants need the same steady care as mature ones. For tips on fixing lanky growth and rebuilding fullness, see fix leggy growth.