humidity tray for houseplants

Indoor Flower Care for South-Facing Windows: Avoid Leaf Burn

Surprising fact: plants sitting in bright south windows can show sun damage in as little as three days when the air around them is very dry.

Leaf burn often looks like dry, crispy tips, curled leaves, or brown edges that mimic underwatering. Those symptoms can be confusing when soil moisture seems fine.

One simple way to help is a humidity tray for houseplants — also called a pebble tray — which raises moisture in the small air pocket around a pot. It won’t change your entire room’s climate, but it creates a helpful microclimate that keeps foliage softer and less papery.

Quick expectations: this is a gentle, localized fix you set up in minutes. In this guide you’ll learn to spot humidity-driven damage, set up a pebble tray correctly, and pick the best plants and timing for extra tools.

Table of Contents

Key Takeaways

  • South-facing spots can cause rapid leaf edge browning even when soil is moist.
  • A pebble-style humidity tray raises moisture right around the plant without soaking the pot.
  • Look for dry, crisp tips and curled leaves as signs of low local moisture plus heat.
  • This method creates a microclimate, not a whole-room change.
  • Small adjustments at the right time protect blooms and keep foliage fresh.

Why South-Facing Windows Dry Out Indoor Flowers and Trigger Leaf Burn

South windows give great light but also create a drier pocket of air that can stress delicate plants. Strong sun warms the glass and sill, and warmer air holds more moisture, so relative humidity around the pot drops even when the rest of the room feels fine.

Lush green leaves with delicate droplets of humidity glistening on their surfaces, showcasing freshness and vitality. In the foreground, a vibrant indoor plant, such as a pothos or monstera, displays rich green foliage with pronounced veins. The middle ground features moisture-laden air, subtly shimmering, hinting at the humid environment surrounding the leaves. In the background, soft, diffused sunlight pours through a south-facing window, casting gentle warm light that enhances the plant's colors. The atmosphere is serene and nurturing, embodying an ideal indoor garden ambiance. The scene is captured with a macro lens angle to emphasize the texture of the leaves and moisture, creating a connection to plant care, particularly in relation to humidity and leaf health.

How bright light and indoor heat lower moisture and stress leaves

When central heat or radiators run, indoor air dries quickly. Moving air near windows pulls moisture from tissues faster, so transpiration outpaces what roots replace.

That loss shows first at the tips and edges. Petals fade sooner and new growth can fail to open.

Symptoms that mimic underwatering or too much light

Watch for dry, crispy tips, browned margins, curled leaves, and slow-to-unfurl new growth. If you are watering normally and the problem appears only in the sunny spot, low humidity is likely.

Room-by-room microclimates and quick fixes

Bathrooms and kitchens often run more humid near sinks and showers, so moving a plant there can help if light works. A low-cost add-on: place a small dish of water on a radiator so water evaporates into the air and raises moisture slightly during heating season.

Next: if moving the pot isn’t possible, a pebble solution creates a local microclimate that protects foliage without changing the whole environment.

How to Set Up a Pebble Tray the Right Way

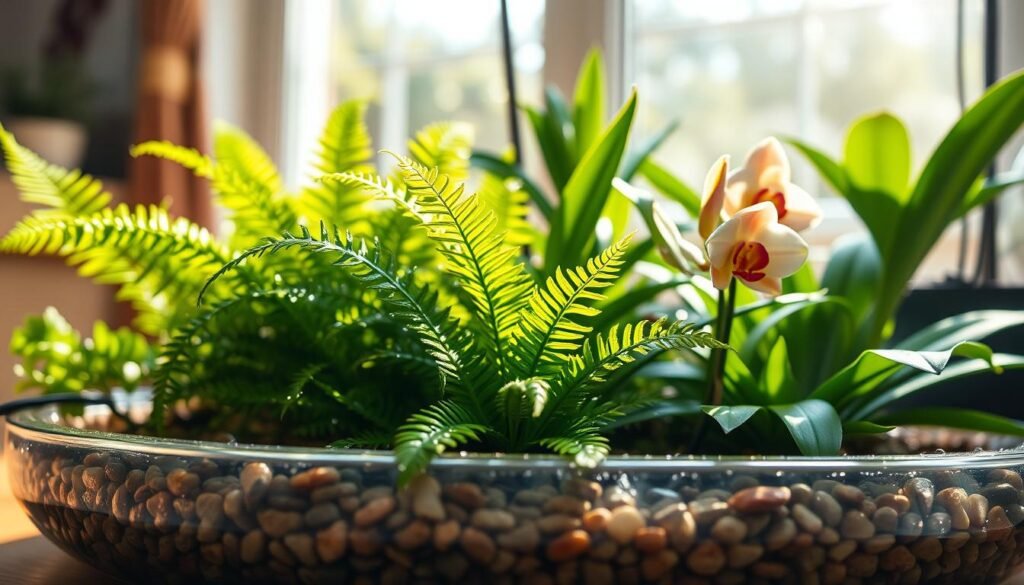
Start simple: a pebble tray is a shallow saucer filled with pebbles and a little water. The pot sits on the stones so the plant is surrounded by moist air, not sitting in soaked soil. This creates a small protective bubble that softens foliage near bright windows.

A decorative pebble tray set up for indoor houseplants, positioned on a beautifully arranged tabletop near a sunlit window. In the foreground, lush green plants are placed strategically on the pebble tray, showcasing their vibrant leaves, which are lush but free from any sign of leaf burn. The textured pebbles vary in size and color, glistening slightly from the humidity, creating an inviting atmosphere. The middle ground features a flowing, sheer curtain gently diffusing the sunlight, casting soft shadows across the scene. The background includes potted plants on the windowsill, creating a sense of abundance and tranquility. The overall mood is calming and refreshing, with bright, natural light enhancing the serene indoor environment. The focus is sharp, capturing the details of the pebbles and plants beautifully, with a shallow depth of field.

Choose the right saucer and pebbles

Pick a non-wicking saucer that extends beyond the pot. Aim for at least 1 inch past a small pot, and several inches beyond a larger pot. A wider saucer increases surface area and boosts moisture around plant more effectively.

Use medium gravel or decorative pebbles for stability. Clay pebbles (LECA) hold and release moisture slowly and look neat on a windowsill.

Set the correct water level and placement

Add water to just below the top of the stones so the pot stays above the water line. This keeps drainage holes clear and avoids soggy soil. Check every few days and top up when the water is almost gone.

Place the setup centered on the sill, slightly set back from scorching glass on hot days. Rotate the pot occasionally so all sides of foliage share the benefit.

Why it works and extra benefits

As water evaporates from the pebbles, it raises moisture in the air immediately around the leaves. The effect is local and steady—far lower maintenance than frequent misting.

Step What to use Practical rule
Tray choice Non-wicking saucer or shallow tray Extend 1+ inch for small pots; several inches for large pots
Pebble selection Medium gravel or clay pebbles Clay pebbles release moisture slowly
Water level Just below top of pebbles Pot base must stay above water line
Maintenance Top up and rinse pebbles Check every few days; clean monthly if mineral build-up appears

Best Plants for Pebble Trays and Other Ways to Increase Humidity Without Overdoing It

Some plants visibly perk up when given a small, consistent boost of local moisture. That gentle lift helps species that evolved in warm understories hold color and open new leaves cleanly.

A lush arrangement of indoor plants thriving in a well-lit, south-facing window. In the foreground, display an assortment of tropical plants like peace lilies and ferns, their vibrant green leaves glossy and healthy. Incorporate a pebble tray filled with water under the plants, showcasing the moisture-adding method. In the middle ground, a gentle cascade of sunlight filters through sheer curtains, casting soft shadows and creating a warm, inviting atmosphere. The background features a soft-focus of more leafy plants, adding depth and texture. The scene should evoke a calm, nurturing vibe, emphasizing the importance of humidity for plant health. Use natural, warm lighting to enhance the freshness and vitality of this indoor garden space.

Great candidates that respond well

  • Orchids, many ferns, and begonias — they often show fewer brown edges and smoother new growth.
  • Calatheas, marantas, anthuriums, spathiphyllum, philodendron, monstera, pothos, and palms also react well to a nearby moist microclimate.

When to pick a humidifier, mister, or move the plant

Choose a humidifier when an entire room dries out in winter or in sealed apartments. It fixes broad low-moisture issues.

Use a mister only as a short-term perk; misting is quick but short-lived and needs repeat attention.

  1. Move sensitive pots to a brighter bathroom or kitchen if light allows — it’s free and effective.
  2. Use a pebble setup to give one or two plants steady local benefit without wetting the soil.

Don’t overdo it: avoid constant wet leaves or standing water. Keep airflow, check soil, and combine a pebble approach with occasional misting during hot spells. For watering tips that match bloom schedules, see a helpful watering schedule.

Conclusion

A pebble-based saucer quietly keeps a small bubble of moist air around a pot, protecting tender leaf edges in bright south windows.

Quick memory cue: wide saucer, stable stones, water kept below the pot base, and refill when nearly empty.

Diagnose first: if watering seems correct but tips still brown, low humidity during heating months or in sealed buildings is often the missing piece.

Practical next step: pick one problem plant, add a single tray, and watch new growth over a few weeks.

Small hack: place a few seashells on the soil to hold tiny droplets that slowly evaporate and add gentle moisture.

With steady care and a simple setup, your indoor blooms will stay healthier and more resilient on that sunny sill.

FAQ

Why do south-facing windows often cause leaf burn on indoor flowers?

South-facing windows deliver intense full-spectrum light and heat. That combination dries the air and the potting mix faster, stressing foliage and causing brown, crispy edges that look like sunburn. Moving sensitive plants a few feet back from the glass or adding a sheer curtain reduces light intensity and protects leaves.

How does bright light and indoor heat lower moisture and stress leaves?

Strong light increases transpiration, and warm indoor air holds more water so it evaporates from soil and leaves quickly. The result: plants lose more water than roots can replace, leading to wilting, scorched tips, and leaf drop. Regular watering, shade, and localized moisture methods help rebalance water loss and uptake.

What symptoms might be mistaken for underwatering or too much light?

Look for curled or crispy leaf margins, brown spots between veins, and premature leaf drop. These signs can mimic drought stress or light damage, but often mean the surrounding air is too dry. Check soil moisture and compare lower leaf color to upper leaves to pinpoint the cause.

How do rooms like bathrooms and kitchens create different microclimates for plants?

Bathrooms and kitchens typically have higher moisture from showers and cooking, which raises local humidity briefly. That makes them good spots for moisture-loving plants. Conversely, living rooms with HVAC or vents stay drier. Match plant choice and placement to each room’s conditions.

How do I set up a pebble tray the right way to increase moisture around a plant?

Pick a shallow saucer larger than the pot, add a layer of pebbles or clay beads, and pour water until it sits just below the pot base. The water should not touch the pot’s drainage holes. Evaporation from the tray raises local moisture, creating a small, beneficial microclimate without overwatering the roots.

How do I choose the best saucer or dish size to boost local moisture?

Choose a tray at least two inches wider than the pot so air circulates around the pot edges. Larger trays support several pots and create a broader humid zone. Ensure the tray is stable and won’t tip on a windowsill under bright light or heat.

Which pebbles or gravel work best, and what about clay pebbles?

Smooth river pebbles or horticultural gravel are inexpensive and work fine. Expanded clay pebbles release moisture more slowly and resist mold, making them ideal for long-term setups. Rinse any material before use to remove dust that could clog drainage.

How much water should I add so the pot stays above the water line?

Fill until the water level reaches just below the pot bottom—about 1/4 to 1/2 inch below the drainage holes. That prevents capillary uptake that can lead to root rot while allowing steady evaporation to raise air moisture around foliage.

How does water evaporating from the tray help plants?

As water evaporates from the pebbles, it forms a localized moist layer of air around the plant. This reduces transpiration stress, keeps stomata functioning, and helps delicate flowers and foliage avoid browning and dropping in dry rooms.

Where should I place a pebble tray on a south-facing windowsill to protect foliage?

Put the tray a few inches behind the pot or place the pot on the tray but shaded with a sheer curtain. That keeps direct midday sun from overheating wet pots and prevents water from magnifying light onto leaves. Elevate the tray slightly if the sill is narrow.

How often do I need to top up the tray?

Check weekly. Top up when water falls below the pebbles’ tops or every 7–10 days in dry winter months. Empty and refresh the water monthly to prevent algae and mineral buildup, especially if you use tap water.

What extra benefits do pebble setups offer besides adding moisture?

They improve drainage for overpotting, prevent surfaces from water damage, and make attractive displays. Pebble layers can elevate pots slightly, helping airflow under the base and reducing the chance of mold around the drainage holes.

Which plants respond well to pebble trays and similar methods?

Orchids, ferns, begonias, calatheas, and African violets benefit most because they prefer steady, moderate moisture around their leaves. These species tolerate the slightly higher local humidity without needing whole-room humidification.

When should I use a humidifier instead of a pebble tray or mister?

Use a humidifier when you need consistent, measurable moisture for several plants or a whole room. Pebble trays and misters work for single plants or small groupings. Humidifiers are better in winter when central heating lowers air moisture for extended periods.

How often should I mist plants compared to using a humidifier or pebble setup?

Mist once daily on warm days for quick relief, but don’t rely on misting alone long-term—it’s short-lived. Combine misting with a pebble tray or humidifier for sustained results, and avoid misting succulents and cacti to prevent rot.

Comments

No comments yet. Why don’t you start the discussion?

Leave a Reply

Your email address will not be published. Required fields are marked *