Surprising fact: studies show poor watering habits cause more than half of common yellowing cases in house plants, often long before pests or nutrients are blamed.
Chlorosis is the technical name for yellowing when chlorophyll fails. Most often this starts because roots sit in wet soil and can’t breathe. That stops nutrient flow and makes foliage pale and limp.
This short guide focuses on easy, repeatable watering habits for potted flowers. We’ll explain why the method—top versus bottom—matters for root health and how it can prevent yellow leaves.
Expect practical steps: check moisture below the surface with a finger test, water thoroughly, let pots drain, and then wait. We’ll also show how to tell true overwatering from other causes like pH, compaction, or low light.
Key Takeaways
- Yellowing often signals root stress: start by assessing soil moisture, not guessing.
- Top watering wets the surface; bottom watering helps hydrate the root zone if drainage is good.
- Let water drain fully and test moisture below the surface before the next session.
- Often “overwatering” means watering too often, not too much at once.
- Other issues (nutrients, pH, light) can mimic wet-root symptoms—diagnose step-by-step.
Why yellowing leaves happen indoors and why watering is usually the trigger
Yellowing is usually a sign that chlorophyll production has dropped. This condition, called chlorosis, means the green pigment and the plant’s ability to make energy are impaired.
The common cause is moisture imbalance in potting soil. Pots dry and hold water differently than garden beds. Watering by habit, not by checking the root zone, makes many plants slowly lose color.
How roots can “drown” and stop feeding the plant
Saturated mix pushes oxygen out. Without air, roots suffocate and stop moving water and nutrients up to the leaf tips.
Too little water can cause a similar outcome. Drought halts nutrient uptake, and leaves may fade for the same underlying reason.
Normal leaf shed vs a real problem
A single old leaf that fades slowly can be normal. But if many leaves go pale fast, or they feel limp, treat it as a serious problem.
Also note low light makes inner leaves pale without any watering issue. Observe which leaves age, the pace of change, and spread before changing your routine.
For seasonal tweaks to how you water, consider adjusting schedules to match plant needs with this guide: adjusting watering schedules.
How to check soil moisture before you water
A quick check below the surface prevents unnecessary watering and stressed roots. Use simple checks each time instead of a calendar.

Do the finger test a few inches down
Insert your index finger two to three inches into the soil. If it feels dry at that depth, give the pot water.
If it feels cool or damp, wait and check again in a few days. Surface dryness can fool you into watering too soon.
Using a soil moisture meter without over-relying on it
Moisture meters report a soil level, but they do not decide for you. Use the meter to confirm what your finger tells you.
Tip: consider pot size, airflow, and room temperature. These change drying time, so a schedule may also be wrong.
What “water thoroughly and let it drain” means
Water until liquid flows from drainage holes so roots get even moisture. That prevents dry pockets that stress a leaf or the whole plant.
Let excess water drain and empty saucers. Do not let the container sit in standing water; check moisture later before topping up.
“Check moisture → confirm drainage → water fully → wait.”
indoor plant leaves turning yellow overwatering: signs, causes, and quick fixes
When soft, fast-spreading pale foliage appears, the likely culprit is too-frequent watering that leaves the root zone soggy.
Common symptoms to watch for
Look for limp or soft leaves that feel mushy rather than crisp. Rapid spread, sudden leaf drop, and fungus gnats hovering near damp soil are strong signs.
Root-rot red flags
Carefully slide the container out and check roots. Healthy roots are pale and firm. Rotten roots are dark, slimy, and often smell foul.
Immediate recovery steps
- Pause watering and empty any saucers now.
- Move the pot to brighter indirect light and boost airflow.
- Check drainage holes and ensure the pot is not sitting in pooled water.
| Condition | Root appearance | Soil feel | Action |
|---|---|---|---|
| Healthy | Pale, firm | Moist, not soggy | Normal routine |
| Early stress | Some darkening | Often wet at depth | Hold water; improve airflow |
| Root rot | Dark, slimy, foul-smelling | Saturated long-term | Repot or trim roots; replace mix |
Expect some leaves to turn brown and drop. Stabilizing the root zone and adjusting a watering schedule can stop the problem from worsening. For guidance on timing, see a simple watering schedule.
Top watering indoor flowers the right way
Top watering works well when you drench the mix and then let excess flow out. Done correctly, it evens moisture, helps nutrients move, and flushes salts that can scorch edges or cause brown tips.

Step-by-step top watering method that prevents soggy soil
Check moisture first. Insert a finger two inches down. If dry, water.
Pour slowly and evenly across the soil surface until water runs freely from drainage holes. Water in passes so the mix soaks, not channels.
How to flush excess mineral salts
Occasionally flood the pot with plain water until runoff to push salts out of the container. Let the pot drain fully and discard saucer water.
Mistakes to avoid
- Avoid frequent “little sips” that leave dry pockets and stress roots.
- Don’t wet crowns on sensitive species or splash foliage late in the day.
- Never leave pots sitting in saucers of water—wet feet invite rot.
Tip: if top watering always makes soil soggy, check mix density and drainage—not the method.
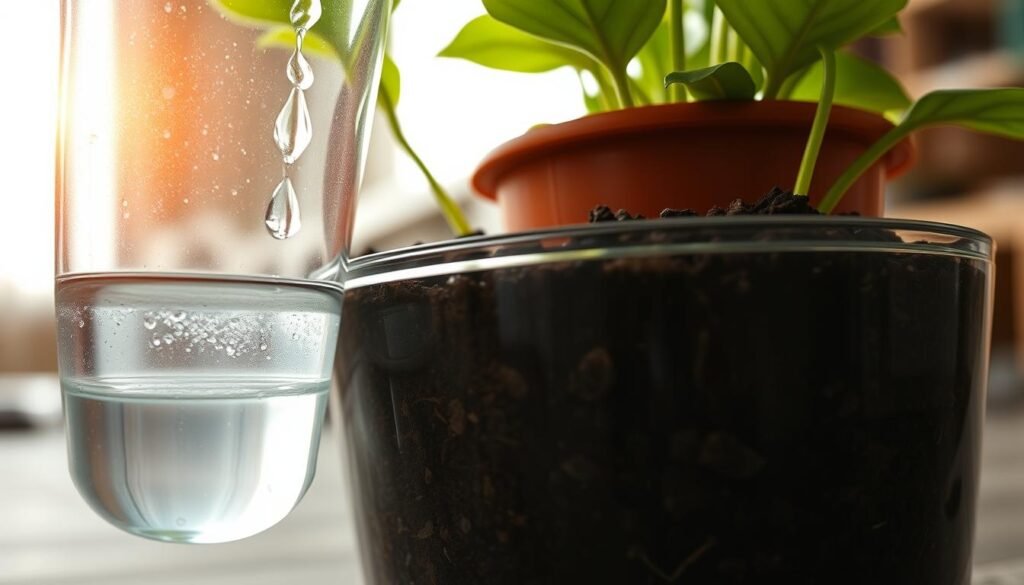
Bottom watering indoor flowers: when it helps and when it backfires
Bottom watering can be a smart choice when you need even moisture without wetting foliage. It keeps the top dry and lets the soil pull water up to the root zone evenly.
When it helps
Use this method for species that dislike wet crowns, pots with water-repellent surfaces, or when you want steady uptake across the soil.
Soak guideline and checking success
Place the pot in a shallow tray and let it sit until the top inch feels evenly damp, not puddled. Remove and let the pot drain fully.
To confirm the root zone drank, lift to compare weight, feel the top for even dampness, and make sure the container isn’t left in standing water.
Pitfalls and balance
Bottom watering reduces runoff, so mineral salts can build up and cause brown edges or nutrient deficiency over time.
If the mix is dense, a long soak can keep soil wet too long and increase the risk of yellowing. Alternate methods: bottom water most times, then top water occasionally to flush salts and reset the pot.
“Wait for the right moisture level before repeating—method matters less than timing.”
Choose the right pot, drainage, and soil to prevent yellow leaves
Good container choices and loose soil give roots room to breathe and make watering work better.
Why drainage matters: Good drainage is not a slogan. It provides oxygen to the root zone and is one of the strongest ways to prevent chronic yellowing of foliage.
Drainage holes and saucer habits
Confirm real drainage holes, not just decorative slots. Make sure holes are clear and not blocked by mesh or debris.
Avoid leaving a pot in a filled cachepot. Water, let the container drain, then discard runoff so the plant never sits with wet feet.
Picking a well-draining mix
Use a premium, well-draining potting mix made for containers. Do not use heavy garden soil, which compacts and holds too much moisture.
Adding a little compost can improve structure, but keep plenty of air space so water and nutrients move freely.
Compaction and chronic yellowing
When soil collapses, water moves poorly and oxygen drops. That causes the same yellowing pattern to return even with careful watering.
The right pot plus the right mix makes both top and bottom watering safer and more forgiving.

“Good drainage equals oxygen for roots — it prevents many common problems.”
| Feature | Why it matters | Action |
|---|---|---|
| Drainage holes | Allow excess water to exit and air to enter | Check holes and clear blockages; avoid sealed cachepots |
| Saucer habit | Prevents standing moisture under the container | Empty saucers after each watering |
| Potting mix | Controls moisture, air, and nutrient flow | Choose a lightweight, well-draining mix; add compost sparingly |
| Compaction | Blocks water and oxygen movement | Repot with fresh mix and loosen compacted soil |
Roots, repotting, and compaction issues that mimic watering problems
Problems that look like poor watering sometimes start with compacted roots that can’t access moisture. A simple root check separates a true watering issue from a root or container problem.
How to slide the plant out and inspect root color and firmness
Tip the pot gently on its side and support the stem near the base. Ease the root ball free without yanking; use gentle pressure on the pot sides if needed.
Healthy roots are pale, whitish-yellow, and firm. Dark, mushy, or foul-smelling roots show rot and need action.
Rootbound signs and why they mimic watering problems
Look for circling roots, a very tight root mass, or water that rushes through the mix. These signs mean the root system can’t absorb water evenly.
Why it looks like a watering issue: compacted or bound roots prevent uptake, so leaves fade even after you water correctly.
- Move up one container size when roots crowd the pot.
- Refresh the soil with a well-draining mix and loosen roots so they re-expand.
- Avoid packing soil down hard to prevent compaction over time.
Tip: After repotting, expect a change in dry-down time—monitor moisture closely for the first few weeks.
| Issue | Root signs | Action |
|---|---|---|
| Healthy | Pale, firm, spread roots | Keep routine; check moisture level regularly |
| Rootbound | Circling, tight mass, fast runoff | Repot up one size; loosen root ball; fresh soil |
| Rot/compaction | Dark, mushy, foul smell | Trim rotten roots; replace mix; improve drainage |
Nutrient deficiency patterns that show up as yellow leaves
You can often diagnose nutrient gaps just by reading how a leaf fades. Look at which leaves go first, whether veins stay green, and if edges or the center change.

Read the pattern
Observe old vs new growth. If older foliage fades first, a mobile nutrient is likely low. If new tips are pale, an immobile element may be the issue.
Nitrogen and potassium clues
Nitrogen lack causes general yellowing; older leaves nearest the stem fade first and overall growth slows.
Potassium shows as bright yellow edges that later brown or form spots. Vigor drops and edges turn brittle.
Magnesium vs iron — vein signals
Magnesium deficiency yields yellowing between veins on older leaves. Iron deficiency shows the same pattern but on new growth near the top.
Practical cue: if new growth is healthy while an old leaf fades, it’s often time to feed—after confirming soil moisture and root health.
Actionable tip: use a balanced indoor fertilizer, avoid extreme DIY mixes, and watch changes over a few weeks rather than making multiple fixes at once. Nutrient problems can reflect underfeeding, poor root function, or locked nutrients in the soil.
Soil pH, nutrient lockout, and fertilizer burn in indoor pots
Even when soil holds nutrients, the wrong pH can lock them away from roots. A mix that is too acidic or too alkaline makes some elements unreachable, so plants show signs that look like a true lack.
How pH blocks access to available nutrients
Practical idea: most potted species do well around pH 5.5–7.0. Outside that range, iron may not move to new growth and nitrogen can seem absent.
Symptom clues: iron-style yellowing on new growth or broad pale cast across older leaf areas can both point to pH problems.
Salt buildup: visible signs and harm
Crusty white deposits on soil or near drainage holes, brown edges and tips, leaf drop, and stalled growth are common signs of salt buildup.
Root-protective fixes that work
- Flush the pot with plain water until runoff clears to reduce mineral salts.
- Moderate fertilizer strength and frequency; less is often safer than more.
- Use top watering with runoff now and then to leach salts—alternate with bottom watering as needed.
- Avoid drastic DIY pH fixes or strong homemade brews; sudden swings can create new deficiencies.
“Test pH before changing feeding; a meter or kit removes guesswork.”
| Issue | Signs | Quick fix | When to test |
|---|---|---|---|
| Nutrient lockout | Pale new growth, iron-like symptoms | Test pH; adjust slowly | If symptoms persist after watering checks |
| Salt buildup | White crust, brown edges, slow growth | Flush with water; reduce feed | When crust or runoff appears |
| Fertilizer burn | Brown tips, wilt, halted growth | Flush, cut back feeding strength | After heavy feeding or DIY mixes |
Conclusion
Good watering habits are the single easiest step to prevent most cases of pale foliage in pots.
Check moisture a few inches down, water thoroughly, let the pot drain, and never leave standing water in a saucer. These actions stop many root and soil problems before they become a serious issue.
Choose top or bottom watering based on species and pot type. Alternating methods helps keep soil evenly moist and reduces salt buildup from fertilizers.
When many leaves go pale fast, inspect roots for firmness and odor—roots drive what happens above the soil line. Also rule out nutrient or pH problems, which can mimic watering signs like vein or tip discoloration and spots.
Watch list: limp, pale foliage = too-frequent wetness; crispy edges = drought or salt stress; patterned vein yellowing = deficiency. Be patient—growth and leaf recovery take time. Small, consistent checks protect long-term growth and life in your container plants.