Surprising fact: nearly 70% of home gardeners report success turning a single leaf into a new plant when they follow a tested, low-rot routine.
This short guide promises a repeatable method for turning one healthy leaf into a living potmate while avoiding mushy failures. The process is simple but patient work: roots often appear in 2–3 weeks and normal size can take months, sometimes up to a year depending on the variety.
Why care? Succulents store water in their tissue, which helps them survive drought but also raises the risk of rot if fresh wounds stay wet. The key is clean removal, letting the wound callus, and using a fast-draining mix with light misting.
You’ll follow clear steps: pick the right leaf, remove it cleanly, allow callusing, set it on well-draining soil, mist lightly, and pot up when tiny roots and pups show. This piece focuses on leaf routes rather than stem cuttings or pups, and it reminds readers that some leaf loss is normal.
Key Takeaways
- Expect patience: roots in weeks, full size in months.
- Select healthy material and let wounds callus before contact with soil.
- Use bright, indirect light and a well-draining mix to reduce rot risk.
- Leaf routes work for many genera, but not all; some need cuttings.
- Track moisture closely and be ready to adjust for the best results.
- For related leaf health tips, see this care guide on yellow leaves.
Why Leaf Propagation Works and What to Expect
A single, well-prepared leaf can become a full plant if the steps focus on cleanliness, airflow, and restrained moisture. This method is popular because many common varieties regrow roots and tiny rosettes from healthy tissue. Propagation is simply making new plants from parts of an existing one—leaves, stems, pups, or roots.

What this means in plain terms
First you will usually see tiny roots or a small rosette. Sometimes roots appear before leaves, and sometimes the baby rosette shows up first. This order varies and does not mean the effort failed.
Typical timeline and realistic expectations
Expect rooting in about 2–3 weeks and a long grow-out phase after that. Over months a new plant slowly becomes independent. Some varieties take up to a year to reach mature size.
Why rot happens and how this guide prevents it
Rot usually comes from excess moisture, poor drainage, and fresh, uncallused wounds. The goal is slightly moist, never soggy. Prevent rot by making clean breaks, letting the cut end callus, using an airy mix, placing leaves on the surface, and misting lightly rather than pouring water.
- Tip: Bright, indirect light and good airflow speed steady growth.
- Remember: Temperature and humidity change the pace. Adjust and be patient.
Choose the Right Succulents and Leaves for the Best Results
Not every variety will reward a leaf attempt—choose species with a track record of rooting. Start by favoring beginner-friendly genera like Echeveria and Sedum. These often sprout roots and tiny rosettes from a single healthy piece.
Which varieties work best
Many Echeveria and Sedum types are reliable. Aeoniums and some others rarely form new plants this way and do better as stem cuttings.
Spotting a healthy leaf
A good leaf is plump, evenly colored, and detaches cleanly without tearing. Avoid mushy, yellowing, or damaged tissue; those parts invite rot and rarely root.
Leaf vs. stem cuttings vs. pups
Leaf attempts are low-cost but slow. Stem cuttings root faster and reach pot-ready size sooner. Pups are the quickest route—often an instant small plant when available.
- Quick decision guide: If the species rarely regrows from foliage, switch to stem cuttings or collect pups.
- Practical tip: Take several leaves when the mother plant allows; not every piece will grow new roots.
Supplies and Setup for Rot-Free Succulent Propagation
Good containers and a fast-draining medium set the stage for steady rooting. A tidy station with a few simple tools cuts failures. Choose shallow trays or small nursery pots that hold pieces flat and make moisture control easy.

Containers and basic gear
Pick inexpensive seedling trays, shallow dishes, or small pots. These keep the cut end visible and reduce overwatering risk.
Keep clean snips on hand and wipe them with rubbing alcohol before each cut. Clean tools lower bacteria and rot chances.
Soil and mix options
Use a commercial cactus/succulent soil or a DIY potting blend amended with extra perlite or pumice. Well-draining means airy particles so water passes quickly and does not sit at the leaf end.
For very fast dry-down, add coarse sand or gravel. A soilless blend can speed evaporation in humid homes.
Optional helpers and watering
Use a spray bottle for gentle misting and dampen the surface for a few days, not soaking. A humidity dome helps only in very dry climates; too much humidity plus wet soil invites rot.
Rooting hormone can aid some growers but is optional. Technique—clean cuts, callus, and good drainage—matters more than additives.
How to Remove Succulent Leaves Without Damaging the Base
A clean removal begins with steady fingers and a focus on the tiny junction where leaf meets stem. This short intro sets the stage for the single most important step in successful cuttings.

Twist-and-pull motion for a clean break
Place your thumb and forefinger close to the stem and gently twist the leaf while pulling outward. Aim for a full release at the base, not a snapped mid-section.
Why torn pieces usually fail
A ragged wound seals poorly and invites rot when moisture arrives. Torn tissue often decays before roots can form, so avoid tearing by controlling the break point.
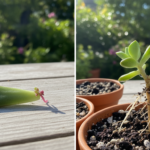
Where to set fresh cuttings right away
Lay each healthy leaf flat on a dry tray, plate, or paper towel in a warm spot with indirect light. No soil contact yet — let the end dry for a few days.
- Quick same-day checklist: clean leaf, intact base, set aside in indirect light.
- Tip: remove only healthy leaves and leave enough on the mother plant so it stays strong.
Let Leaves Callus to Prevent Rot
Callusing is the key anti-rot step: you are letting the wound seal so it does not drink excess water and collapse. This simple pause protects the tissue and gives the future roots a fighting chance.

Typical timing and visual cues
Callus time varies by home conditions: common ranges are about 1–3 days, 3–5 days, or roughly 4 days. In cooler, humid spots allow up to a week.
Make sure you judge readiness by feel: the cut end should be dry and slightly tough, not wet or translucent. Slight wrinkling of the body is normal and does not mean failure.
Best curing conditions
Place pieces in a warm, airy spot with bright, indirect light. Avoid direct afternoon sun that can scorch or dehydrate the tissue too fast.
Do not set leaves on damp soil, seal them in a humid container, or mist during this time. Those mistakes invite rot.
What to watch for next
When the end is sealed, controlled moisture will encourage new roots without inviting mushy decay. Move on only when the wound feels firm.
“Let the end dry properly; it is the single best insurance against soggy failure.”
| Home Condition | Typical Days | Readiness Sign |
|---|---|---|
| Warm, dry, airy | 1–3 days | Firm, dull end |
| Moderate humidity | 3–5 days | Hardened, not translucent |
| Cool or humid | Up to ~7 days | Sealed and slightly tough |
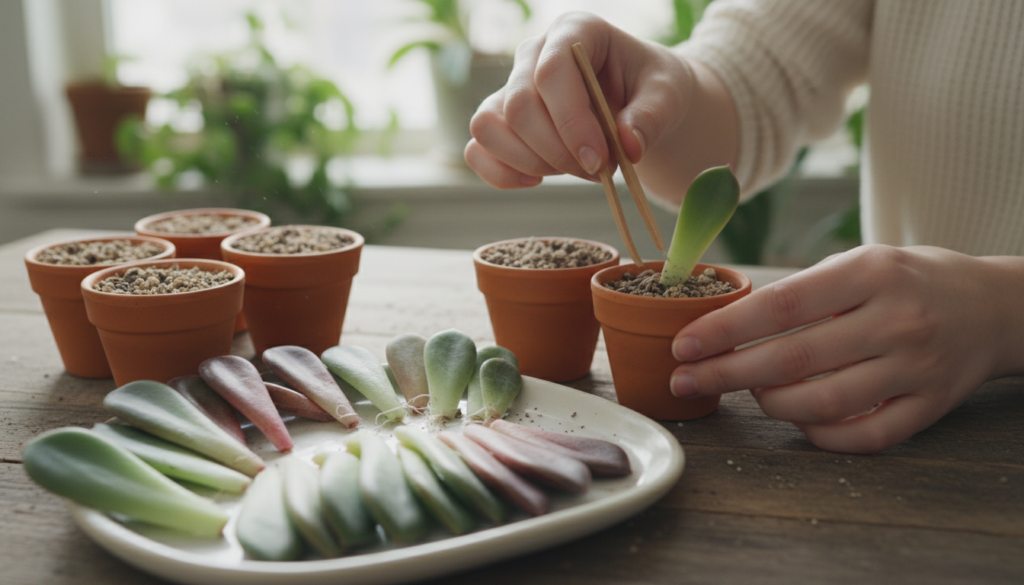
How to Propagate Succulents from Leaves in Soil Without Rot
Set up each callused piece on a fast-draining bed so air reaches the wound and rot stays away.
Best placement: on top versus slight insertion
Lay callused leaf tips flat on top of the soil. This gives the cut end airflow and reduces contact with wet mix.
An angled, shallow tuck can steady a wobbly piece. Avoid deep burying; that raises rot risk and may cause roots without a baby plant.
Prep the mix and test dampness
Mist the surface until the soil darkens but no water pools. The simple test: the tray should not feel heavy or soggy.
Use a gritty cactus mix so the surface dries between sprays.
Watering, light, and early signs
Light misting every few days works. Wait until the top dries before the next spray. In dry homes mist more; in humid homes cut back and boost airflow.
Place the tray in bright, indirect light or filtered morning sun. Avoid harsh afternoon heat.
Expect tiny roots or a small rosette in about 2–3 weeks. Some leaves root first; others show rosettes first. Do several pieces for best odds and remove any mushy, sour-smelling failures promptly.
Care, Watering, and Potting Up Once Roots and Baby Plants Appear
The moment new roots show is a turning point: protect those threads and plan the next steps. Small shifts in care help the baby gain strength without inviting rot.
Covering exposed roots and gentle soil contact
When fine roots appear, lightly tuck a bit of mix over them so they don’t dry out. Keep the top layer loose so air still reaches the base.
Let the mother leaf finish its job
The shriveling leaf feeds the baby. Do not remove it until it is papery and detaches easily.
When to pot up for stronger growth
Move a new plant once the baby is about an inch across and has multiple roots. If it stays anchored when nudged, it’s ready for potting.
Simple potting method and aftercare
Use a small pot with drainage and fresh gritty mix. Moisten the mix lightly, make a shallow hole, set the roots, then settle soil gently.
- Watering: modest and less frequent than during rooting; wait until the mix dries.
- Light & drainage: bright, indirect light and fast drainage prevent decline.
“Excellent drainage plus restraint are the best defenses against soggy failure.”
Conclusion
A reliable routine—clean cuts, dry ends, airy soil, and light misting—lets tiny plants take root without rot.
Keep the rot-free formula simple: clean removal, full callus, surface placement on well-draining soil, gentle misting, and patient care. These steps cut risk and raise success rates.
Do not bury fresh ends, soak the tray, or rush the callusing phase; those moves invite mushy failure. If a variety resists, try stem cuttings or pups for faster results.
Use rooting hormone as a nice-to-have, not a fix-all. Control moisture and airflow—those two factors drive better outcomes than any additive.
Try a small batch first, note timing and light, then scale up. Expect some failures; with steady repeats you’ll grow more healthy succulents and learn which leaves and methods work best in your home.