Did you know one healthy housegreen can create a dozen new offshoots in a single season? That makes this method both fun and very productive for beginners.
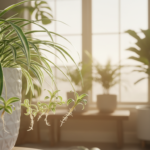
Water propagation means placing a baby that grows on a runner into a clear jar so you can watch roots form. It’s popular because it’s visual and uses only common tools: a jar, scissors, and plain tap liquid.
This guide shows a simple, reliable path: choose the best baby, set up the jar, wait for visible roots, then move the young shoot to soil with minimal shock. Many people worry that roots started in liquid struggle later. That can happen, but you can reduce stress with gradual transitions and gentle handling.
Best results come from bright, indirect light and warm indoor temps. You don’t need special gear or hormones. Follow a few clear steps and you can propagate spider housegreens with steady, visible progress.
Key Takeaways
- One easy method uses a jar to watch roots form on baby shoots.
- It’s beginner-friendly and needs only household tools.
- Roots started in liquid may need a gentle transition to soil.
- Bright, indirect light and warmth give the best outcomes.
- Follow simple steps to propagate spider successfully and reliably.
Why water propagation works for Chlorophytum comosum
Seeing roots form in a clear jar explains why many hobbyists prefer this method.
What a plantlet is: A baby, often called a spiderette, forms on long thin stems (runners or stolons) that trail from the mother plant. These babies sit at the runner tips and act as ready-made new growth you can cut at the base.
Why this way is effective: Many of these babies already show tiny root nubs. Placing the baby in clear water lets those nubs swell into visible roots quickly. Under warm, bright indirect light, roots often appear in about 7–10 days.
“Visible root growth makes it easy to track progress and avoid early overwatering mistakes.
| Feature | What to expect | Timing |
|---|---|---|
| Baby location | Ends of runners from the mother plant | Immediate identification |
| Root start | Small nubs expand into roots | 7–10 days |
| Main drawback | Roots adapted to liquid may need acclimation | Transition period after potting |
Be aware that roots formed in liquid can be more fragile when moved to soil. A gentle transition helps the baby adapt and supports steady growth.
When to propagate for the best results
Picking the ideal moment helps young shoots take root faster. Timing matters because active growth gives a clear advantage. Faster cell division and more daylight help new roots form quickly.
Best season: spring and summer
Spring and summer are the sweet spot. Warmer temps and longer days speed growth and increase baby production on the mother pot. That means a higher success rate and quicker results.
Year-round expectations indoors
You can propagate year-round if you keep a bright, warm spot. Rooting takes longer when the home is cooler or light drops. Move cuttings near an east window or a bright room with indirect light during darker months.
“Choose a time when you can check water level and clarity regularly—consistency helps as much as season.”
| Timing cue | Why it helps | Action |
|---|---|---|
| More daylight hours | Boosts growth rates | Start in spring/summer |
| Faster growth on mother | More healthy babies | Select vigorous shoots |
| Cooler months | Slower rooting | Provide extra indirect light |

What you’ll need before you start
Gather a small kit and choose a healthy baby before you cut. Gathering the right tools and choosing a vigorous baby sets you up for fast, reliable rooting.
Choosing the right baby
Select plantlets that show tiny brown root nubs and firm, green leaves. These candidates root faster and fail less often.
Avoid limp or damaged shoots and very tiny babies that lack any root nubs; they rot more easily and take longer to recover.
Tools and basic supplies
Essentials: sterile scissors or pruning shears (wipe with alcohol), a clear jar or shallow container, and room-temperature water.
Let tap water sit about an hour so it de-chlorinates and warms to room temp before adding the plantlet. Keep leaves out of the liquid to prevent rot.
Optional setup helpers
Place your container where it gets bright, indirect light and stays warm. A stable spot prevents tipping and gives steady root development.
“Clean tools and a clear container are the easiest ways to avoid cloudy water and smells later.”

| Item | Why it matters | Quick tip |
|---|---|---|
| Sterile scissors | Prevents infection | Wipe blades with alcohol |
| Clear container | Monitor roots and clarity | Use shallow jar so baby stays upright |
| Room-temp water | Gentle on delicate roots | Let tap sit ~1 hour to de-chlorinate |
Spider plant propagation in water step-by-step
A careful cut and a simple jar setup make rooting a baby quick and reliable.
Cutting the baby correctly
Sanitize scissors or shears with alcohol, then snip the baby where the runner meets its base. Make a clean cut close to the junction to avoid tearing the stem.
If a short runner piece stays attached, that’s fine. The mother will continue producing more babies.
Prepping the cutting
Remove any leaves that would sit below the waterline. Submerged foliage invites rot and cloudiness.
Placing the baby at the right depth
Use a clear container and set the baby so only the tiny root zone touches the liquid. Keep the leafy crown dry and above the surface.

Light placement
Place the container near a bright window with indirect light. Avoid harsh direct sun that can overheat the jar and stress the leaves.
Water care checklist
- Let tap sit to de-chlorinate and reach room temperature.
- Top off to keep the root zone submerged; don’t dunk leaves.
- Change the liquid when it turns cloudy or smells.
“Gentle monitoring beats constant handling — watch for new white roots rather than tugging.”
Root timeline and patience
Under warm, steady indirect light, early roots often appear in about 7–10 days. Many home setups require several weeks, so patience helps.
Warmth and steady conditions speed the process. Check for white, healthy roots before moving to soil.
| Step | What to do | Why it matters |
|---|---|---|
| Sanitize tool | Wipe blades with alcohol | Prevents infection at the cut |
| Make the cut | Snip at the base of the runner | Gives the baby the best chance to root |
| Set depth | Cover only root zone; keep crown dry | Reduces rot and keeps leaves healthy |
| Water care | Use room-temp, de-chlorinated liquid; change if cloudy | Maintains oxygen and prevents odors |
For more troubleshooting on leaves and curling after transplant, see this guide on leaf issues and recovery.
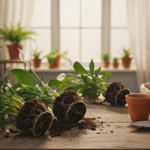
Transplanting from water to soil without shocking the roots
Move rooted cuttings only when they show a healthy cluster of roots about 2–3 inches long. That length gives the young shoot the best chance to adapt to potting soil without stress.
Choose a pot with drainage holes. Good drainage prevents soggy mix and protects delicate soil roots. Pick a pot just slightly larger than the root ball; oversized pots hold too much moisture.
Pot and potting mix basics
Use a loose, airy potting mix that drains well. A common choice is soilless mix with added perlite or pumice to improve aeration.
Well-draining means the mix holds some moisture but never stays wet for days. This helps young roots form new soil roots faster.

How to plant
Make a hole wide and deep enough for the root bundle. Place roots downward and keep the base level with the soil line.
Cover roots gently and avoid compacting the mix. Water roots are fragile—handle them with care to prevent bending or breakage.
First watering and follow-up
Water thoroughly once after planting, then keep soil evenly moist (not soaked) for the first couple of weeks. This helps roots transition from liquid to soil and encourages new soil roots to form.
How to tell it took: perform the gentle tug test after 10–14 days. If you feel resistance, the cutting has anchored and is making new soil roots.
| Signal | Action | Why it matters |
|---|---|---|
| Roots ~2–3 inches long | Pot now | Enough root mass to establish in soil |
| Pot with drainage holes | Use slightly larger pot | Prevents soggy mix and root rot |
| Loose, airy potting mix | Add perlite if needed | Encourages soil root growth and aeration |
| Gentle tug test | Check for resistance | Confirms successful rooting |
Common mistakes and quick fixes during water propagation
Troubles during jar rooting usually have simple, quick solutions.
Leaves turning mushy
If foliage sits too low, it can go soft and rot. Lower the water line so only the tiny root zone touches the liquid.
Trim any submerged leaves and keep the crown dry to stop decay and keep the container clean.
Cloudy or smelly container
Cloudy or foul-smelling liquid signals contamination. Dump the jar, rinse it, and refill with room-temp, clean liquid.
Use a fresh, sanitized container when needed to prevent repeat issues.
No roots forming
First, check warmth and indirect light. Cooler, dim spots slow root growth a lot.
Resist moving the cutting constantly — steady conditions and patience often do the trick. Some babies need several weeks to show roots.
Slow baby production on the mother plant
Low light, an oversized pot, or youth can reduce runner output. Increase indirect light and keep the mother slightly snug in its pot.
Consistent care and time will usually restore steady baby growth; avoid too much direct sun, which can stress leaves.
“A clean jar, stable light, and gentle patience fix most rooting setbacks.”
| Problem | Quick fix | Why it works |
|---|---|---|
| Mushy leaves | Lower liquid level; remove submerged foliage | Stops rot and fungal growth |
| Cloudy/smelly container | Clean jar; replace with room-temp liquid | Restores oxygen and hygiene |
| No roots yet | Increase warmth and indirect light; wait | Speeds cell activity for root growth |
| Few babies on mother | Raise indirect light; use snug pot; give time | Shifts energy to runner production |
For more on treating root loss and rot after mistakes, see this guide on root rot treatment and prevention.
Conclusion
Rooting is fast and visual. Choose a healthy spider plant baby, keep its leaves dry, and set the crown at the right depth for spider plant propagation in water. Bright, indirect light and clean containers speed results.
Quick recap: cut cleanly, use sterile tools, keep foliage above the surface, change cloudy water, and pot once roots reach about 2–3 inches. Move to soil and keep the mix evenly moist while new soil roots form.
Use the gentle tug test to confirm the young has anchored. Try rooting a few babies at once to boost success and create more new plants. This method builds skill and a steady supply of generous plants for your home and gives you confidence with plant propagation.