Surprising fact: many growers see visible roots from a single stem in as little as 7–14 days when light and warmth are right.
Water propagation is simply placing stem cuttings so the nodes sit in fresh liquid while leaves stay above the surface. It is one of the easiest ways to make new pothos plants at home without buying more.
Expect fast roots under bright, indirect light and warm room temps. Cooler rooms or stale water can stretch the time a few weeks.
This short guide previews the workflow: take healthy cuttings, submerge nodes (not leaves), refresh the liquid, watch for white, feathery roots, then pot up when roots are long enough.
It’s written for beginners with one healthy vine who want more greenery or a fuller pot. You will learn node ID, container choices, speeding root growth, spotting rot vs. healthy roots, and moving plants to soil with minimal shock.
Quick safety note: sterilized scissors reduce bacteria and stem damage for better success.
Key Takeaways
- Roots can appear in 7–14 days under good conditions.
- Keep nodes submerged and leaves dry for best results.
- Bright, indirect light and warm temps speed rooting.
- Use clean tools to avoid infection and failure.
- Pot up when roots reach a few inches to prevent shock.
Why Water Propagation Works for Pothos Plants
With the right light and a warm spot, you can watch new roots appear in days rather than months. This is why many beginners choose liquid-rooting over other options. Pothos plants thrive across a range of indoor conditions, so they forgive imperfect care and still grow.
Biology made simple: nodes along the stem act like small growth centers. When those nodes stay moist and get oxygen, they trigger tiny root cells to form. That visible, feathery growth is the plant building a new root system.
Plant experts from online communities note stems often root faster in clear liquid than in soil. Liquid propagation removes guesswork about hidden moisture and humidity. That makes it a friendly option for new growers of houseplants.
Quick comparison of common methods
| Liquid | Soil | |
|---|---|---|
| Visibility | Watch roots grow | Hidden below surface |
| Ease | Simple swaps and clean jars | Requires moisture balance |
| Speed | Often faster | Reliable but slower |
- Bottom line: both approaches work, but liquid is usually the easiest starting way for a new pothos plant.
- Focus on node placement, clean tools, and steady light/temperature for best results.
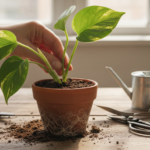
When to Take Cuttings for a New Pothos Vine
Trim when vines look leggy. If a vine grows long and sparse, a simple snip restores shape and gives you cuttings for a new pothos. Pruning during active growth yields the best results.
Best everyday timing: cut while you shape a pot, after a growth spurt, or anytime the plant needs thinning. This keeps the main plant full and supplies material for a new vine.
Using pruning to fix leggy growth and encourage fullness
- Prune long, spindly stems to force bushier growth.
- Trim just above a leaf node to invite branching.
- Tip: removing long runners gives an instant fuller look and useful cuttings for later.
How to choose a healthy stem with strong leaves
Pick stems with rich color and mature leaves. Avoid sections with yellowing or limp leaf growth. Young leaves that are still unfolding often struggle when separated and should be left on the parent plant.
Take more than one cutting for better odds. Healthy cuttings usually root faster and give a fuller final planting. Remember: trimming a vigorous plant is not harmful—most rebound quickly and look better for it.

Read more about reversing leggy stems and restoring indoor plants at leggy stems and restoration.
Know Your Pothos Parts: Nodes, Leaves, and Stems
Identify the tiny bumps along a vine before you make a snip — they decide where new roots start. These small raised spots are the nodes. Some gardeners call them “eyes.”
Parts you’ll handle are simple: the stem that runs between leaves, the leaves themselves, and the nodes where growth concentrates.
How to spot nodes and “eyes” where roots grow
Look for a slight bump or joint on the stem, usually right under a leaf. Aerial roots may already peek from that spot. That bump is a node and it is the part that will produce roots grow in liquid.
Where to cut: just below a node for best rooting
Make your snip just below the node so the node sits under the liquid later. Leaves do not form roots; nodes do. That simple rule raises your success rate.
- Quick visual tip: find the bump under a leaf and cut one finger-width below it.
- Take cuttings with at least one or two nodes for better results.
- Keep leaves above the liquid so they stay healthy while roots form.
| Part | What to look for | Why it matters |
|---|---|---|
| Stem | Long connector between leaves | Supports cuttings and carries nutrients |
| Node | Small bump near a leaf or aerial root | Where roots form; essential for success |
| Leaf | Flat green growth attached at the node | Provides energy but does not make roots |
Supplies for Propagating Pothos in Water at Home
A small kit of sharp blades and a clean jar is all you need to start. Gather basic items on a table near bright, indirect light for the best results.
Sharp, sterilized scissors or pruning shears
Use clean, sharp scissors or pruning shears to make neat cuts. Sterilized blades reduce crush damage and cut the chance of infection that slows rooting.
Best container options
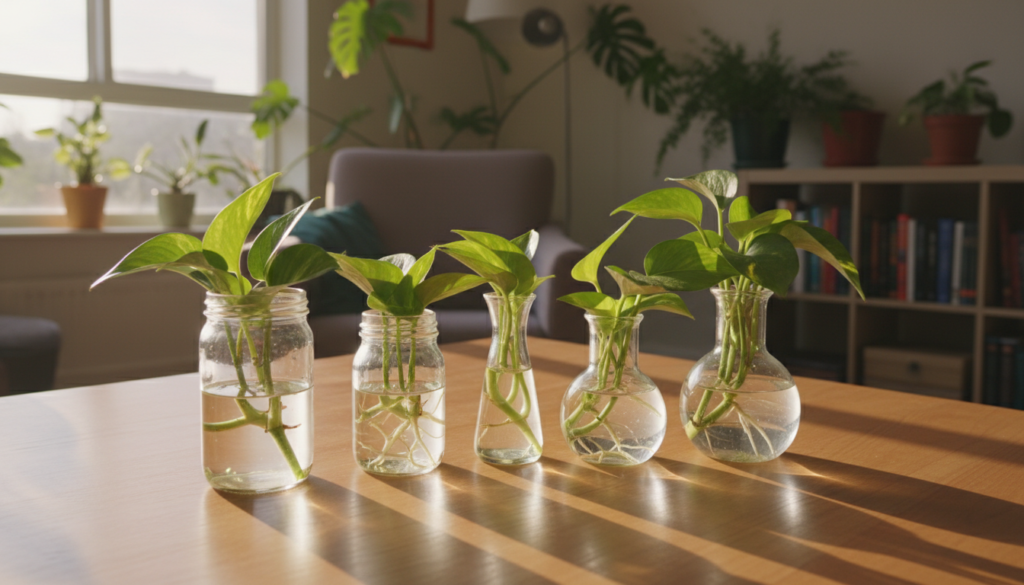
Any small container works: a clear glass jar for visibility, a vase for longer vines, or a plastic cup for tiny cuttings. Choose a container that holds upright stems without bending them.
Clean, room-temperature water and optional plant food
Fill the chosen container with fresh, room-temperature water. Avoid very cold or hot water that can shock the cutting. If you plan long-term liquid care, add a small dose of indoor plant food per label.
- Budget kit: scissors, a glass jar, and spare water.
- Why cleanliness matters: dull or dirty blades can crush stems and invite bacteria.
- Potting note: keep basic potting supplies and soil ready for later transfer.

How to Propagate Pothos in Water Step by Step
Select a vigorous vine and take a cutting that contains multiple nodes. Aim for a stem with 3–4 nodes; each node is a potential rooting point and raises your odds of success.
Strip the lower leaves so none sit below the water line. Leave 1–2 leaves at the top for energy, but remove anything that would rot and cloud the jar.
Place cuttings in fresh, room-temperature water with the nodes submerged and leaves above the surface. Keep stems spaced so they don’t crowd or tangle.
Set a simple propagation station
Choose a bright, indirect light location near a window. Avoid harsh sunlight that can scorch leaves or warm the jar too much.
- If leaves keep falling into the water, use a narrower-neck jar or reduce the number of cuttings per container.
- Refresh the water every few days for cleaner roots and better success.
Rooting Conditions That Speed Up Growth in the Next Two Weeks
Create a steady mix of warmth, bright indirect light, and clean liquid and you’ll see faster root development over the coming weeks.
Light matters: place cuttings where they get bright to moderate indirect sunlight. This level of light speeds growth without overheating the jar or stressing leaves.
Temperature and drafts
Keep stems in a warm room at normal indoor temps. Avoid cold drafts from doors or vents.
Steady warmth encourages metabolic activity and faster rooting. Sudden temperature swings slow progress.
Simple water-care routine
Change the liquid about once a week for most setups. If it looks cloudy, refresh it every few days.
Fresh liquid cuts bacteria and slime. That lowers rot risk and keeps roots white and feathery instead of mushy.
- Fast-rooting formula: the right light + steady warmth + clean liquid = best conditions for quick growth.
- If growth lags, move the container to a brighter indirect spot before altering other care.
| Factor | Recommended | Why it helps |
|---|---|---|
| Light | Bright, indirect sunlight | Boosts photosynthesis without overheating |
| Temperature | Normal room temps, no drafts | Supports steady metabolic activity |
| Liquid care | Replace weekly or when cloudy | Reduces bacteria and prevents rot |
| Adjustment tip | Try brighter indirect spot | Often speeds rooting without extra products |

Root Timeline: What to Expect From Day to Day
Quick overview: expect a few quiet days, then visible changes at the nodes as pale growth appears. This gives a realistic sense of time so you won’t panic if nothing shows during week one.
When small changes usually start
In many cases you’ll see the first tiny root nubs appear near nodes around the ten-day mark.
Day 1–5: little or no visible change — stems are settling.
Day 6–14: small white nubs or thin threads form and lengthen. By two weeks some roots grow noticeably.
Spotting healthy growth versus rot
Healthy signs: firm, pale or white strands that lengthen steadily. Clean water and steady light help roots grow well.
Warning signs: bad smell, cloudy water, slimy stems or mushy nodes. These indicate bacterial rot and need a water change and trimming.
When roots are ready for soil
Target multiple roots about 2–3 inches long before potting. At this length rooted cuttings handle the change with less shock.
Remember: the goal is strong, short roots that transition well — not the longest possible strands floating for months.
| Time frame | Typical signs | Action |
|---|---|---|
| Days 1–5 | No visible change | Keep steady light; check water |
| Days 6–14 | White nubs and thin roots | Refresh water; watch growth |
| 2+ weeks | Roots 2–3 inches | Pot up for best results |
Moving Rooted Cuttings From Water to Soil Without Shock
Switching young roots from a jar into soil is a delicate step that rewards careful prep. The goal is to ease the change since water roots and soil roots behave differently. Gentle handling reduces transplant stress and helps new roots spread in the potting mix.

Pick a small pot and the right mix
Choose a small pot with drainage holes so excess moisture can escape. A compact pot helps the rooted cuttings establish faster than an oversized container.
Use a well-draining potting mix. Avoid heavy, dense soil that holds water near the base of new roots.
Planting depth and position
Set the cutting so the rooted nodes sit under the soil while leaves remain above the surface. Burying nodes encourages soil-root formation; leaves must stay clear for air and photosynthesis.
Aftercare for the first one to two weeks
Water well right after potting and keep the soil evenly moist — not soggy — for 7–14 days. Some growers water every other day at first, depending on drying rate.
“Moving at 2–3 inches of root length gives the best balance: roots are mature enough to handle soil, but not so long they struggle adapting.”
| Step | What to check | Why it matters |
|---|---|---|
| Root length | 2–3 inches | Enough mass for soil uptake and lower shock |
| Pot choice | Small with drainage | Prevents soggy pothos soil and rot |
| Soil mix | Light, well-draining potting mix | Allows air and moisture balance for new roots |
| Aftercare | Keep soil evenly moist 1–2 weeks | Helps roots transition from water to soil |
Practical check: if the top inch dries quickly, water again. If it stays wet for days, improve drainage or raise light levels. For guidance on indoor watering schedules, see indoor watering tips.
Common Mistakes That Slow Rooting (and How to Fix Them)
Small errors at the cutting stage often stall progress. Fix these in order and you’ll raise success rates for cuttings and final pots.
Tool damage: using dull or dirty scissors crushes the stem and invites infection. Sterilize blades and make a clean snip. This gives cuttings a stronger chance at rooting.
Wrong placement: never submerge leaves. Nodes must sit under the liquid while leaves stay above. Submerged leaves rot and foul the jar quickly.
Liquid care: letting water sit breeds bacteria. Refresh the liquid on a routine schedule and change it sooner if it clouds or smells.
Delayed potting: long stays in jars make the move to pothos soil harder. Pot up when roots reach about 2–3 inches for best transition.
Weak material: avoid cuttings from stressed vines with yellowing leaves. Healthy cuttings root faster and establish better in pots.
“Clean cuts, the right submersion point, and timely potting are the fastest repairs for stalled rooting.”
| Common Mistake | What it causes | Quick fix |
|---|---|---|
| Dull scissors | Crushed stem, slow rooting | Sterilize and sharpen blades |
| Leaves submerged | Rot, cloudy liquid | Keep leaves above liquid; submerge nodes only |
| Stale water | Bacterial growth | Refresh weekly or when cloudy |
| Waiting too long | Transplant shock to pothos soil | Pot when roots reach 2–3 inches |
Conclusion
A clear routine — neat cut, clean container, steady light — makes new plants thrive. Follow the simple steps: cut below a node, keep nodes under clean water and leaves dry, refresh the liquid, and watch for white roots.
Nodes are the real rooting engine; their placement and fresh liquid matter more than fancy gear. For a fuller result, pot several rooted cuttings into one container and give the young vine a stable spot with bright, indirect light.
You can move rooted cuttings into soil for a classic houseplant setup or keep them in water long-term with mild feeding. Don’t worry — this is one of the friendliest methods for learning by hand, and small adjustments fix slow growth.