Surprising fact: a healthy Pilea peperomioides can produce several baby offshoots in a single year, giving you more plants than you started with.
These offshoots often appear at the soil line and are ready for separation once they grow a few leaves and reach about 2–3 inches tall. Spring is the ideal time because the mother plant has the most energy for recovery and new roots form faster.
This guide explains practical propagation steps: when to separate, the safest cutting method, and whether water or soil is best for initial rooting. Expect clear, step-by-step tips that aim for high success rather than rushing tiny babies.
Key success factors you’ll revisit include a clean cut with a sterile knife, a small pot with drainage, and steady aftercare—light, consistent moisture, and patience. Many people share these offshoots with friends and family as part of a long-running “pass-it-on” plant tradition.
Key Takeaways
- Wait until offshoots have several leaves and are 2–3 inches tall before separating.
- Spring offers the best time because growth and recovery are strongest.
- Use a sharp, sterile knife—never pull a baby from the mother plant.
- Rooting can start in water for 10–14 days or directly in lightly moist soil.
- Clean cuts, small pots with drainage, and steady care boost success.
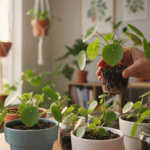
Meet Your Pilea Babies: What Pups Look Like and Why They Pop Up
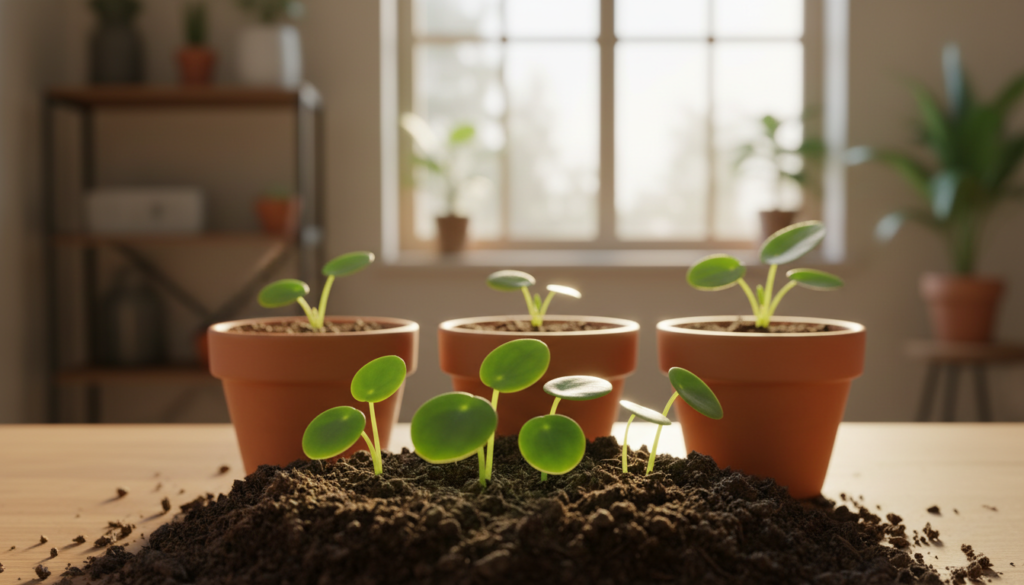
Tiny new stems often poke up at the soil edge, each carrying a set of round leaves that mark a fresh baby plant.

Underground mechanics
Peperomioides sends out low, rhizome-like runners and short root offshoots. These underground threads create new growth points that rise above the soil.
That’s why shoots can seem to appear out of nowhere: below the surface, a network of roots and runners is busy making baby shoots.
Do pups already have roots?
Sometimes a pup shows tiny visible roots, but often roots form after separation. Treat each baby as a mix of visible shoots and developing root tissue.
Pot-bound triggers and crowding cues
When the mother plant gets slightly snug in its pot, it may produce more babies as a survival response. This is normal and not always a problem.
Watch for signs over months: multiple babies clustered in one spot, slower soil drying, or older leaves yellowing. Different homes and care mean people see varying growth rates.
When to Separate Pilea Pups for the Best Success Rate
Timing a split correctly gives each juvenile the best chance at quick root growth and steady recovery.
Ideal size: Make sure a young stem reaches about 2–3 inches above the soil and has a few full leaves. This height makes the baby sturdy enough for handling and helps roots form faster after separation.
 gently lifting a pup from the main plant, using a small trowel, with a look of concentration and care. The background shows a sunny garden with soft, dappled lighting filtering through nearby trees, creating an inviting and tranquil atmosphere. Use a shallow depth of field to draw focus to the Pilea and the gardening action, with warm, natural colors to enhance the feeling of growth and nurturing.")
Best season notes
Spring is the top choice because plants channel most growth energy then. Early fall ranks as a strong runner-up when light and temperatures remain mild. Avoid the darkest months of winter and extreme summer heat.
Signs a split will help
Separate when many babies crowd a pot or the mother plant looks tired. Crowding can split energy and slow overall growth. Some people keep clusters for a full look, but dividing often refreshes the main plant.
Realistic timeline and quick checklist
Expect initial roots in a few weeks and visible recovery over several months, depending on light and care. Use this short checklist before cutting:
- Height about 2–3 inches
- Several leaves present
- Season: spring or early fall
- Pot feels crowded
| Factor | Ideal | Why it matters |
|---|---|---|
| Height | 2–3 inches | Sturdier baby, better survival |
| Leaves | Few full leaves | Energy for root formation |
| Season | Spring / Early fall | Best growth energy and light |
| Pot | Not overcrowded | Reduces competition |
How to Propagate Pilea Pups Without Damaging the Mother Plant
With simple prep and a steady blade you can free a small shoot without stressing the main plant. Prepare everything first: a clean workspace, a small pot with drainage, and fresh soil mixed with a bit of perlite.
Tools and hygiene: use a sharp, sterile knife and make sure it is cleaned before and after use. A clean blade reduces tearing and lowers infection risk.
Digging and finding the connection. Gently scrape soil back about an inch around the baby until you see the thicker connecting root. Do not pull or rip — that can damage the mother plant and the delicate root web.
The cut and lift. Run the blade through the connecting root in one controlled motion. Keep a small clump of soil around the baby when lifting; those fine roots are shallow and fragile.
Quick checklist
- Small pot with drainage ready
- Fresh soil mix and perlite
- Sharp, sterile knife on hand
- Work calmly and cleanly
“A careful cut protects both the mother and the new plant.”
| Item | Why | Note |
|---|---|---|
| Knife | Cleaner cut | Sterilize first |
| Pot | Safe home | Drainage needed |
| Soil | Root support | Lightly moist |
Rooting Your Pup: Water Propagation vs. Planting Straight Into Soil
Choose a rooting method that fits your schedule and comfort—both water and soil can yield strong new growth.

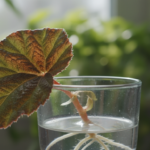
Water method basics
Place the pup so only the lower stem sits in clear water and keep the leaves well above the line. Change or top off water every few days and use a clean container to lower infection risk.
Expect new roots in about 10 days to two weeks. Wait until those roots reach roughly 1–2 inches before potting up so the baby can anchor and absorb moisture in soil.
Soil method explained
Plant the pup directly into fresh, well-draining mix and keep the surface evenly damp for the first few days. Lightly moist means like a wrung-out sponge—wet enough for contact but not soggy.
This approach reduces handling and can cut shock, but you must watch moisture closely to prevent stem rot.
Quick comparison
| Method | Timeline | Main risk |
|---|---|---|
| Water | Roots in 10–14 days | Leaf rot if submerged |
| Soil | Anchors in weeks; watch moisture | Stem rot if soggy |
| Choice | Depends on monitoring | Pick the method you can check often |
Both methods work well. If you can check a jar daily, water gives quick visual feedback. If you prefer less fuss, planting in soil and gentle care often brings reliable growth.
Potting Mix, Pot Size, and Light Tips That Help Pilea Pups Thrive
A loose, airy mix and the right-sized pot give small plants the best chance at steady root growth.

Soil recipe for strong roots
Use mostly quality potting soil with a scoop of perlite. This keeps the mix airy and prevents compaction that can slow root spread.
Drainage basics
Make sure the pot has drainage holes so extra water escapes. Some growers add a few rocks at the bottom for extra airflow, but holes are the vital part.
Right pot size and light needs
A 3–4 inch pot (about 7 cm) gives a baby plant room to anchor without excess wet soil. Oversized pots hold water and invite rot.
Place plants in bright, indirect light. Too little light slows growth; strong direct sun can scorch leaves.
What to expect after transplant
Slight shock or droop is normal. Most small plants anchor in about 4–6 weeks, then start pushing new leaves as roots firm up.
- Water only when the top layer feels dry.
- Avoid oversized pots and overwatering.
- Adjust placement if leaves pale or growth stalls.
“A snug pot and airy mix speed recovery and steady growth.”
| Item | Why | Timing |
|---|---|---|
| Soil + perlite | Airy mix, fewer soggy spots | Immediate |
| 3–4 inch pot | Even drying, compact roots | At transplant |
| Bright, indirect light | Prevents stretching | Ongoing |
Conclusion
Timing, a clean cut, and the right soil mix set small plants up for lasting success.
Wait until each baby is sturdy (about 2–3 inches with a few leaves), then use a sharp, sterile knife and lift with a small soil clump. This protects the mother and gives the new root system the best start.
Choose water if you want to watch roots form, or plant directly into lightly moist soil for fewer moves. Make sure drainage and correct pot sizing prevent rot and stalled growth.
Expect anchoring in 4–6 weeks and fuller leaf growth over months. Share healthy young plants with friends and family once they stabilize.
Next steps: clean tools, locate pups, pick a method, monitor leaves, and keep care steady this time of year.