Surprising fact: some baby plantlets that form on a mother plant can take two to three years to bloom, yet they still give you a perfect clone of the parent.
Keiki (pronounced “KAY-kee”) are small plantlets that appear on a mature plant. They let you multiply your collection without seeds, and that makes this method very beginner-friendly.
This guide shows two paths: leave a natural baby to mature, or gently encourage growth with keiki paste. Results vary, so we explain both simply.
You’ll learn how to judge mom plant health, when to remove a baby, safe cutting and potting steps, and the basic aftercare that prevents rot and disease. Good orchid care matters more than tricks, because a keiki draws energy from its parent as it develops.
Key Takeaways
- Keikis are baby plantlets that clone the mother plant and can bloom in 1–3 years.
- Two approaches: let a natural keiki grow or use keiki paste to encourage one.
- Check parent health before removing a baby to avoid stressing the plant.
- Sterile tools, clean cuts, and simple aftercare reduce disease risk.
- Propagation is an affordable way to expand a houseplants collection in the U.S.
- Patience and steady orchid care beat shortcuts for long-term success.
Keikis on Phalaenopsis Orchids: What They Are and Why They Happen
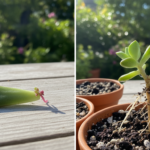
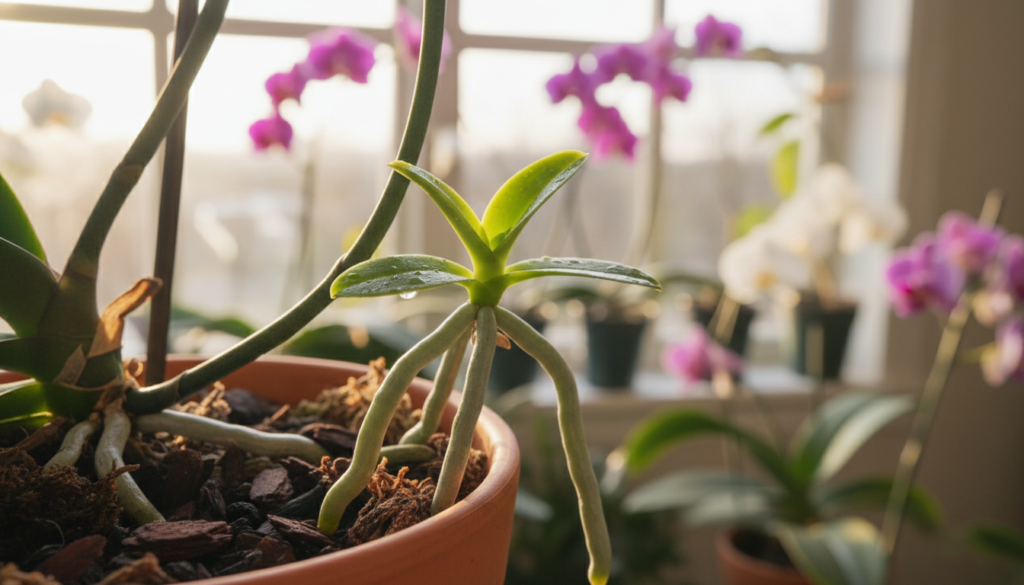
Sometimes a tiny growth on a flower stalk is the first sign of a baby plantlet. At first, that growth may look like a new spike or bud. Soon, tiny leaves begin to appear and aerial roots follow.
 emerging from the spike. The foreground features the luminous green leaves and the delicate purple and white flowers, displaying intricate patterns and a glossy sheen. In the middle, the keikis are depicted in various stages of growth, some with roots beginning to develop. The background includes a soft-focus of lush greenery and hints of other orchids, creating a tropical atmosphere. The lighting is soft and natural, with gentle highlights accentuating the textures of the flowers and leaves. The camera angle is slightly above eye level, providing a clear view of the keikis while evoking a sense of wonder and tranquility in this serene botanical setting.")
How early growth can look
Visual cues: a small green nub on the flower spike that initially resembles a spike. If leaves form instead of buds, you are seeing a plantlet starting to develop.
Natural vs. triggered growth
Natural growth can appear without intervention when the mother plant’s nodes activate. Cutting back a spent flower spike can also wake dormant nodes and sometimes prompts a new growth or branching.
Why the baby is a clone
Clonal explanation: this growth develops from the parent tissue, not from seed. That means the baby carries the same genetics and will match the mother’s bloom pattern and color.
| Feature | Plantlet | New Spike | Aerial Root |
|---|---|---|---|
| First sign | Green nub → leaves | Green nub → buds | Thin smooth tip |
| What forms next | Leaves then roots | Buds then flowers | Roots only |
| Origin | Activated node on stalk | Activated node or tip | Adventitious growth |
| Why it matters | Produces a clone | Extends blooming | Helps anchoring and uptake |
Is Your Mother Plant Healthy Enough to Support a Keiki?
Before you cheer for a new baby, check whether the mother plant can spare the energy. A small growth can be a healthy sign or a stress response. Do a quick health check before deciding to leave it attached.

When a baby signals stress
Stress-linked growth often comes from overwatering or failing roots. The mother may try to make a backup if its root system declines.
Home signs the mother is taxed
- Limp or yellowing leaves and soft, rotten roots.
- Stalled growth or roots that look dehydrated instead of plump.
- During flowering: unopened buds dropping (bud blast) or a spike that won’t mature.
Decide: remove now or wait
If the mother is clearly struggling, removing the baby can free resources and improve recovery. If the parent is healthy and still blooming, letting the baby stay usually helps the baby build leaves and roots.
Monitor closely: adjust watering and light, and watch the roots and flower spike for any new signs of decline.
phalaenopsis orchid keiki propagation: When to Remove a Keiki (and When to Wait)
A careful readiness check helps you decide whether to wait or remove a baby plantlet. Use clear, measurable signs instead of guessing; that lowers the risk for both the parent and the new plant.

The readiness checklist
- Leaves: at least three healthy leaves.
- Roots: several roots that reach about 2–3 inches.
- Firm base: the baby should sit stable when gently moved.
How long it takes
Initial swelling or leaf formation can show within a few weeks. Expect several months before a plantlet is stout enough to separate safely.
Plan for years before the new plant reaches its first flowering. Smaller baby plants need more time after potting to build reserves.
Leave or remove: trade-offs
Leaving a baby on the parent helps root and leaf development, but it also draws energy from the parent. That can slow the mother’s growth or shift her bloom timing.
Remove a plantlet sooner if the parent shows stress, or if the baby already meets the checklist. If the mother is healthy and still flowering, it’s usually smart to wait until flowering ends.
How to Remove and Repot a Baby Orchid Keiki Step-by-Step
Before you make any cut, gather your supplies and set a clean workspace to protect both plants.
Supplies to gather
- Sterilized razor blade or shears (wipe with alcohol).
- Small clear plastic cups or pots for monitoring roots and moisture.
- Orchid potting mix and a small stake.
- Cinnamon or a ready orchid fungicide for wound care.

Making the cut safely
Identify where the plantlet attaches to the flower stalk. Stabilize the stem so you don’t crush leaves or snap roots.
Make a clean slice through the stem at the base of the plantlet. If aerial roots wrap the stem, cut up to 2 inches below the base to preserve them.
Wound care and potting
Treat both cut surfaces with cinnamon or fungicide to reduce rot risk.
Place roots downward in a clear pot, backfill gently with potting mix, and water well. Stake the plantlet if it wobbles.
Keep the new plantlet in low, indirect light. Mist daily or use a pebble tray and water about weekly while monitoring moisture. Hold off on fertilizer until new growth and firm roots appear, then use a diluted orchid fertilizer.
Alternate option
You can repot the baby and mother together in a slightly larger clear pot to reduce stress and let both share environment and light.
| Step | Action | Why it matters |
|---|---|---|
| Prepare | Sterilize tools; gather clear pots, mix, cinnamon | Prevents infection and lets you watch roots |
| Cut | Stabilize stem; cut at base or 2″ below | Protects aerial roots and reduces damage |
| Treat | Apply cinnamon or fungicide | Helps wounds dry and lowers rot risk |
| Pot | Roots down, backfill, stake, water | Offers support and the right moisture for growth |
Encouraging Keikis with Keiki Paste: Safe Timing, Node Selection, and What to Expect
A small dab at the right spot can nudge a dormant bud, but results are never guaranteed.
What the paste does
Keiki paste is a sticky lanolin-based mix that carries a cytokinin growth hormone. It encourages cell division at a dormant site on the flower stalk, aiming to wake a bud or node.
When and where to apply
Apply after flowering, when the plant shows active leaf growth and warmer conditions favor new shoots. Choose a mature, healthy plant that has bloomed before.
Pick a dormant node on the stalk, peel back the sheath, and make a shallow nick if you follow common grower methods. Use a tiny dab—a little goes a long way.
How much and what to expect
Treat one node at a time; treating many can stress the mother plant. In a few weeks a bud may swell. Leaves suggest a baby forming, while a developing spike can mean more flowers instead. Both are valid outcomes.
Note: Results vary, so try paste only on plants you can spare and monitor moisture and light closely.
Conclusion
In closing, the right timing and clean technique give the best chance for a baby to thrive.
First, spot keikis and confirm the mother plant is healthy before you act. Wait until the baby has at least three leaves and roots about 2–3 inches long.
When you separate, use sterile tools, treat cuts, and pot the baby gently. Keep the new plant in low, indirect light and give steady moisture—never soggy—and watch root and leaf development.
Remember: if the mother shows stress, prioritize her recovery to protect both plants. Most keikis need patience; many take two to three years to flower.
Observe, adapt, and log changes—small adjustments improve your experience. For tips on light, watering, and restarting blooms see restart blooms.