Surprising fact: studies show that excess moisture causes more failures in potted flowering plants than any other care mistake — it can suffocate roots and invite rot fast.
This guide frames a clear A vs. B comparison so you can spot whether your flowering houseplant is stressed by too much water or not enough. First, we focus on restoring healthy root function, then on helping buds form and open again.
Before you change a routine, do a quick check: feel the soil, watch leaf behavior, and confirm pot drainage. Wilting isn’t always dryness; saturated roots can’t take up water, so leaves may look dehydrated even when the soil is wet.
Expect step-by-step actions for each case: pause and dry the pot when excess moisture rules, or rehydrate safely when the media is bone dry. We use simple tricks you already have at home — the finger test, drain checks, and repotting basics — so you can act with confidence.
Key Takeaways
- Check soil moisture before you add water — don’t guess.
- Restore root health first, then support bud formation.
- Wilting can mean either too much or too little water; diagnose first.
- Use quick checks: finger test, drainage holes, and leaf cues.
- Follow simple, repeatable steps to avoid the same problem next week.
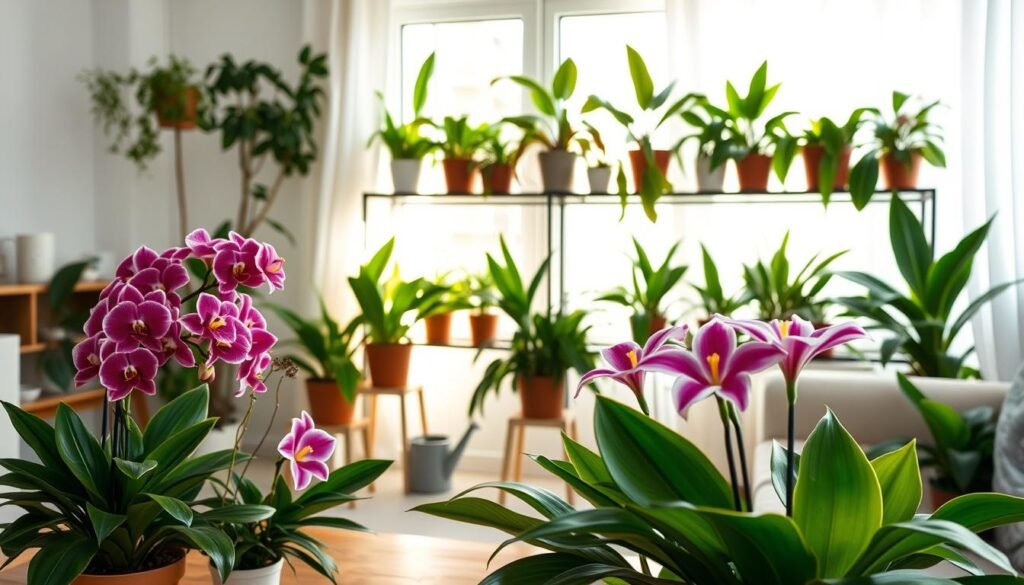
Why Indoor Flowering Plants Stop Blooming Indoors
Bloom failure often begins below the surface. Roots under stress change how a plant uses energy. When moisture is inconsistent or roots decay, the system shifts from flowering to survival.
How watering stress blocks buds and slows growth
Blooming is energy-intensive. If roots can’t supply water and nutrients, the plant diverts resources away from buds and new growth.
Why wilting can mean opposite conditions
Wilting can come from dry soil that lowers leaf turgor. It can also appear when roots are damaged and can’t move water, even if the media feels wet.

- Blossom drop is common when moisture fluctuates or roots decay; buds form but abort.
- Early signs include leaf yellowing, limp foliage, and leaf drop before blooms fail.
- Diagnose by pairing leaf cues with a soil check rather than reacting to foliage alone.
| Early signs | What it means | Quick way to act |
|---|---|---|
| Yellowing leaves | Roots stressed; nutrient flow reduced | Check drainage and soil moisture an inch deep |
| Limp foliage | Too dry or roots failing to supply water | Feel soil and adjust watering; improve airflow |
| Buds dropping | Energy reallocated to survival | Stabilize moisture and avoid fertilizing until recovery |
These are common care mistakes, not the end. With simple changes to watering and drainage, most plants recover and resume healthy growth and flowering over time.
Overwatered Plant vs Underwatered Plant: What’s Really Happening in the Roots
What happens at the roots decides whether a bloom keeps going or shuts down. Look below the surface before you judge the leaves. The same limp look can come from opposite problems.
How too much moisture harms roots
Overwatering cuts oxygen in the root zone. When soil stays soggy, roots can’t breathe and may develop root rot. Affected roots turn dark and mushy and lose the ability to move water and nutrients upward.

How too little moisture harms roots
Underwatering leaves roots unable to access enough water. Soil that is bone dry shrinks away from the pot and roots dehydrate. The result is limp foliage, stunted growth, and fewer blooms.
Why both problems can look the same
Once roots are damaged—by rot or by desiccation—the whole system can’t “drink.” That overlap explains why wilting alone is a poor guide. Check roots, soil moisture, and pot drainage to find the real cause.
- Core difference: overwatering limits oxygen; underwatering limits available moisture.
- Shared outcome: root damage prevents water uptake and delays flowering.
Most important habit: always check soil moisture before you add more water. For seasonal tips, see adjusting watering schedules.
Check Soil Moisture Before You Water
Never guess—confirm how wet the mix really is before you water. A quick check saves stress and helps buds stay. Use simple, repeatable methods so you get consistent results.

The finger test
Push a finger about one inch into the soil. If the mix feels cool and damp, hold off on watering. If it feels dry and dusty, the pot needs water.
Look beyond the surface
Topsoil dries faster. Inspect how much of the potting mix has dried through the container. Some plants need only 25–50% of the volume to dry, while others prefer the whole root ball dry.
Simple tools that help
Try a wooden chopstick: insert, wait, then check if soil clings wetly. A moisture meter adds consistency for busy owners. Use tools as a guide and pair them with feel and sight checks.
“Confirming moisture keeps buds from stalling or dropping.”
| Method | What it shows | Best for |
|---|---|---|
| Finger test | Cool/damp vs dry at ~1 inch | Everyday checks |
| Chopstick | Moisture deeper in the mix | Low-cost confirmation |
| Moisture meter | Consistent numeric reading | Busy caretakers, benchmarks |
Next step: Once you check soil moisture, match symptoms to whether the root zone is too wet or too dry and follow the right recovery path.
Signs of Overwatering in Indoor Plants
Wet soil and limp foliage often point to a root problem rather than thirsty leaves. Catching the pattern early stops rot from taking hold and gives the bloom a chance to recover.

Key visual and tactile signs
Wilting with wet soil: Leaves wilt or drop even though the mix is soggy. This happens because roots can’t breathe and fail to move water upward.
Leaf changes to watch for
Yellowing leaves with brown tips or a pale band often appear. Brown spots or a yellow “halo” between green and dead tissue signal stress, not always pests.
Unusual surface and underside symptoms
Oedema looks like water-soaked blisters on the undersides of foliage. It occurs when roots take up more water than the shoots can use.
Root-zone and soil clues
Mushy stems at the base, foul-smelling soil, and dark, soft roots mean rot is present. Surface fungus or fungus gnats suggest the mix rarely dries and drainage needs attention.
| Sign | What it indicates | Immediate check |
|---|---|---|
| Wilting with wet soil | Roots starving for oxygen | Inspect drainage and feel root ball |
| Yellowing leaves & brown halos | Stress from excess moisture | Check moisture depth and reduce water |
| Foul-smelling, wet soil | Active rot | Unpot and inspect roots; consider repotting |
Tip: Spotting these signs early prevents deep root rot. Correcting drainage and pausing watering are the next steps to help buds recover and bloom again.
Signs of Underwatering in Indoor Plants
When roots run low on moisture, the signs show up in leaves and soil. Watch closely — many clues are easy to read and act on.
Drooping that perks up after watering: A classic response is limp foliage that visibly recovers after a deep drink. That quick bounce-back tells you the roots still function but had lost access to moisture.
Brown, dry, curling edges: Leaves may crisp at the margins and feel paper-thin. Edges turn brown without the broad yellowing seen with other issues.
Slow growth and failed blooms: Chronic dryness stunts growth. Flowering specimens may stop forming buds or drop them mid-cycle because the system conserves resources.
Hard, dry soil and gaps at the pot walls: The mix can compact and pull away from the inside of the pot. The container may feel unusually light when lifted — a quick pot check you can do in seconds.
Note: uneven watering — not giving enough water when you do water — can leave sections of the root ball dry. Rehydration should be thorough but slow to avoid shock. The next section explains the right rewetting methods.
How to Fix an Overwatered Plant and Set It Up to Bloom Again
Act quickly but calmly—rescuing soggy roots starts with giving the mix room to breathe. Begin by pausing any watering and let the soil dry until about 75% of the volume feels dry. This restores oxygen to the root zone and stops further damage.
Unpot and inspect the roots
If the specimen does not perk up or the soil smells foul, gently unpot and check the roots. Healthy roots are firm and pale; rotted roots look mushy and dark.
Trim rot and repot cleanly
Use clean shears to remove soft, black or brown root tissue. Discard the old soggy soil to avoid lingering fungus. Repot into fresh, pasteurized potting soil at the same depth so the crown stays level.
Use a pot with drainage holes and empty trays
Choose a container with bottom holes and confirm water runs freely out. Always empty the drainage tray after a soak so moisture does not wick back up into the soil.
Adjust the environment
Speed drying with warmer air, bright indirect light, and gentle airflow helps the medium recover. Once roots regain function and you adopt a steady watering routine, the plant will redirect energy back to buds and blooms.
How to Fix an Underwatered Plant Without Triggering More Stress
Start rehydration gently so the root zone soaks evenly instead of channeling water through dry pockets.
Correct watering begins at the surface. Add water slowly and evenly across the whole soil surface until clear drainage appears from the hole. Pause as needed so dry sections absorb instead of letting water run through a channel.
- Why slow watering works: very dry soil can repel quick pours. Pausing helps moisture spread into all parts of the root ball.
- Saucer etiquette: remove excess water after the pot drains so the container does not sit in standing water.
- Deep-soak method: place the pot in a shallow bucket or sink of water for about 20 minutes to let the mix saturate evenly.
If dryness is chronic and the pot is rootbound, repot into a slightly larger pot with fresh mix. More soil volume holds moisture longer and gives the roots room to spread so future watering is more effective.
“Consistent, thorough rehydration reduces stress and helps buds return to blooming cycles.”
Follow a gentle routine and use these simple tips in your care plan. Proper rewetting restores roots, evens moisture in the soil, and gives the best chance for flowers to recover.
Prevent Overwatering and Underwatering With a Smarter Watering Routine
A steady, predictable watering plan protects roots and keeps blooms on track.
Dial in drainage. Use a loose, well-aerated mix and a pot with bottom holes. If a decorative container has no holes, place the inner pot on pebbles or drill holes if the material allows.
Match care to context
Adjust frequency by plant type, pot size, and season. Smaller pots dry faster. Warm, sunny spots need more frequent attention than cool, dim rooms.
Use location cues and reminders
- Check soil before you water; don’t rely on a fixed calendar.
- Set one weekly check-in day to avoid forgetfulness and panic watering.
- Keep brief notes: date, how dry the soil was, and any leaf changes.
“Stable moisture, not extremes, is what keeps indoor plants healthy and flowering.”
| Factor | Signal | Action | Why it matters |
|---|---|---|---|
| Pot size | Light when lifted | Water slowly; note refill dates | Smaller volume dries faster |
| Location | Bright/warm vs cool/dim | Adjust check frequency | Sun and heat speed drying |
| Drainage | Pooling or slow flow | Ensure holes and use loose mix | Prevents rot and lost blooms |
Conclusion
Simple tests of moisture and root health reveal the real cause behind limp leaves. Above-ground symptoms can match across different problems, so check the soil, feel the moisture, and inspect the roots before acting.
Quick rule: if the mix is wet and you see yellowing or wilting, the issue often starts with too much moisture. If foliage perks after a drink or edges are crisp, the system likely needed water.
Make the habit of testing before you pour. Use a finger, chopstick, or meter, keep good drainage, and match care to the room environment and pot type.
When roots recover, leaves, steady growth, and blooms follow. Small, consistent changes in routine are the best path in this guide to long-term success with your plants.