Surprising fact: a single Pilea can produce a dozen healthy offshoots in a single growing season, making it one of the easiest houseplants to multiply.
Goal: this short how-to will show you how to use chinese money plant propagation pups to multiply your specimen while keeping the mother healthy and tidy.
First, you’ll learn to spot ready offsets — those with a few leaves and about 2–3 inches tall. Then we’ll cover clean separation (no pulling), and two rooting choices: water or soil.
Expect a quick, hands-on cut session, then a few weeks of aftercare before steady new growth appears. Pilea is beginner-friendly when you follow a clean-cut method and simple tips.
Success usually comes down to a small draining pot, airy potting mix, and bright indirect light. If you want more on avoiding root issues and good drainage, see this guide on root rot prevention.
Key Takeaways
- Goal: multiply plants without stressing the mother.
- Steps: identify, clean-cut, root in water or soil, then pot up.
- Plan: short cutting session plus weeks of gentle aftercare.
- Options: water rooting is visual; soil gives faster long-term establishment.
- Success factors: drainage, loose mix, bright indirect light.
- Pilea offsets are the easiest route; stem cuttings work too but are harder.
Why Pilea peperomioides makes pups and when propagation works best
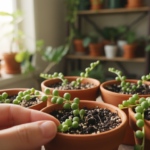
Many pilea peperomioides develop tiny offshoots at the soil line—look for them near the pot edge. These small shoots are simple to spot and make dividing a mature specimen satisfying and efficient.

What pups are and where to look
Pups are baby plants that form from the mother’s base. They share an underground connection before separating.
Scan the soil line around the mother plant for small leaves on short stems. They often cluster near the pot edge and appear as little colonies that will become independent over time.
Best time for success
Spring and early summer are the ideal period because the pilea has peak energy for new growth. Starting during this time usually means faster rooting and less stalling.
You can separate offsets other times of the year, but only if indoor conditions are stable—warm temperatures and steady light. As a readiness cue, choose pups with several leaves; they recover faster and start growing sooner.
“A healthy mother often produces offsets each season, making gentle division a low-risk way to multiply your collection.”
Get set up for success before you cut
Set up a tidy work area and gather a few simple supplies before you cut any offsets. A calm, prepared station helps the mother and the baby start well.

Tools and tidy checklist
Make sure you have these on hand so you are not scrambling mid-cut:
- Sharp non-serrated knife or scissors and gardening gloves
- Small pot or containers with drainage holes
- Fresh potting mix (well-draining soil with added perlite)
- A cup or jar if you plan to use water for rooting
Why sharp tools matter
A clean cut heals faster than a crushed tear. Use a sharp knife or scissors so the separated part recovers quickly.
Sanitation and quick prep
Sterilize the blade with isopropyl alcohol or ethanol before every cut to reduce disease risk. Wipe tools between each separate plant.
| Item | Why it matters | Quick tip |
|---|---|---|
| Sharp knife/scissors | Clean slice, faster healing | Keep a dedicated tool for house plants |
| Pots with holes | Prevents soggy roots | Choose 3–4 inch pot for new starts |
| Potting mix / soil | Light, airy mix encourages root growth | Pre-moisten so mix is damp but not wet |
| Sanitizer | Stops pathogen spread | Quick wipe between cuts |
Choose the right spot
Place new starts in bright, indirect light near an east- or west-facing window. Keep temperatures warm and stable—avoid drafts and vents.
Stable conditions matter more than perfect ones. Move the new chinese money or money starts as little as possible for the first few weeks.
chinese money plant propagation pups step-by-step
Only remove a baby when it stands about 2–3 inches tall and has several healthy leaves. This gives the offset enough energy to recover after separation.
Expose the connection by gently moving soil away about an inch to find the small rhizome that links the baby to the mother plant. Work slowly so you don’t nick any tiny roots.
Do not yank the offshoot; tearing damages the stem and slows recovery. Instead, sterilize a sharp knife and place it as close to the mother as practical.
Cut in one controlled motion so the separated piece keeps a bit of root attached. Ideally you will see a small root system and firm leaves. If roots are minimal, water-root the pup for a week or two to encourage more roots before potting in soil.
After removal, the mother typically bounces back and may produce more offshoots over time. Make sure to give both plants bright indirect light and gentle care while they establish.

Rooting your pup: water method vs. soil method
Choose a rooting way that matches your schedule and comfort. One method lets you watch tiny roots form in clear water. The other puts the offset straight into a small pot and asks for less attention.
Water rooting
How to do it: place only the base and small root area in water. Keep the leaves and any leaf stem above the waterline to prevent rot.
Refresh or top off the water when it gets cloudy or low. In warm, bright conditions you will often see roots in about 1–2 weeks.
 pup. In the foreground, a clear glass jar filled with fresh, crystal-clear water, with a vibrant green pup submerged, its roots visibly spreading. Surrounding the jar, delicate pebbles add a natural touch. In the middle ground, the setting includes a soft, wooden table with a few lush leaves from the plant nearby, creating an organic feel. The background features a softly blurred indoor plant environment, bathed in gentle, diffused natural light, evoking a calm and nurturing atmosphere. The focus should be sharp on the water-filled jar, highlighting the intricate details of the roots, while the overall composition captures the essence of plant care and propagation.")
Soil rooting
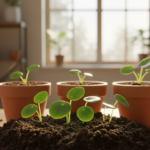
How to do it: plant the baby into a 3–4 inch pot filled with a well-draining mix. Firm the soil gently around the base and keep the surface lightly moist for a few days while the new plant adjusts.
When to pot up and transition tips
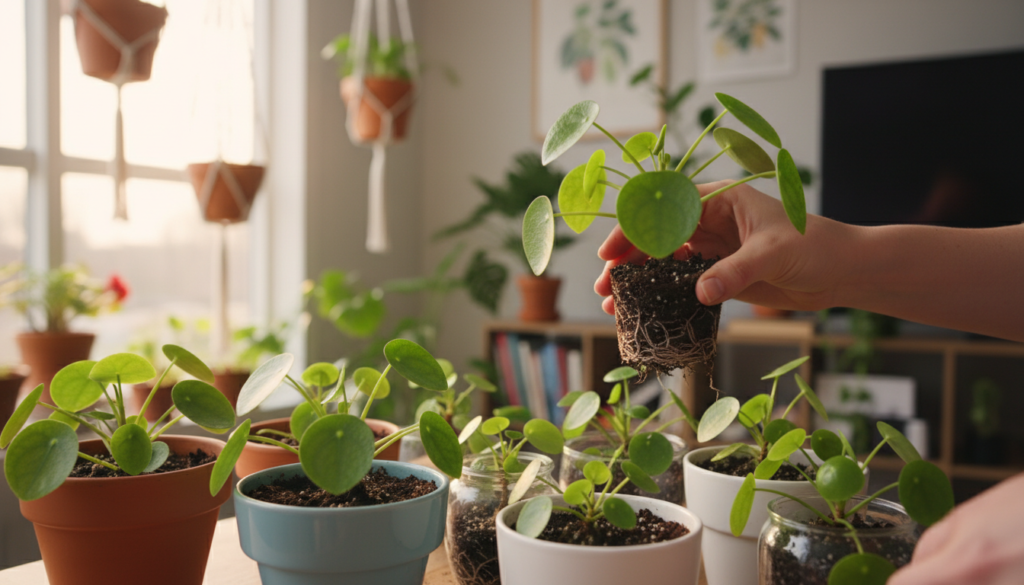
If you started in water, transplant once roots reach roughly an inch long. Move carefully to avoid breaking those fragile roots.
After potting, water once and then ease back. Overwatering is the bigger threat while the root system settles.
- Quick pick: water is visual and fast; soil is set-and-forget.
- Both ways work well for pilea peperomioides and similar house specimens when light and warmth are steady.
Potting, soil mix, and aftercare for fast new growth
Start strong: pick a small container that lets new roots dry predictably between waterings. A 3–4 inch plant pot with drainage holes is ideal because it stays snug and reduces the chance of rot.
Build a well-draining mix
Use a light potting soil blended with perlite to keep the mix airy. Avoid heavy, compacted soil that holds water and suffocates roots.
Watering routine
Water thoroughly, let excess drain, then wait until the surface feels dry before the next watering. This rhythm protects developing roots and prevents soggy conditions.
Light and shaping
Place new plants in bright, indirect light (east or west window). Rotate the plant pot every few days so the stem and leaves grow evenly and do not lean.
What to expect
Most offsets anchor within a few weeks and start pushing new leaves around 4–6 weeks. If leaves droop, first check soil moisture. If growth slows, reassess light and watering before changing pots.
Tip: With steady care, these small starts mature over years into rounded specimens that produce their own offshoots.
Conclusion
Finish with a clear routine: identify 2–3 inch offsets with healthy leaves, expose the tiny rhizome, then cut with a sterilized blade and start to propagate pilea.
Make sure you cut—don’t pull—and keep tools clean so the mother and baby avoid damage. Choose water for visible roots quickly or soil for an easier setup; both build a strong root system when you water carefully.
Leaf and stem routes also work, but pups are the simplest way to multiply pilea peperomioides. Place new starts in a warm bright spot, watch for roots and new leaves, and let the soil dry between drinks. Once established, you can share young plants with friends and keep your collection growing.