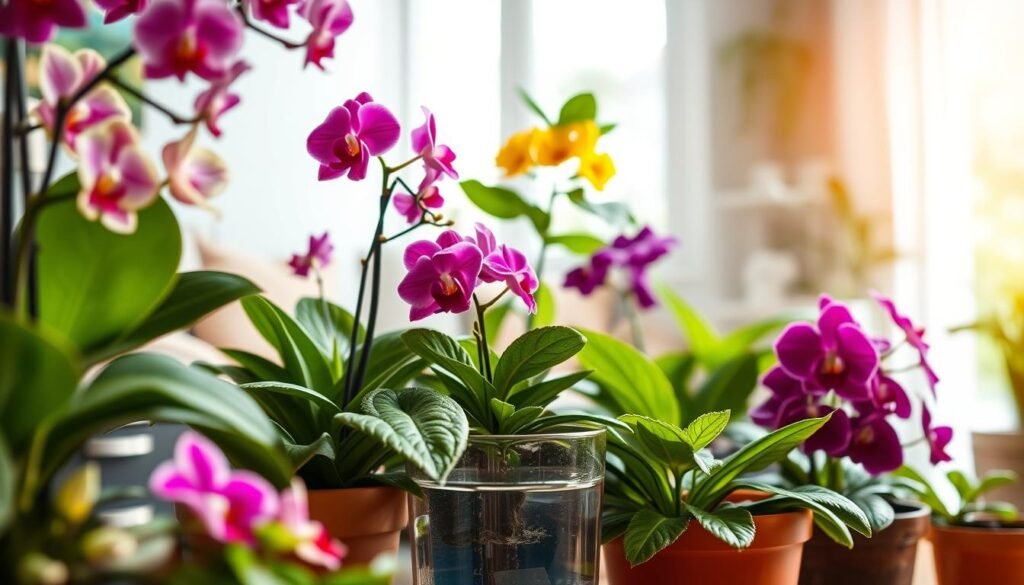
Bottom watering flowering houseplants means setting a potted plant into a shallow tray so the soil draws up moisture through its drainage holes. This simple method helps avoid common indoor mistakes like uneven wetting or surface-only watering.
It’s not a magic fix. The real goal is matching supply to a plant’s needs, pot size, and the soil mix. Done correctly, the soil takes what it can. Left too long, though, the mix can stay soggy and invite root rot.
This guide focuses on practical, repeatable steps — timing, safe waterline, and clear drainage rules — rather than strict schedules. Always use a pot with drainage holes and never leave a pot sitting in standing water after the session ends.
Many plant parents blend top and this approach to suit light, humidity, and temperature in their homes. Read on to get a simple decision framework for when to try this method and how to avoid the classic “soak too long” mistake.
Key Takeaways
- Bottom watering helps even soil moisture and reduces surface dry spots.
- It is not a cure-all; match the method to pot, mix, and plant needs.
- Never leave pots in standing water; use drainage holes every time.
- Too-long soaks can cause root rot in poorly draining mixes.
- Combine top and base approaches for flexible care across conditions.
- Follow simple, repeatable steps—timing, waterline, and drainage—for best results.
What Bottom Watering Is and Why It Works
Supplying water at the base of a pot changes how moisture moves through the mix. In plain terms, to bottom water you set the container into a shallow tray so the soil wicks moisture up through the drainage holes instead of pouring water onto the surface.
Bottom watering vs. top watering: what changes in the pot
With top watering, water flows down and often pools near the drainage hole. The wettest zone starts at the surface and moves downward. When you bottom water, the wettest area begins at the lower mix and rises upward. This can rewet dry pockets more evenly in some mixes.
How capillary action pulls water up through soil
Capillary action is the wicking force that moves water against gravity. Water molecules cling to soil particles and travel through tiny air spaces. Fine, well-mixed potting media wicks best, so the method works faster in those mixes.
Why keeping water off leaves matters for many plants
Keeping the leaves dry reduces spotting, mineral residue, and fungal risk. Roots often grow toward a steady water source, so low, steady moisture can encourage deeper roots. Remember: a pot with a drainage hole is the baseline requirement for safe practice, and this is a controlled soak—not a long-term submersion.

Why Bottom Watering Can Be Great for Flowering Houseplants
Many indoor gardeners find that a controlled soak can simplify how much and when they give water. This approach helps the potting mix take a measured amount of moisture, which often removes guesswork for busy plant parents.
Helps prevent accidental overwatering: The mix can only absorb so much during a set soak. That limited uptake lowers the chance of long-term sogginess that harms roots and stalls blooms.
Encourages stronger root growth
Plant roots respond to water gradients by growing toward steady sources. Giving water from the base nudges roots downward, creating a deeper, sturdier root system that supports better bloom production.
Keeps soil surface drier and cuts pests
A drier top layer reduces habitat for fungus gnats. When the surface stays less wet between sessions, pests have fewer opportunities to breed and fewer larvae survive.
Protects delicate leaves
This method avoids splashing that causes spots on sensitive foliage. Plants like African violets show how wet leaves can mark or discolor, so keeping leaves dry preserves appearance.
Quick checklist — who benefits most:
- Compact flowering plant varieties
- Plants with dense foliage that covers soil
- Anyone prone to overwatering

How to Bottom Water Plants Safely
Begin each session with a fast moisture test to avoid giving water too soon. Use a finger or a small moisture meter. This habit keeps you from overdoing it and helps the plant stay healthy.
Pick a stable container: use a tray, bowl, sink, or tub that won’t tip when you move a wet pot. Stability matters when you lift or carry a heavy, soaked container.

Fill to the correct water line
Fill the tray to about 1/4–1/2 the height of the pot’s side. Keep the water shallow and below the rim so it never spills over. This rule helps control uptake and prevents messes.
Soak time and checking
Set a timer and check every 10 minutes. Small pots often finish in 15–20 minutes; larger pots may need 30–60 minutes. “Done” looks like a slightly darker surface that feels damp, not muddy.
Fixes when wicking stalls
If moisture hasn’t reached the top after ~20 minutes, add a small, careful top watering or extend the soak by a few minutes. This balances wetting without over-saturating the mix.
Drainage is non-negotiable
Lift the pot out and let it drip in the sink for at least 15 minutes before you return it to a saucer or cachepot. Empty any standing water so roots do not sit in pooled water.
- Make sure to write down typical soak times per pot size and season.
- Note changes in light, heat, or humidity so you can adjust future sessions.
Bottom Watering Flowering Houseplants: When This Method Works Best
Use this method when the potting mix repels water and needs a gentle rewet. It’s a practical choice for specific problems rather than a universal cure.
Hydrophobic soil and easy visual cues
Hydrophobic mixes (often peat-heavy) can shrink and repel water after they dry. You may see the soil pull away from the pot edges, water racing out of the drainage hole, or the top soil refusing to darken during a normal pour.
Leaves covering the surface
When a leafy canopy blocks access, top watering can splash or damage foliage. For plants like Peperomia Frost/Rosso or African violets, keeping leaves dry is better for appearance and health.
Small pots and root-bound plants
Smaller 4–6 inch pots wick moisture to the top faster, so this method often finishes in less time and with lower risk. For root-bound plants it can be a short-term fix to rehydrate a dense root ball until you repot.
Use-case limits
This list shows when this approach helps most. Match the method to your plant needs, monitor drying, and combine it with occasional top watering to flush salts. Treat this as a targeted way to keep buds and blooms healthy, not a one-size-fits-all solution.
When Bottom Watering Can Lead to Root Rot
A short, controlled soak helps rehydrate pots — leaving that soak too long does real harm.
How root rot starts: Roots need oxygen. If the soil stays waterlogged, air pockets fill and roots suffocate. That low-oxygen state lets decay organisms thrive and causes root rot.

Timing and oxygen
Set a timer and never forget the pot in the tray. The longer a plant soaks, the more air leaves the mix. In short, time equals lost oxygen — and faster rot risk.
Drainage and saucer traps
A pot without proper drainage turns every soak into an uncontrolled flood. Even with holes, a full saucer holds water against the base and keeps lower roots wet nonstop.
Soil structure and pot size
Compacted or old soil wicks unevenly, creating dry pockets and soggy zones that confuse care and raise rot risk. Oversized pots contain lots of mix that dries slowly, so the center can stay wet for days.
| Problem | Why it raises risk | Quick fix |
|---|---|---|
| Extended soak time | Soil loses air; roots suffocate | Limit soak to 10–30 minutes; set timer |
| No drainage or full saucer | Water cannot exit; roots sit wet | Use pots with holes; empty saucers immediately |
| Compacted mix | Ineven wetting and slow drying | Repot into looser mix with perlite |
| Oversized pot | Large volume stays damp long | Use appropriately sized pot or remove excess mix |
Warning signs to watch for after a session: a sour smell, persistently wet soil, yellow leaves that limp, or blackened roots on inspection. Remember: bottom watering isn’t the enemy — poor drainage, bad mix, and too much time are.
Common Bottom Watering Mistakes (and Quick Fixes)
A few simple oversights can turn a helpful soak into a stress event for your plant. Read these quick checks before your next session so you can fix problems in minutes.
If moisture never reaches the top soil
Step-by-step: start by increasing soak time in 5–10 minute increments. Confirm the tray waterline sits high enough to contact the drainage holes.
If you hit ~15–20 minutes and the top stays dry, finish with a small, targeted top watering to settle the mix. That often evens moisture without flooding the pot.
If the plant looks stressed after a session
Check whether the mix stays soggy or dries too fast. Droop, yellowing, or dull leaves signal two different problems; use pot weight and surface color to tell which.
Fixes: aerate or refresh compacted media, confirm drainage holes are clear, and consider repotting into a looser blend to restore healthy root oxygen.
If you left a pot in water too long
Drain immediately, remove the pot from any cachepot, and let it drip upright. Place the plant in brighter light and boost airflow to speed evaporation.
For severe cases, inspect roots for softness and trim rotten bits before repotting in fresh mix.
Quick troubleshooting checklist (do in this order)
- Check minutes elapsed and pot weight.
- Inspect top soil color and surface feel.
- Add a small top watering only if needed.
- Empty saucers and increase light/air if soggy.
Prevention tip: set a timer for every session, especially when watering many plants at once. Treat this as a controlled routine, not a set-it-and-forget-it method.
Water Quality and Temperature: What to Use for Healthier Roots and Blooms
Clean, correctly tempered water keeps stress low and lets plants focus on growth and blooms. Water chemistry and temperature matter even when your technique is spot on.
Tap water habit that’s easy to keep
Fill a jug ahead of time and let tap water sit about 24 hours. This lets chlorine dissipate and brings dissolved gases closer to equilibrium.
For many people this simple step prevents browning edges and reduces spotting on sensitive leaves.
Why room-temperature water matters
Use room temperature water to avoid shocking roots. Cold water straight from the tap can slow root activity and stress the plant.
Aim for water roughly the same as your room to keep transitions gentle.
When to choose rain, distilled, or bottled water
Consider rainwater or distilled water if you see mineral crust, persistent tip burn, or if your tap has very hard minerals. These options cut salts that build up in the soil.
Keep it simple: the best plant water is one you can use consistently. Start with clean containers so you do not reintroduce residues that affect care.
- Tap water left to stand ~24 hours reduces chlorine.
- Room-temperature water avoids root shock.
- Use rain or distilled for mineral-sensitive plants or visible spotting.
Note: better water helps blooms by lowering stress, but it won’t fix poor drainage. Soil mix and pot setup still control root oxygen and long-term health.
Bottom Watering vs. Top Watering: The Best Routine Is Often Both
Using two watering styles in rotation solves more problems than either alone. A mixed routine gives control over surface dryness while keeping the mix free of buildup.
Top watering occasionally to flush salt and fertilizer buildup
Top watering removes accumulated salts that rise when water only moves upward. Do this about every third or fourth session, or roughly once a month. You will rinse residues that cause white crust, brown leaf tips, or slow decline.
Why some potting mixes need top watering to wet evenly
Chunky or very loose mixes may not wick from below. In those cases, a brief pour from the top wets the soil more evenly and avoids dry pockets that stunt roots.
Hygiene: avoid sharing soak water between plants
Don’t reuse basin water. Shared tubs can spread pests and disease between plants. Make sure to use fresh water per pot, clean containers, and empty saucers after each session.
Quick pros cons: bottom watering cuts splash and keeps leaves dry; top watering is faster and flushes the mix. Combine both for steady blooms and healthier roots.
Conclusion
Good results come from timing and drainage more than a single technique. Use bottom watering as a targeted tool when the mix wicks well and you can drain fully.
Quick decision rule: if the soil draws moisture up and the pot empties in the sink, this method can be your go-to. If the mix stays soggy, switch to top water or refresh the mix.
Safe routine: check moisture → place the pot in a stable container → soak until the surface is just damp → drain and return to its spot. Watch the leaves for spotting or yellowing; those signs point to water quality, buildup, or excess wet time—not always thirst.
Combine bottom watering with occasional water top flushing, empty saucers, and keep soil airy. Track soak time per pot and season. With proper timing and drainage, this simple approach supports healthier roots, cleaner foliage, and better blooms for many houseplants.